Team Project 1: Spring Cliches
A dynamic sculpture that combines mechanical engineering with artistic design, featuring nature-inspired elements driven by an integrated belt and pulley system.
Design Process:
Initial Concept
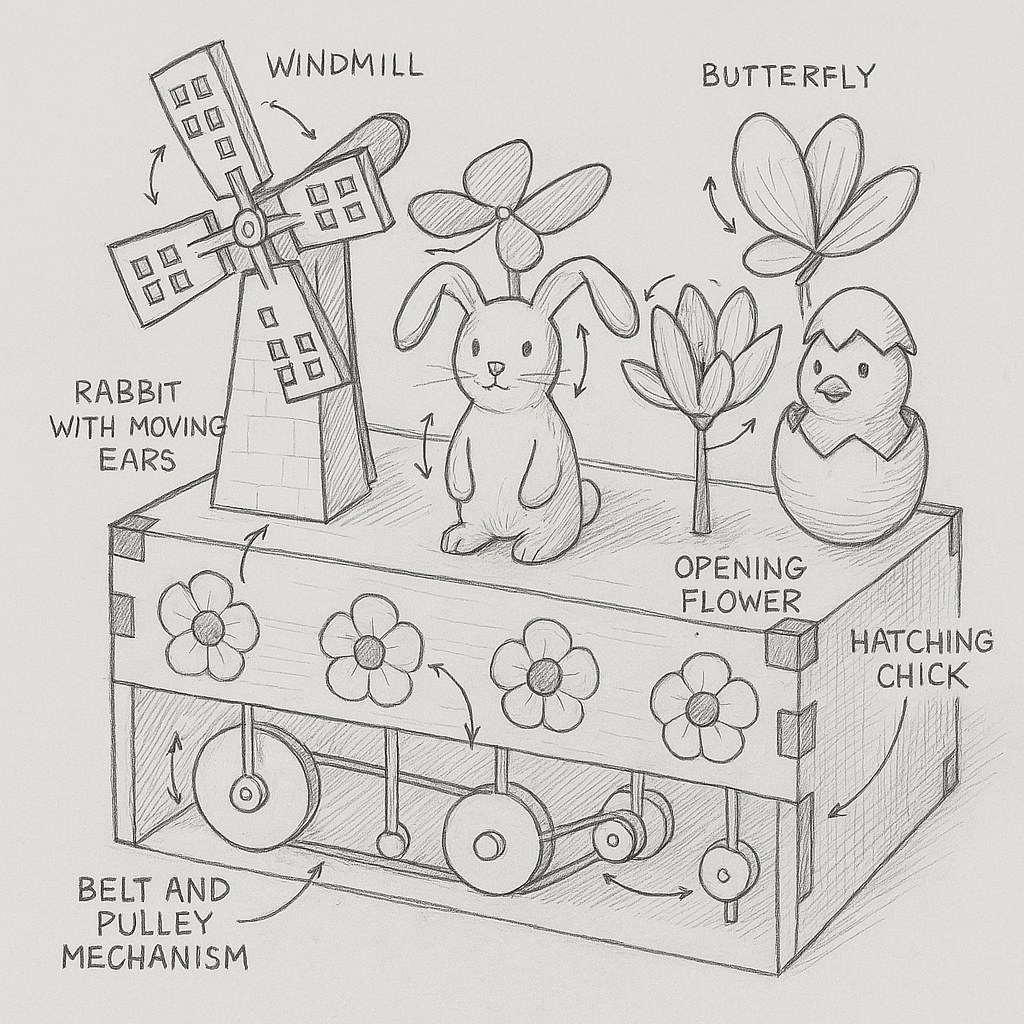
Early sketches explored making a box as the base to store the belt and pulley system as well as the motor, with CAMs coming off shafts and allowing the components to move aside from the windmill which would also be powered using a belt and pulley and the butterfly which would use a scotch and yolk mechanism.
Key considerations included:
Keeping a clean look
Not overcomplicating the mechanisms
Having enough for each team member to contribute
Prototyping
What We Prototyped:
Windmill structure and rotation using a basic shaft and pinwheel
Linkage-based flower with opening petals to test joint orientation and movement
Butterfly with Scotch Yoke mechanism to explore up-down flutter motion
Cam-driven egg to visualize the chick hatching effect
Rope-actuated bunny ears for testing vertical actuation via cam
What We Learned:
Box dimensions were dialed in to balance space for all mechanisms without overcrowding
Joint tolerance and alignment are critical—loose fits caused jamming or wobble
Motion validation confirmed that the flower linkage was really hard to do and linkages around 4 separate pivot points were the easiest way to make the flower open using a CAM which provided 1 linear motion in the wrong direction
Assembly steps became clearer, helping us plan for modular sub-assemblies

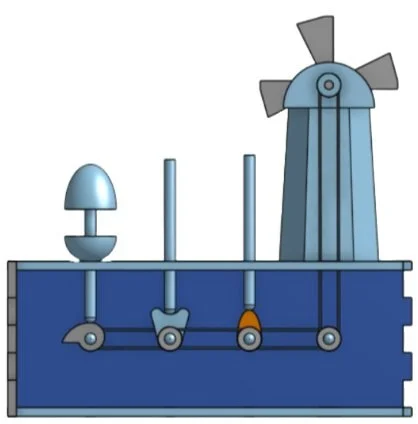
CAD Development
The CAD model refined the design through:
Precise part integration: Ensured that all mechanical elements—windmill, flower linkages, butterfly yoke, bunny cam, and chick lifter—fit within the confined box space without collisions.
Motion simulation: Enabled virtual testing of each mechanism's motion path and range before fabrication, reducing risk of failed assembly.
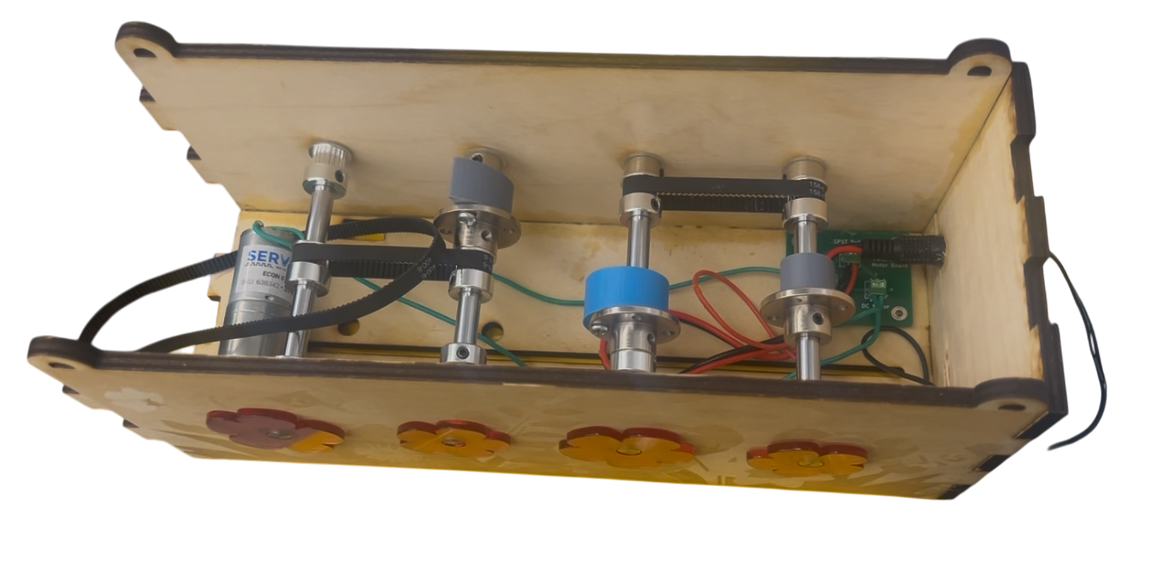
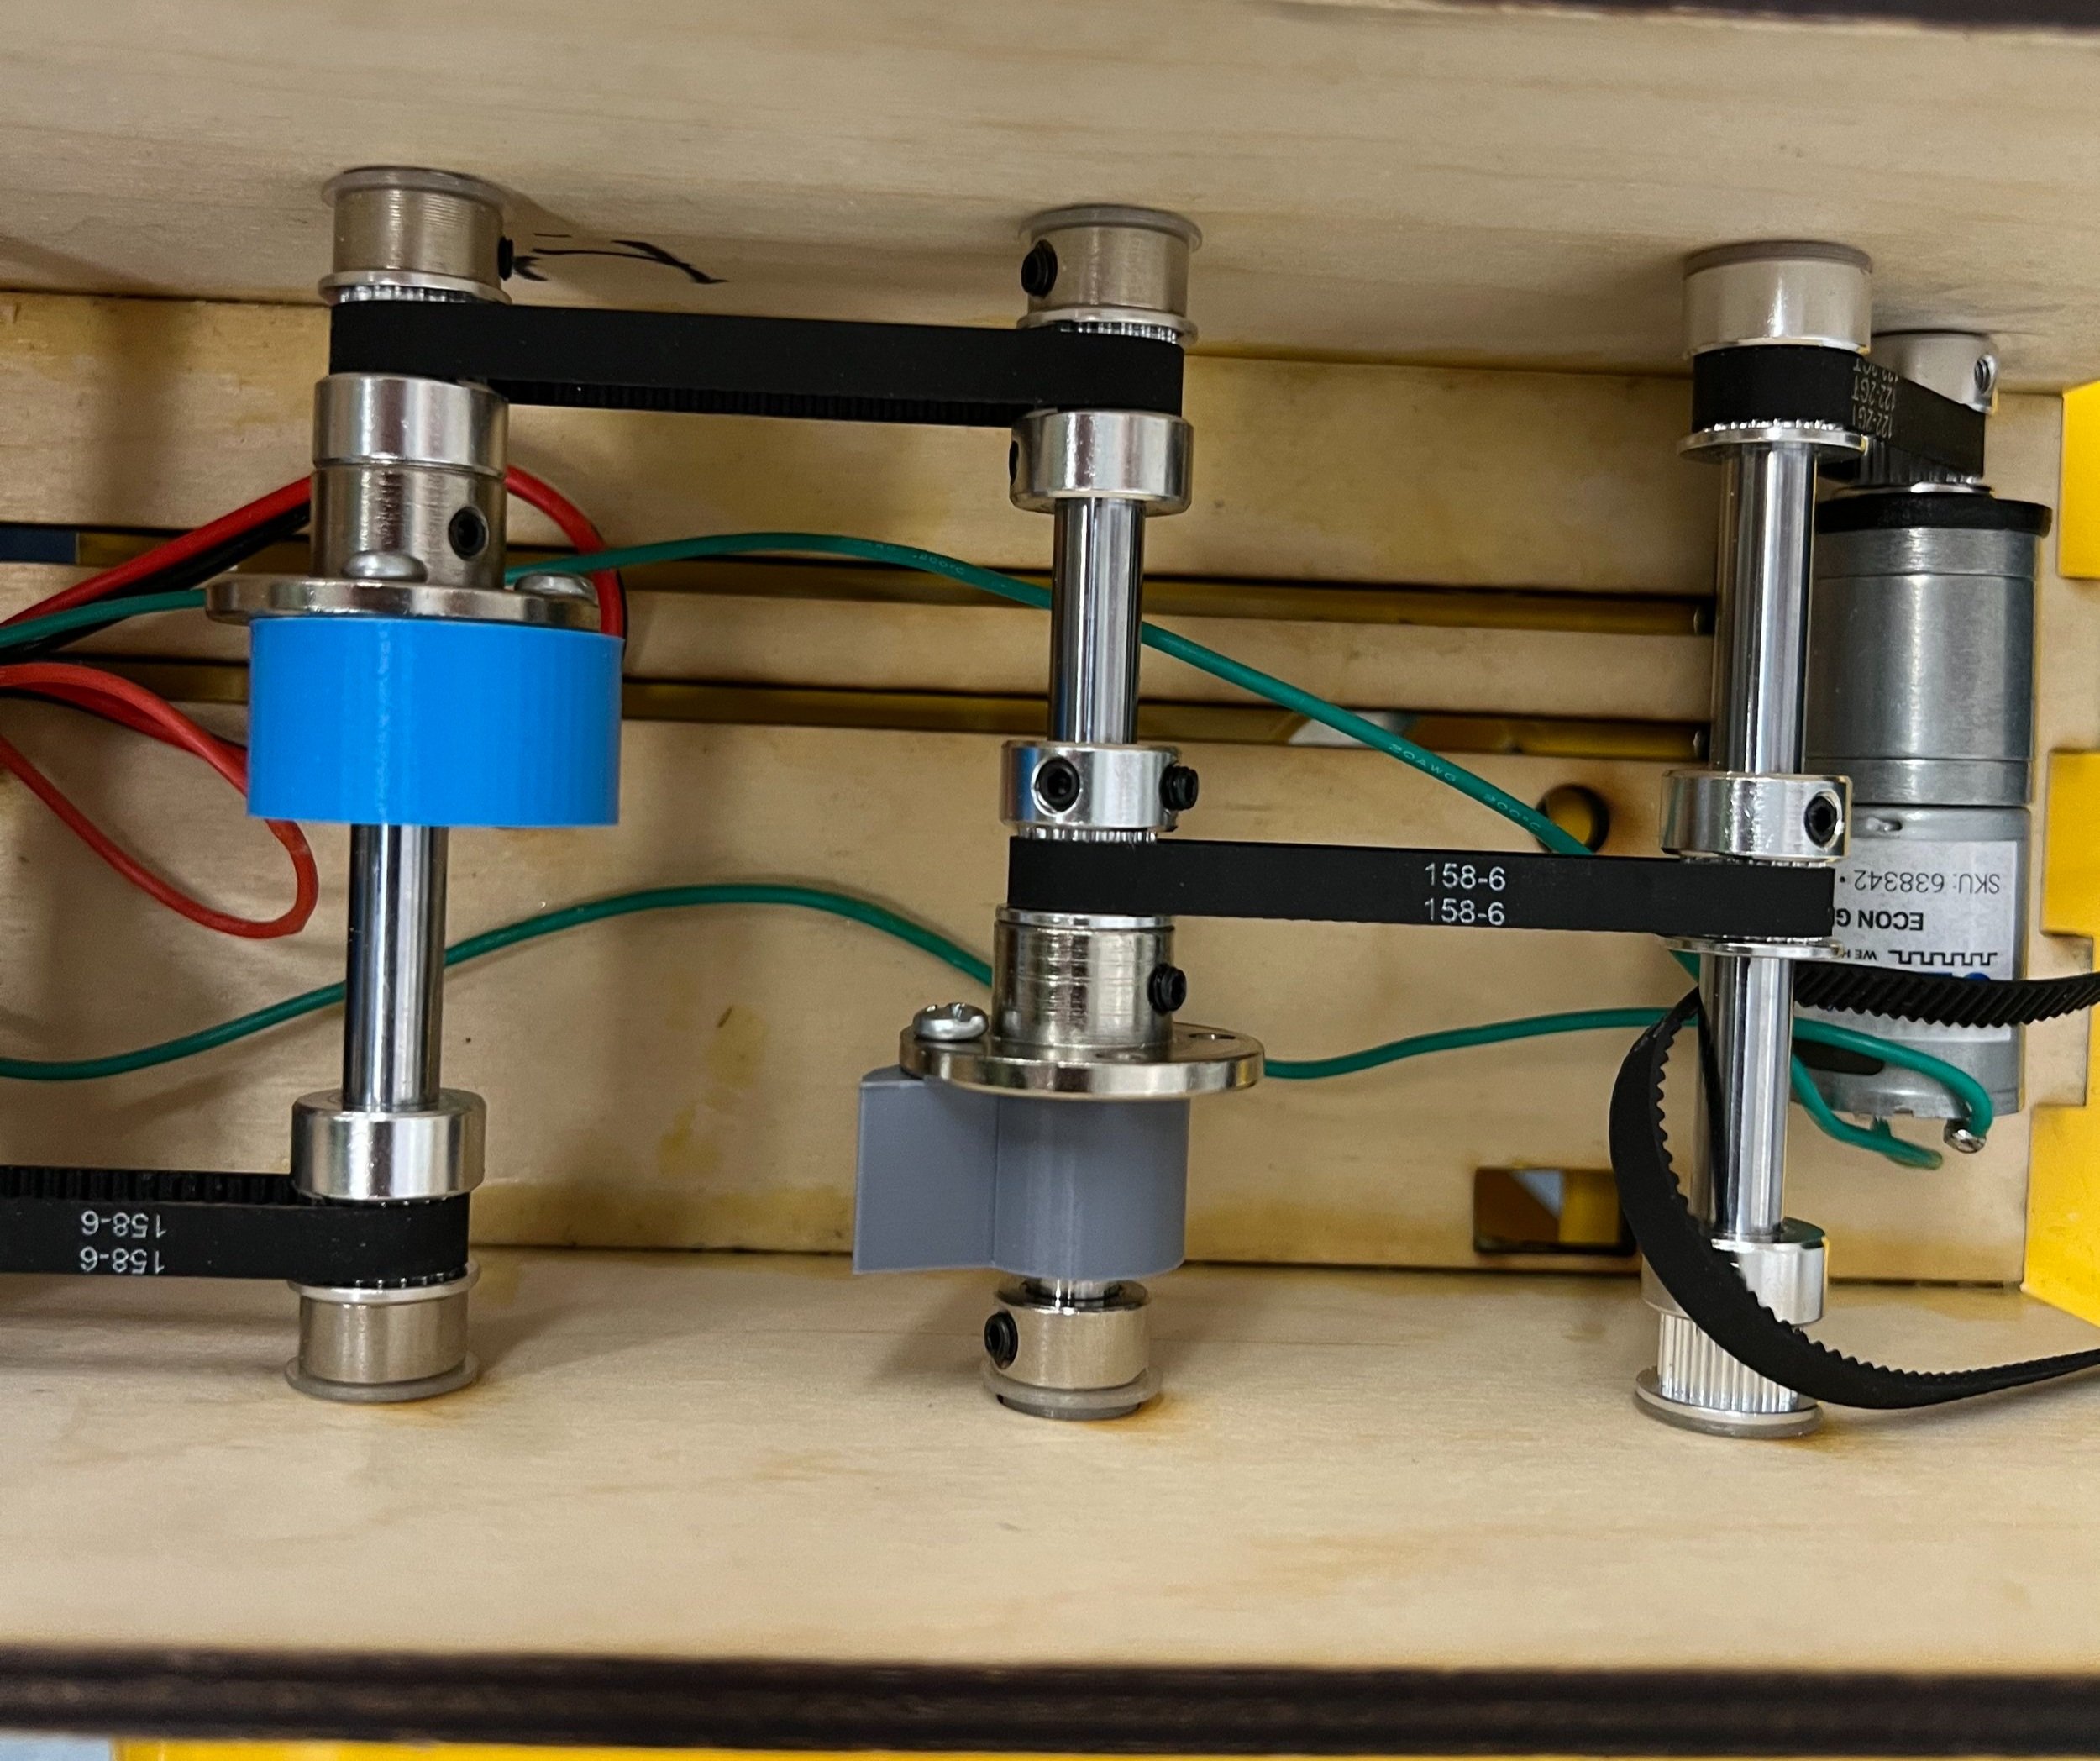
Belt and pulley layout: Optimized pulley spacing, shaft alignment, and belt tensioning for consistent motion transfer across four vertical axes.
3. Mounting the Motor and Maintaining Belt Tension
Challenge: One major challenge was securely mounting the motor while allowing for adjustable belt tension. A fixed mount led to inconsistent tension and slippage.
Solution: I redesigned the box with two slotted lines through the base panel, creating a built-in motor slider. This allowed the motor to be screwed in and adjusted along the slots, enabling precise control of belt tension without additional hardware. It was a clean, integrated solution that improved performance and ease of assembly.
Technical Challenges & Solutions
1. Mechanism Crowding
Challenge: The proximity of five independently moving components in a small footprint led to collisions during early testing.
Solution: We repositioned mechanisms and adjusted component heights to ensure clean paths of motion. This meant drilling new holes in the laser cut box to move parts so the egg and flower mover back and the windmill moved forward and in doing so everything fit well.

Objective of the Design Project:
To design and fabricate a moving sculpture where multiple components (4 minimum)—windmill, butterfly, flower, bunny ears, and hatching chick—operate seamlessly using a unified belt and pulley mechanism, showcasing the integration of mechanical systems in artistic installations.
Skills Developed and Practiced:
CAD Modeling & Assembly Design
Designed complex multi-part systems with motion constraints and mechanical integration.CNC Machining
Used CNC routers to fabricate precise components for the box structure and mechanisms.Manual Machining & Lathe Work
Created custom shafts and axles for pulley-driven motion using lathe and mill tools.3D Printing
Rapidly prototyped detailed or curved components not easily made by subtractive methods.Plasma Cutting
Used for cutting out larger or uniquely shaped components with precision and speed.Laser Cutting
Fabricated flat-pack parts with tight tolerances for quick testing and clean assembly.Belt and Pulley Calculations
Determined pulley sizes, spacing, and tensioning for optimal motion transfer.Mechanism Prototyping
Built and tested linkages, cams, Scotch yokes, and actuation methods.Assembly Planning
Structured component layouts for modular builds and ease of integration.Team Collaboration
Worked effectively within a group—dividing tasks, integrating feedback, and troubleshooting together.Design for Manufacturing (DFM)
Balanced visual design with fabrication constraints for efficient and clean builds.
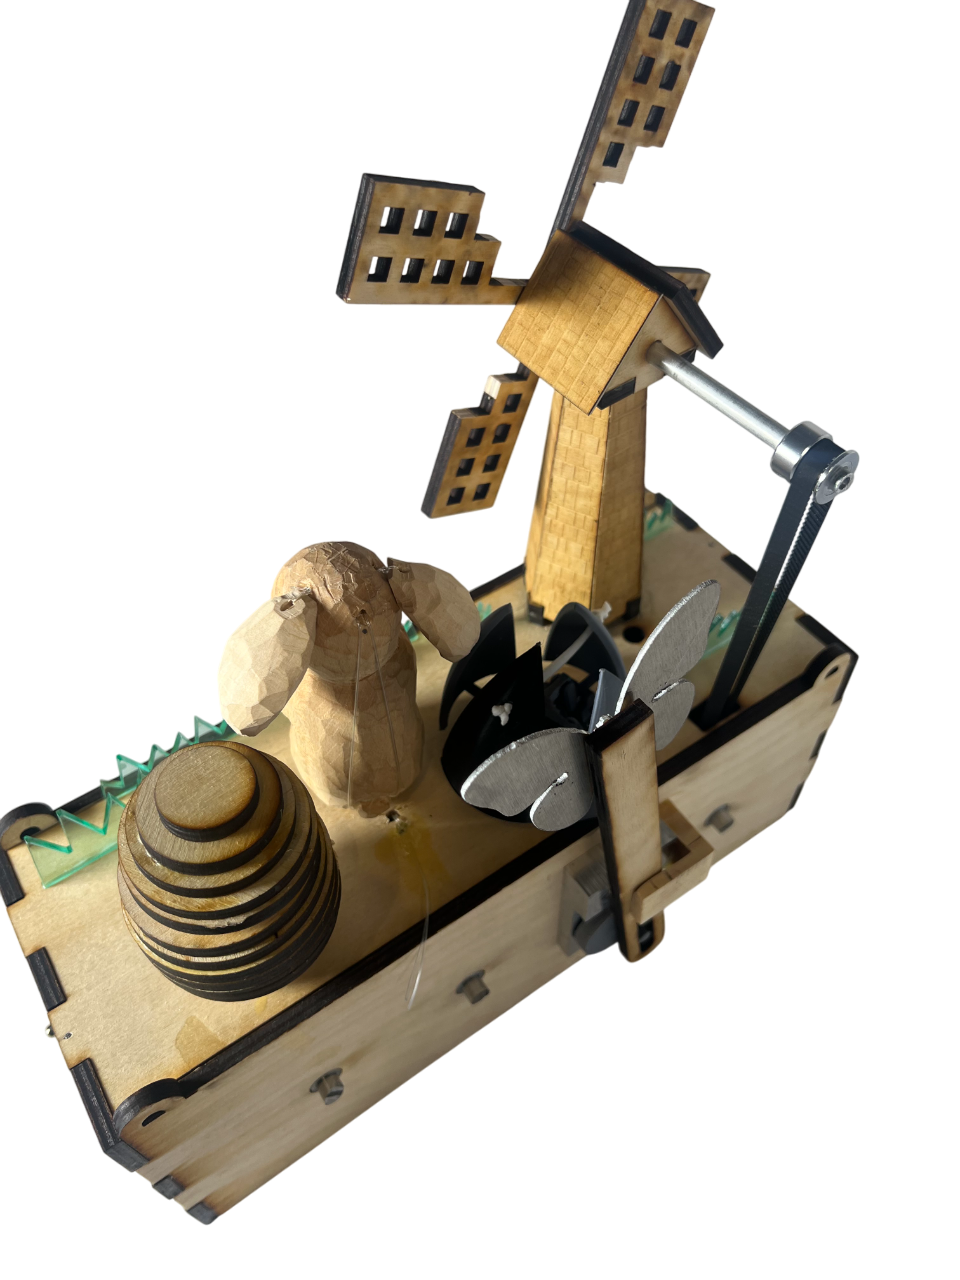
Results
Our final sculpture successfully brought together five dynamic, nature-inspired elements powered by a unified belt and pulley system. Each component performed its intended motion:
The windmill spun fluidly.
The butterfly flapped using a Scotch yoke.
The flower opened through a four-bar linkage.
The bunny’s ears moved up and down via cam and rope.
The chick hatched as a cam pushed its eggshell open.
To enhance the visual experience, we added laser-cut acrylic grass to the top surface, introducing depth and a 3D perspective to the otherwise flat layout. The integration of different materials like clear acrylic and rastered wood also elevated the visual appeal and dimensional contrast of the design.
What Went Well:
All mechanical elements operated as intended after final tuning.
Belt-driven motion transferred smoothly across four vertical shafts.
The entire system ran reliably off a single motor with coordinated timing.
The aesthetic and mechanical elements blended seamlessly into one playful, kinetic design.
2. Overly Aggressive CAM Profiles
Challenge: Initial cam designs had steep rises, which caused jamming and inconsistent movement.
Solution: Redesigned cams with smoother rise/fall transitions and tested on scrap before final cuts. Originally we had planned to use different CAM shapes to learn about them which included a heart, circle and raindrop CAM. These mechanisms although cool, did not work and caused jamming with the optimal CAM shape ending up being a simple circle cam with an offset hole in the middle and we ended up using this for all the CAMS.