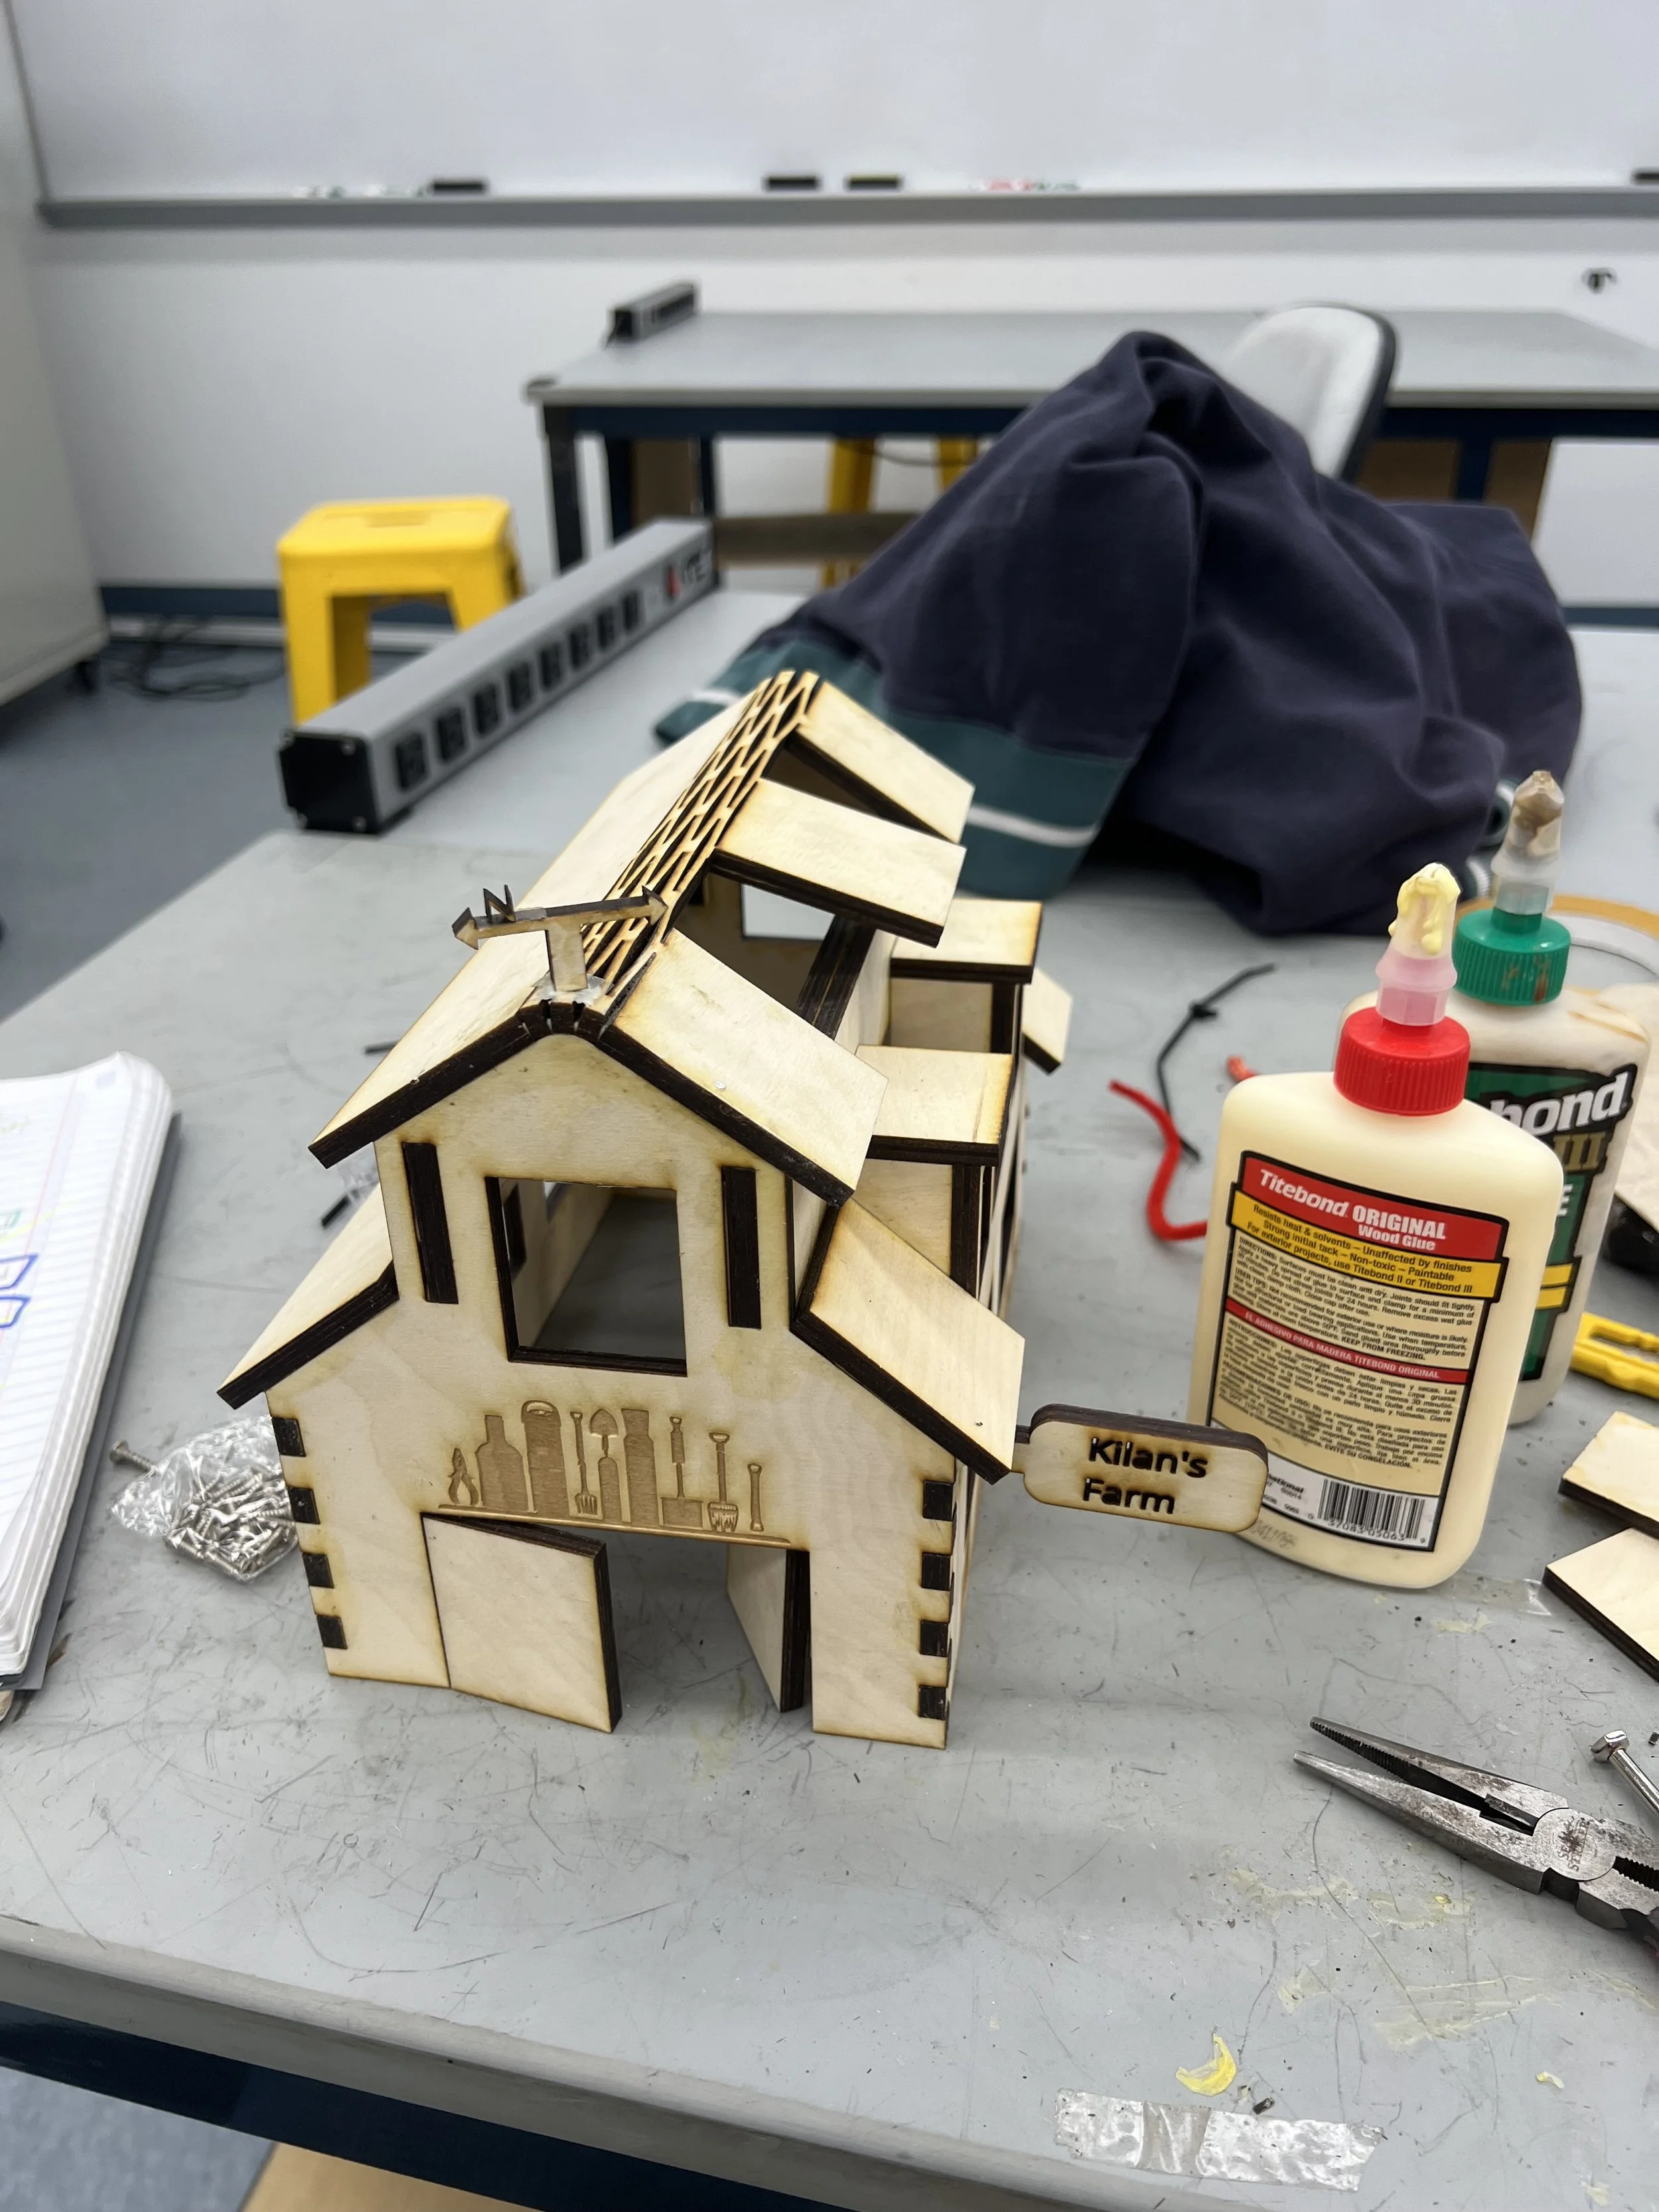
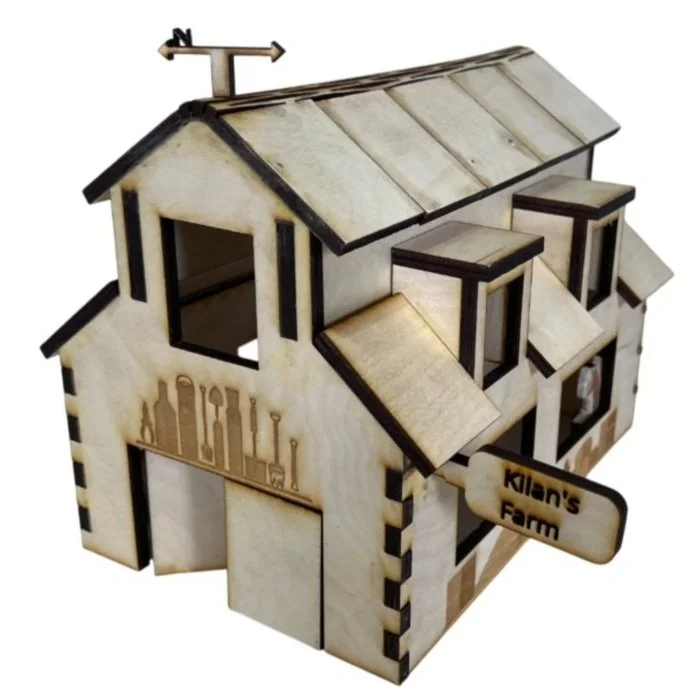
Barn in a box: A laser cut box
A laser-cut plywood box designed as a miniature barn, featuring functional doors, decorative farm engravings, and detailed architectural elements.
Design Process:
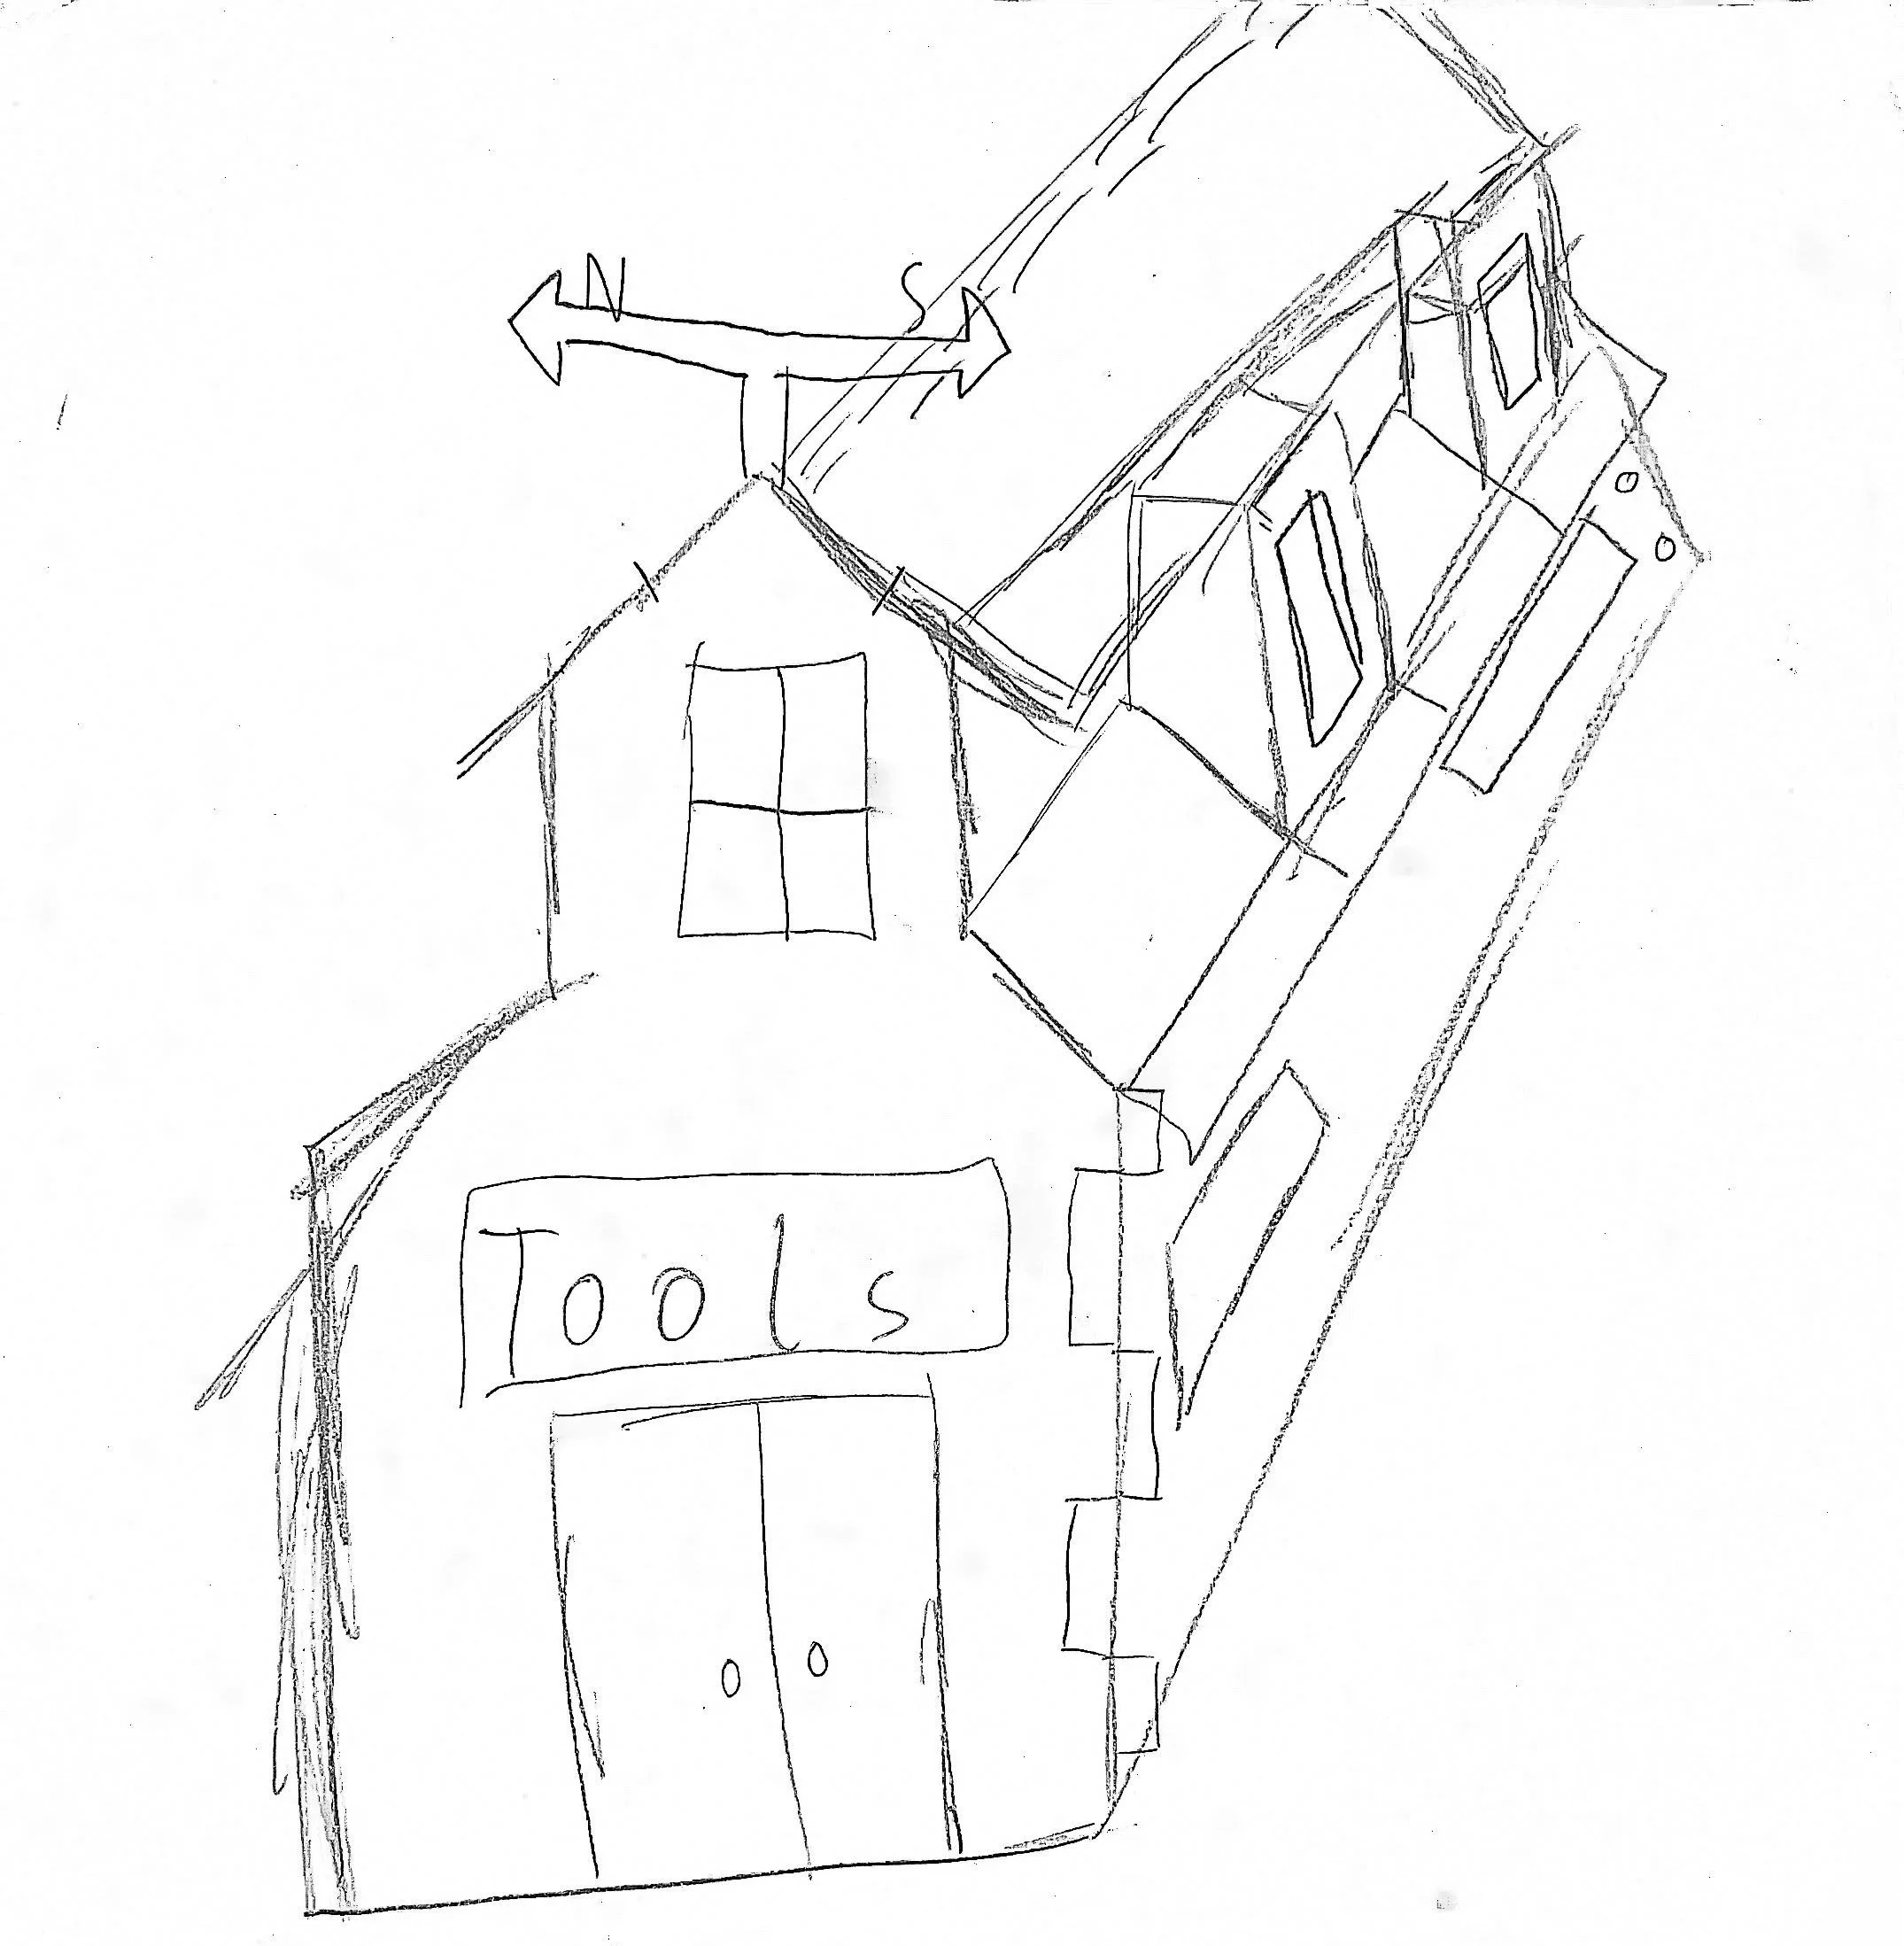
Initial Concept
Early sketches explored various barn architectural elements and how to translate them into a functional box design. Key considerations included:
Roof angle and window placement
Integration of farm imagery
Joint placements and box opening mechanism
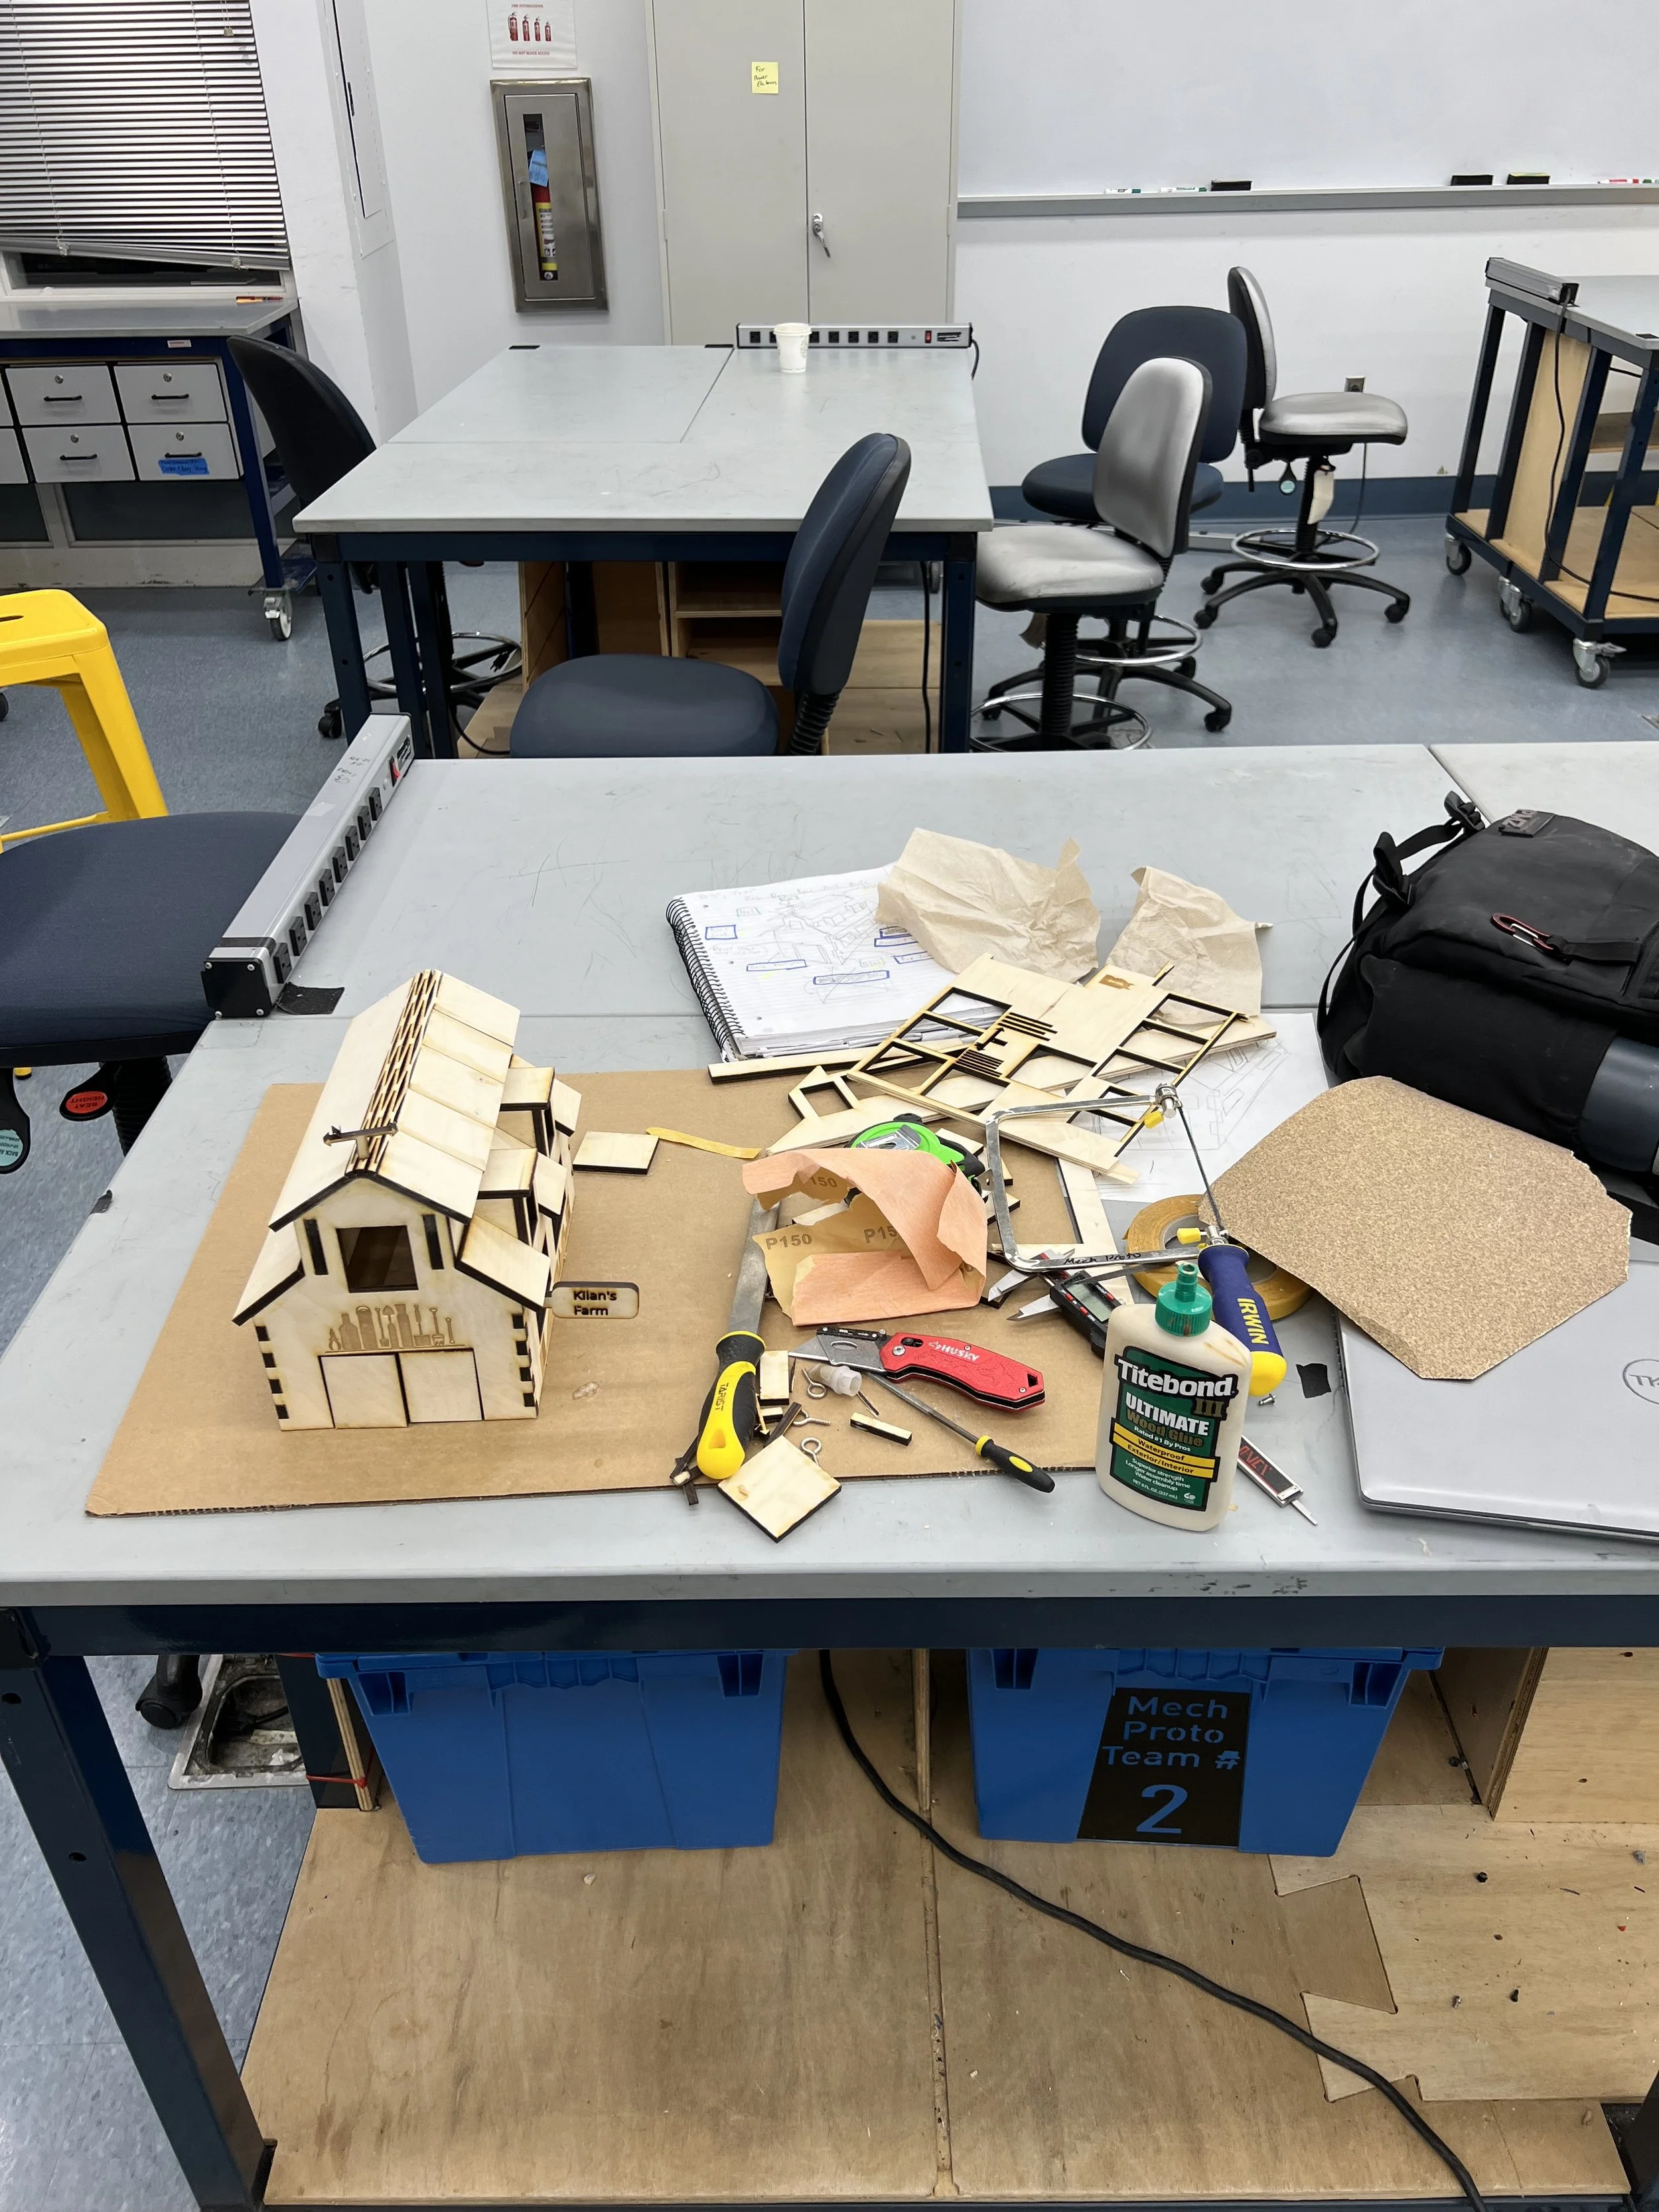
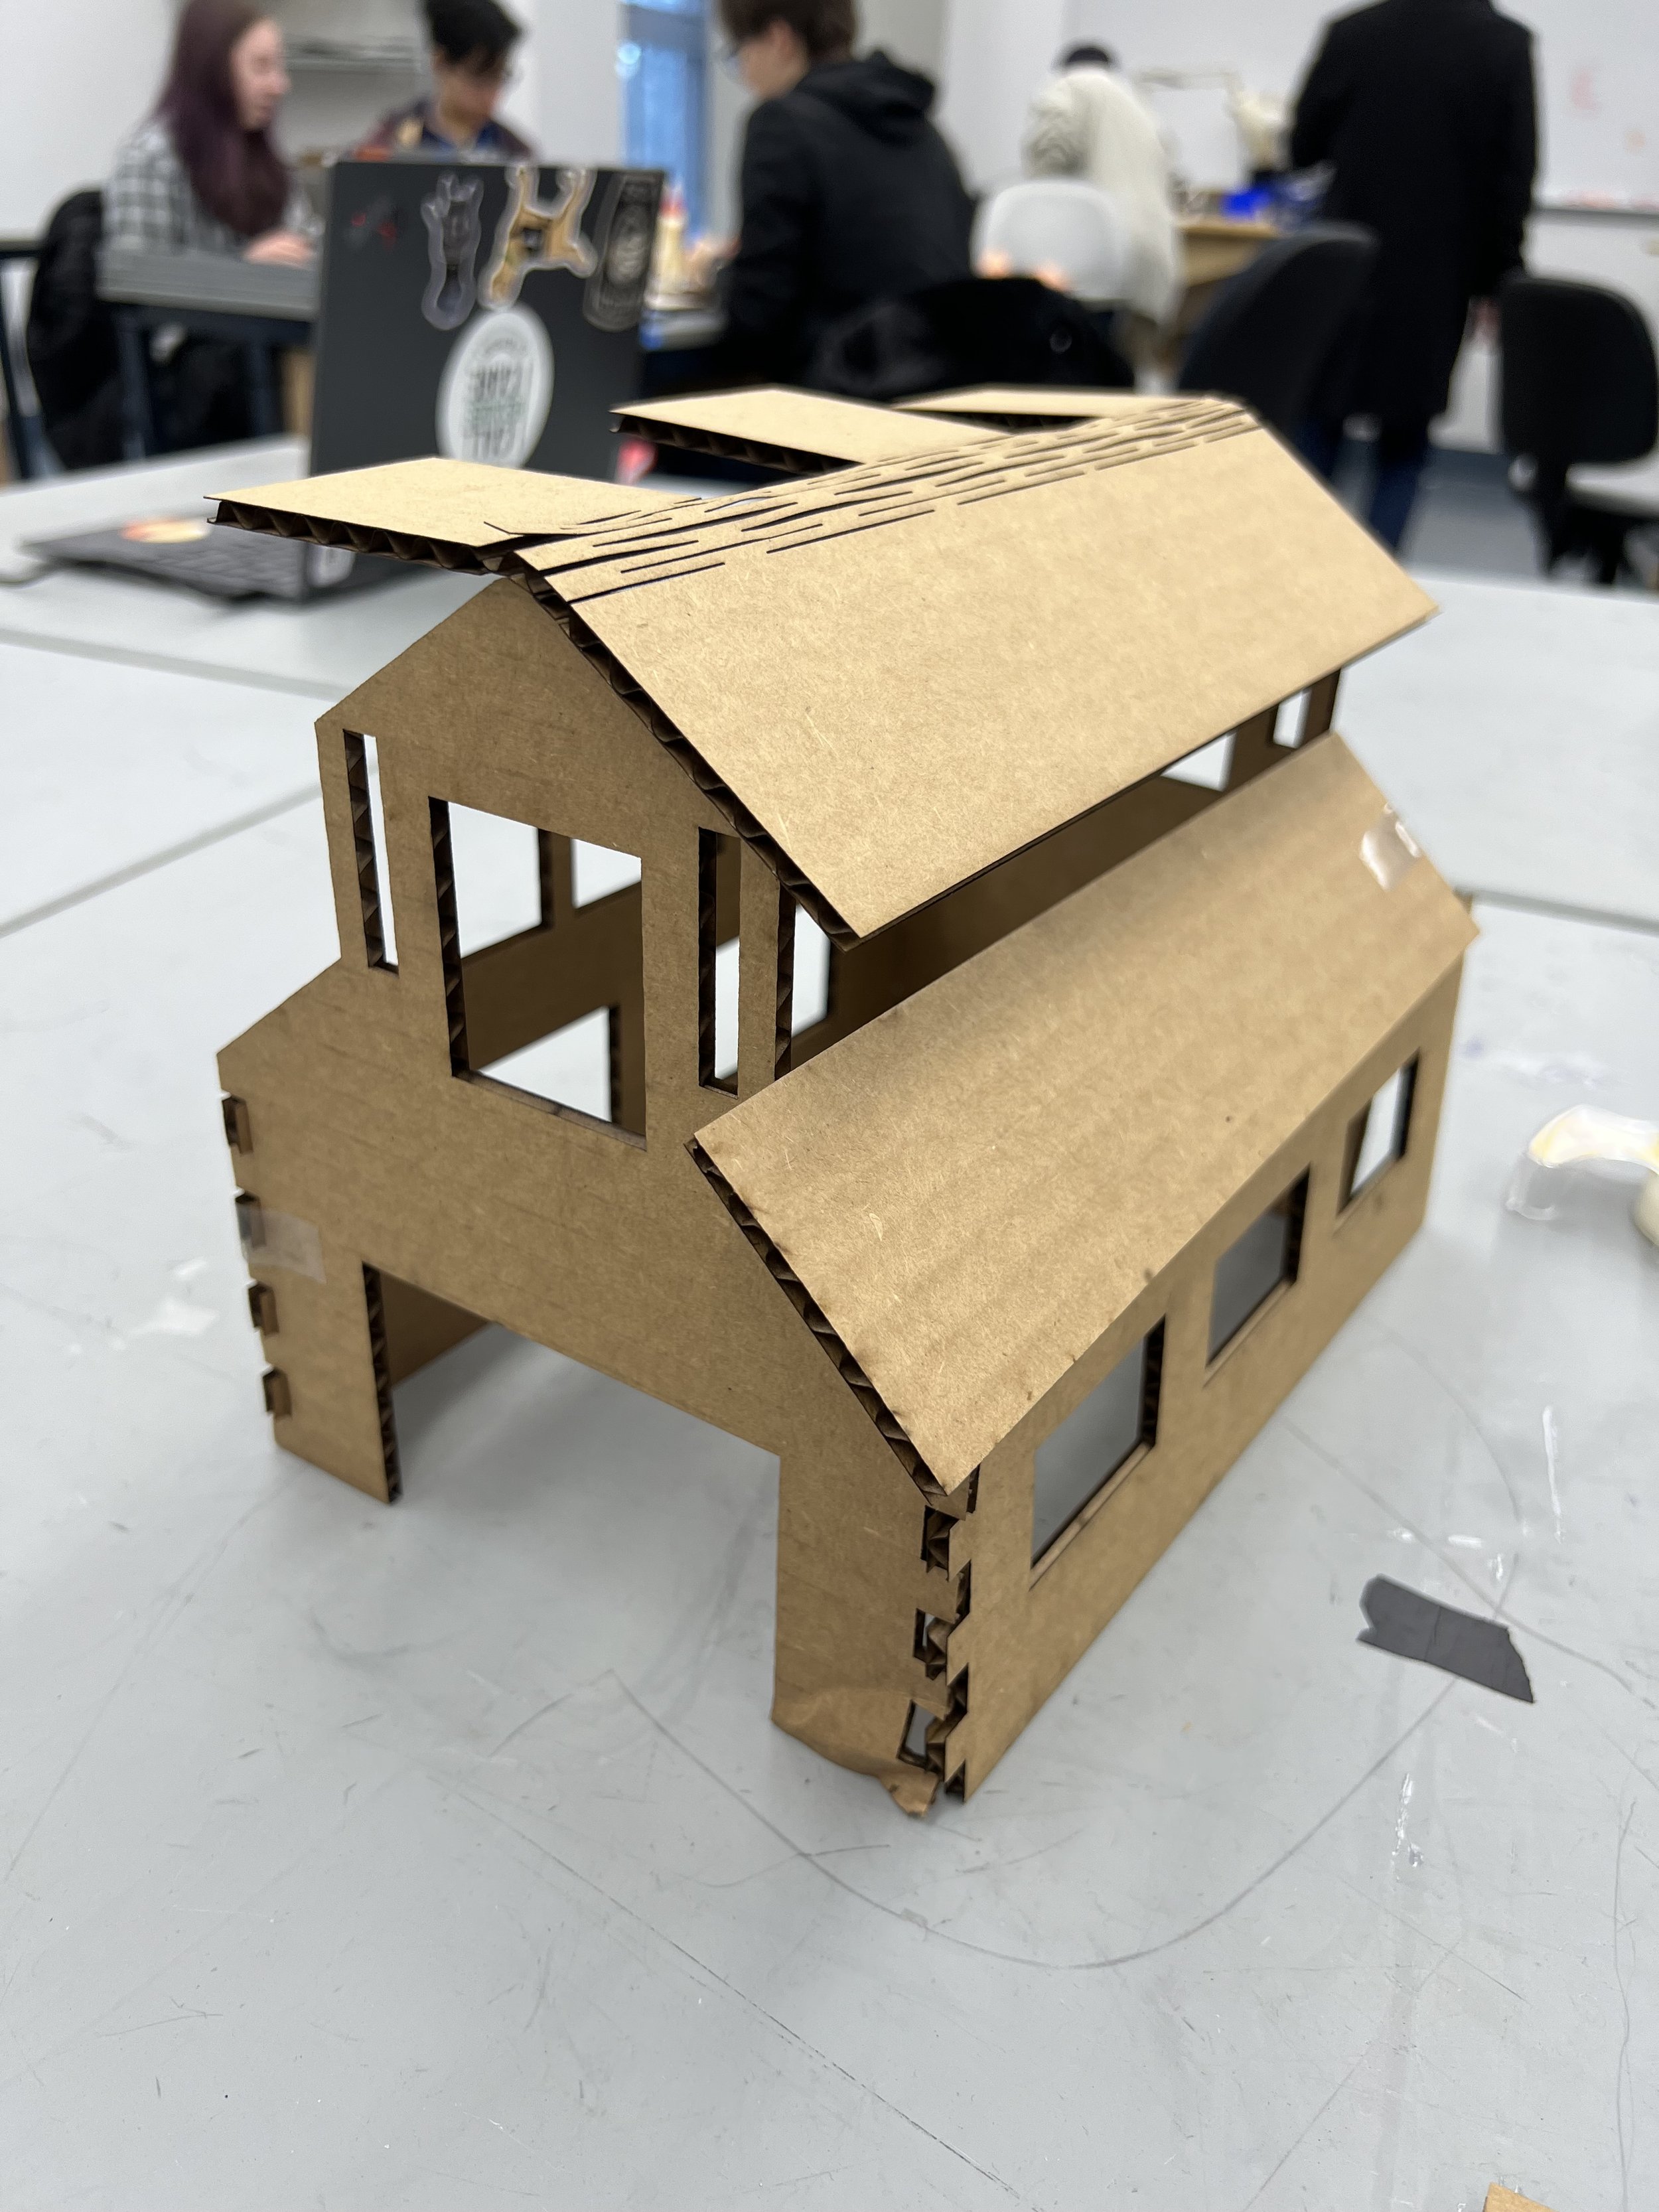
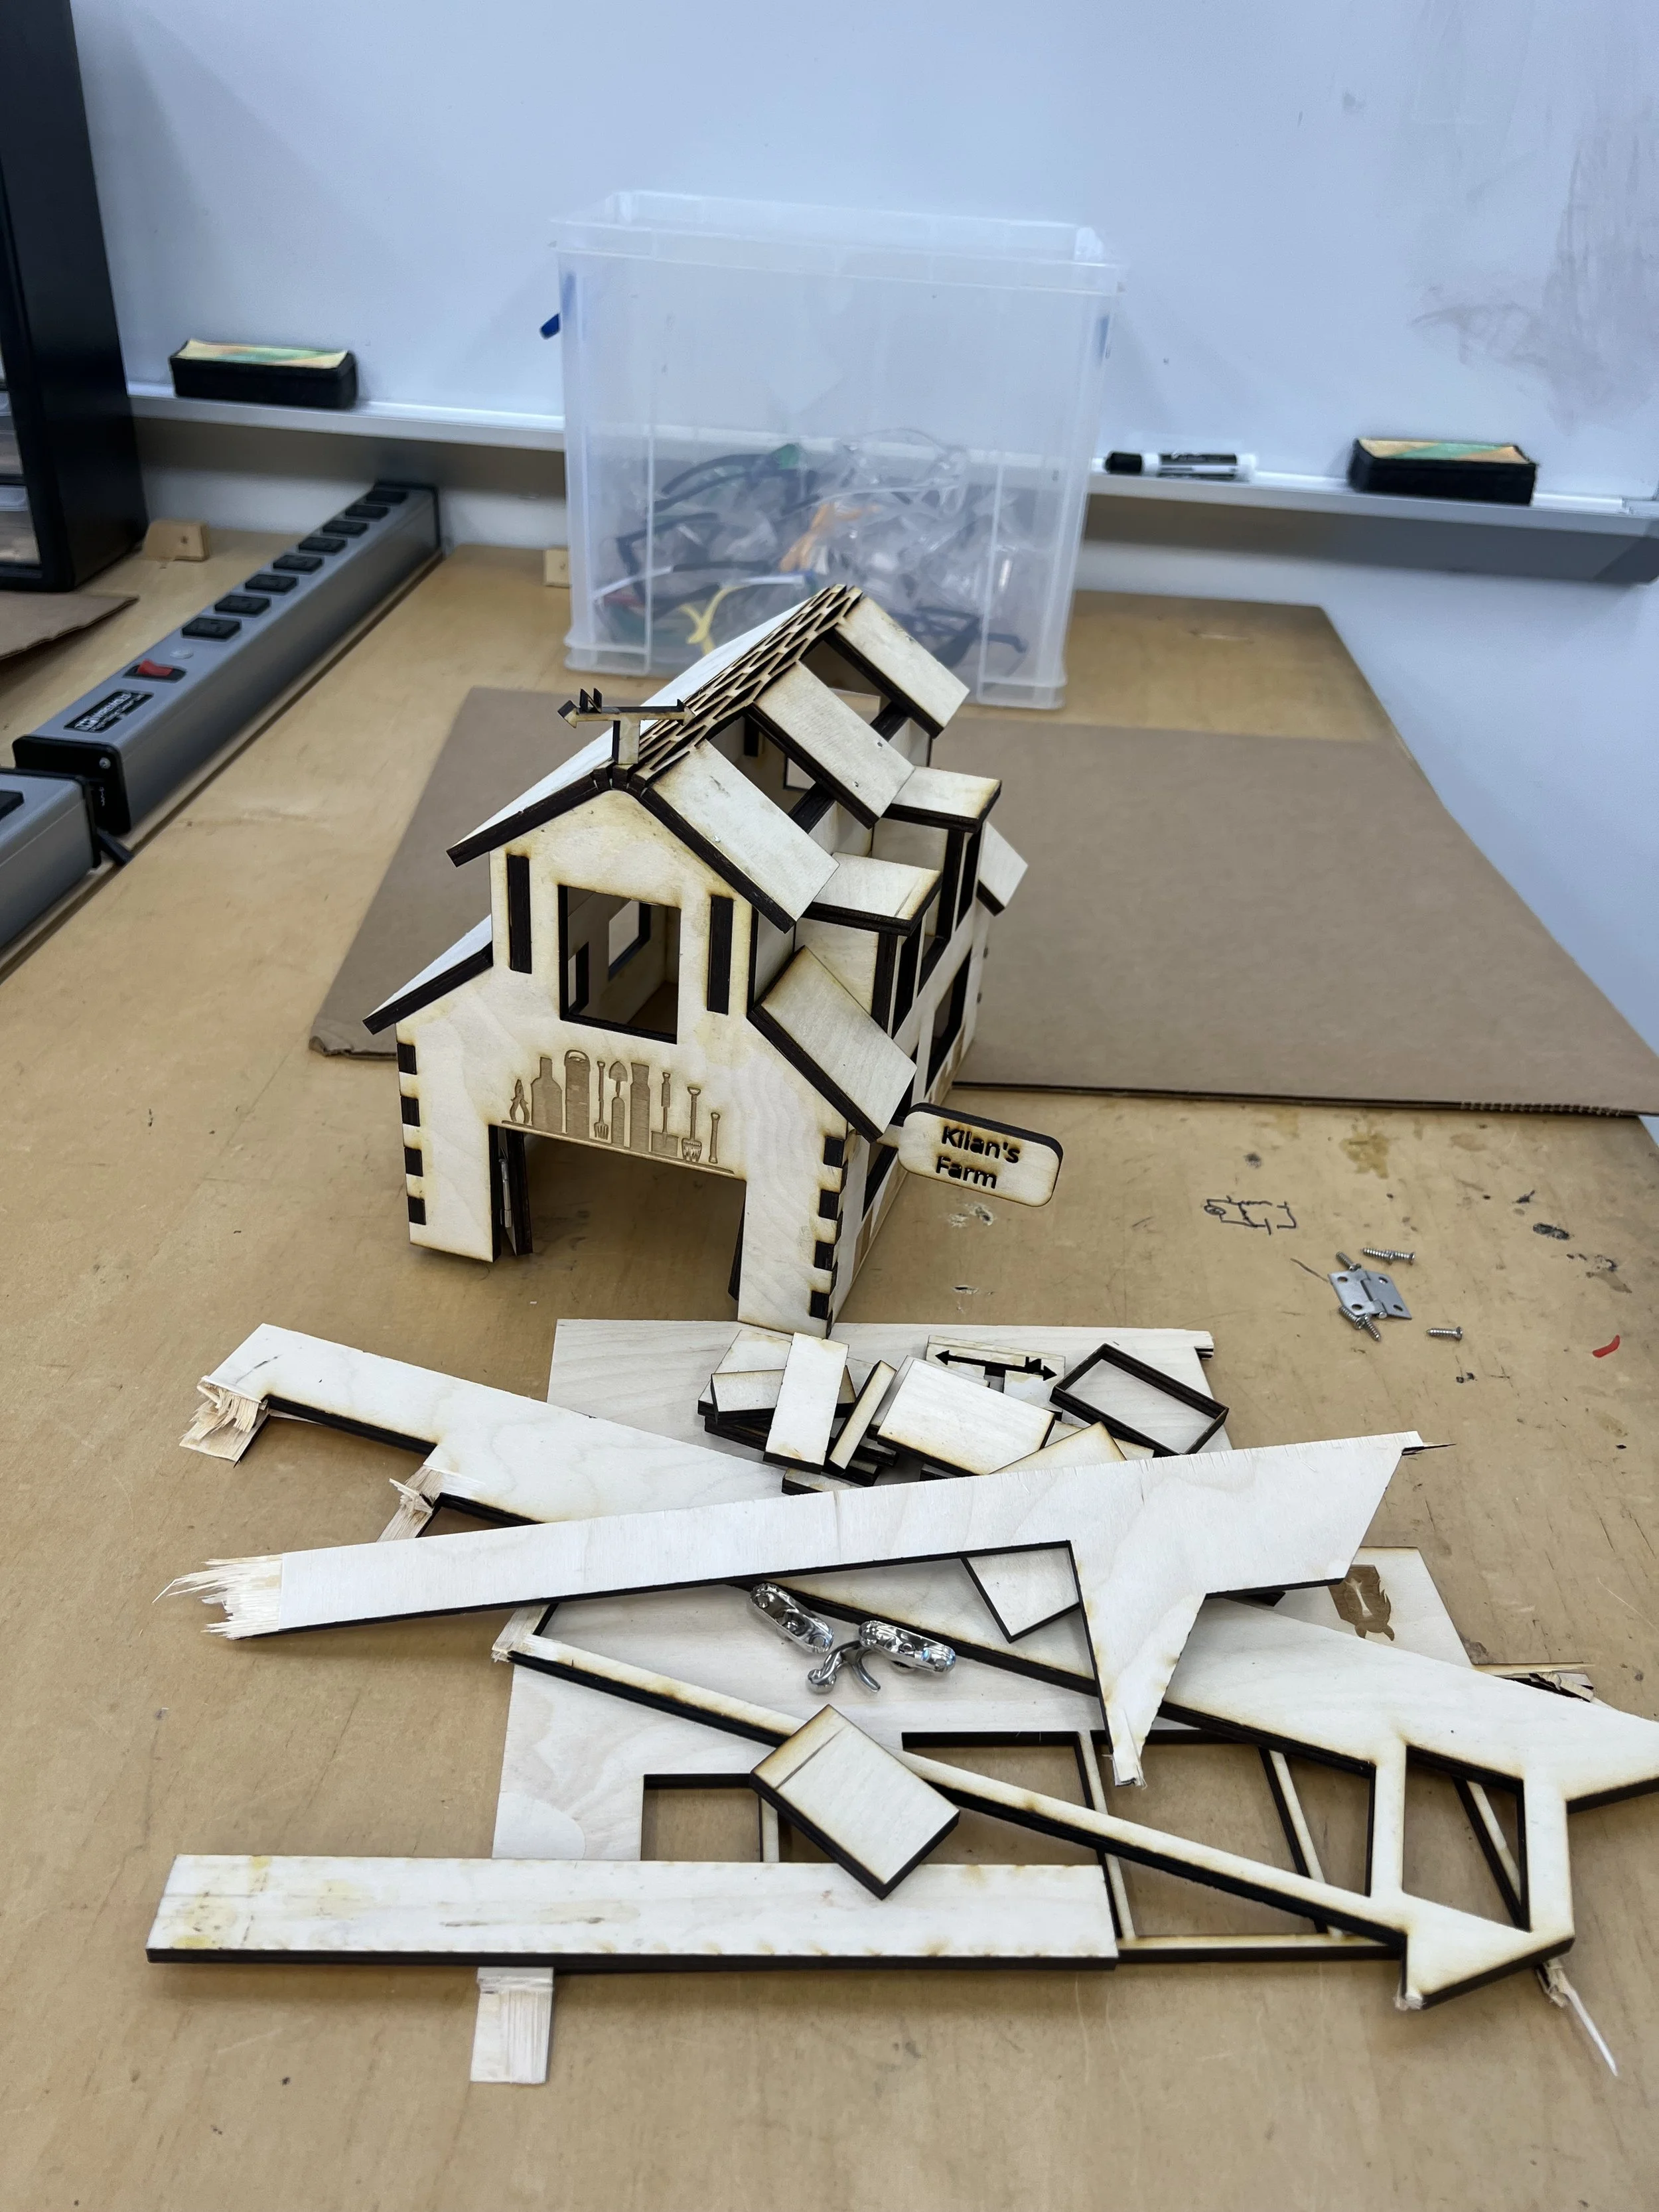
Prototyping
The cardboard prototype phase revealed:
Optimal dimensions for the box proportions
Testing of joint placements and fit
Validation of the opening mechanism
Assembly sequence steps
More ideas for patterns and and things to include
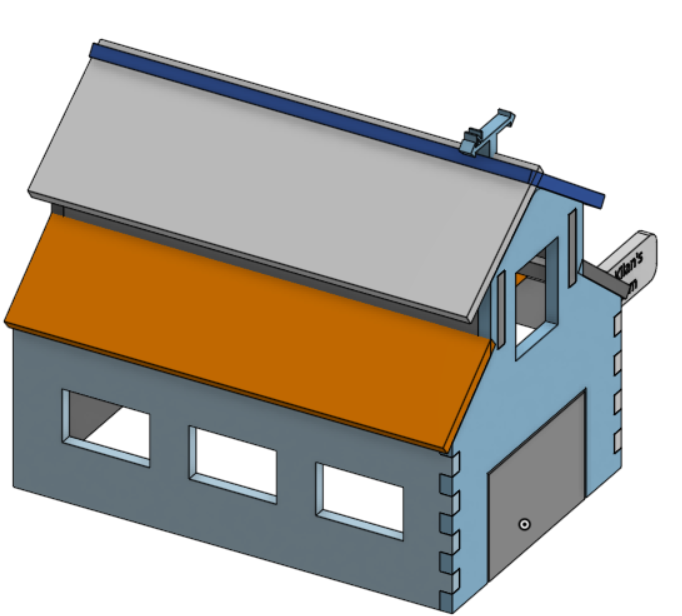
CAD Development
The CAD model refined the design through:
Precise joint specifications
Material thickness compensation
Although, the roof couldn’t be made with the curve because it would be inaccurate.

Objective
Create a functional box that links to the memory of my grandfather's farmhouse and is similar to the one found in the mobile game: “Hay Day” while demonstrating mastery of various joinery techniques and laser-cutting capabilities. Key requirements included:
Incorporating at least 5 different joint types
Using as least 4 fastening methods
Manufacturing from a single piece of 1/4" plywood, 18" x 24''
Including personal design elements that reflect the farm's character
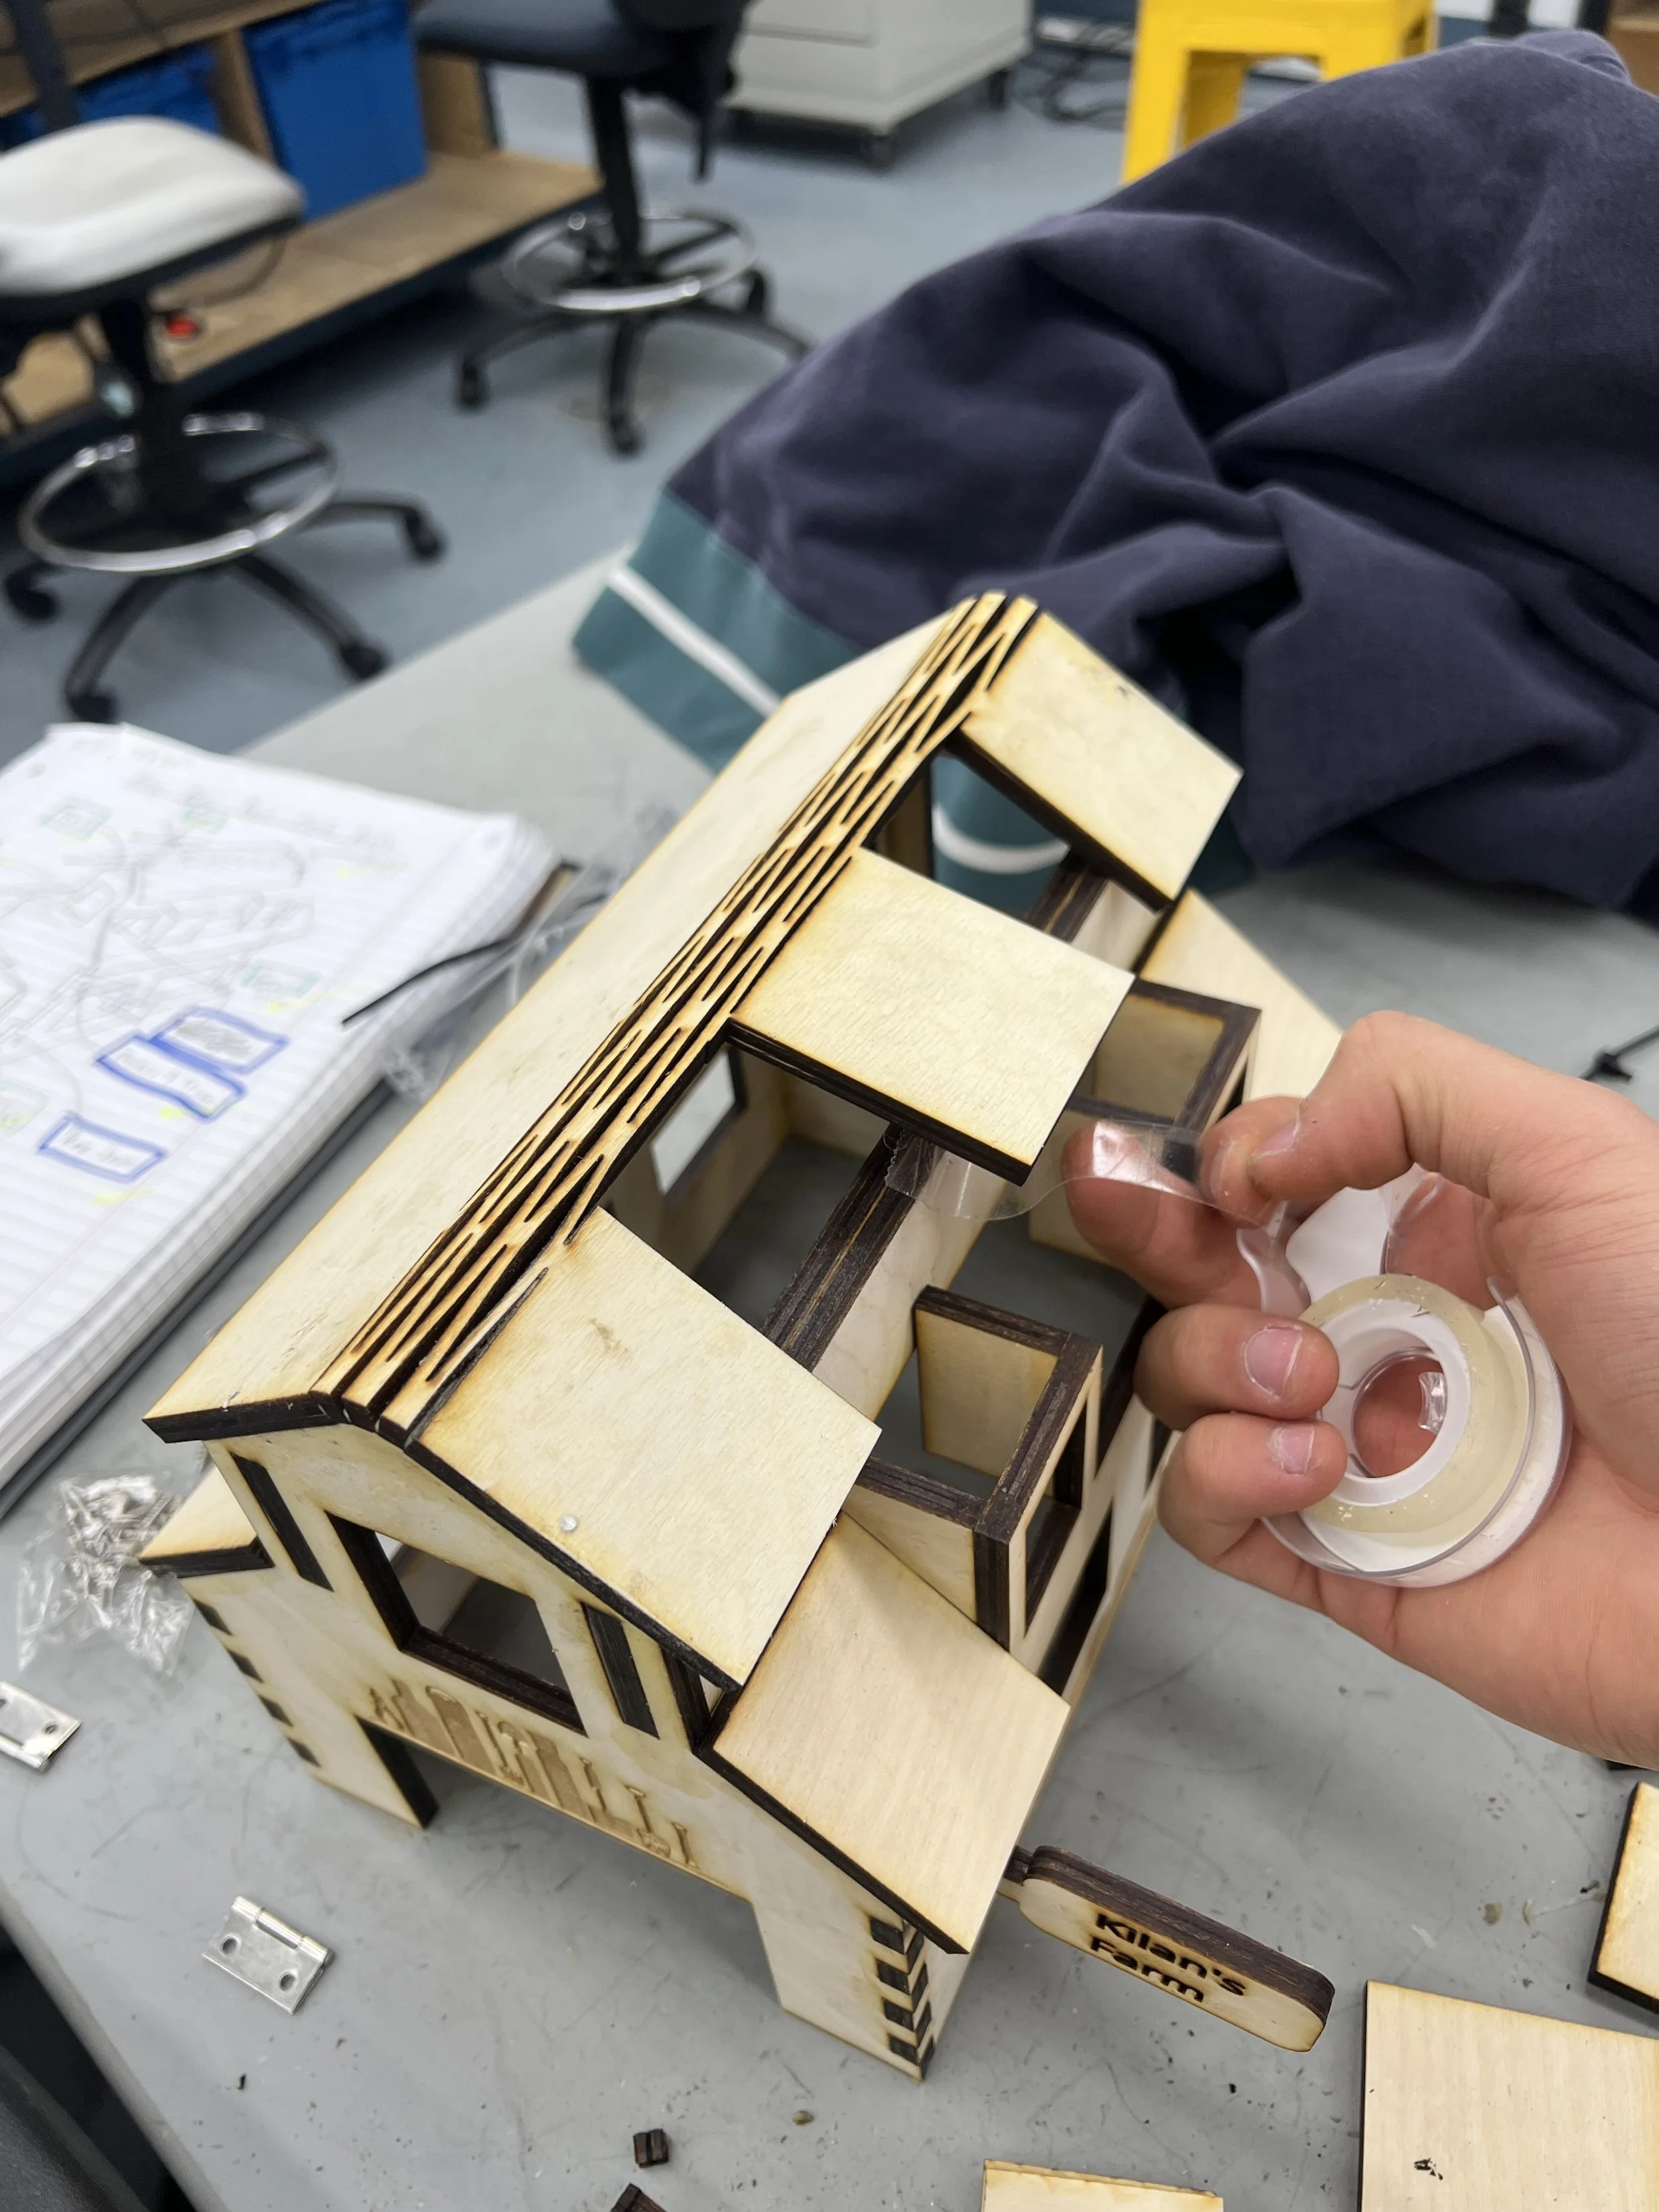
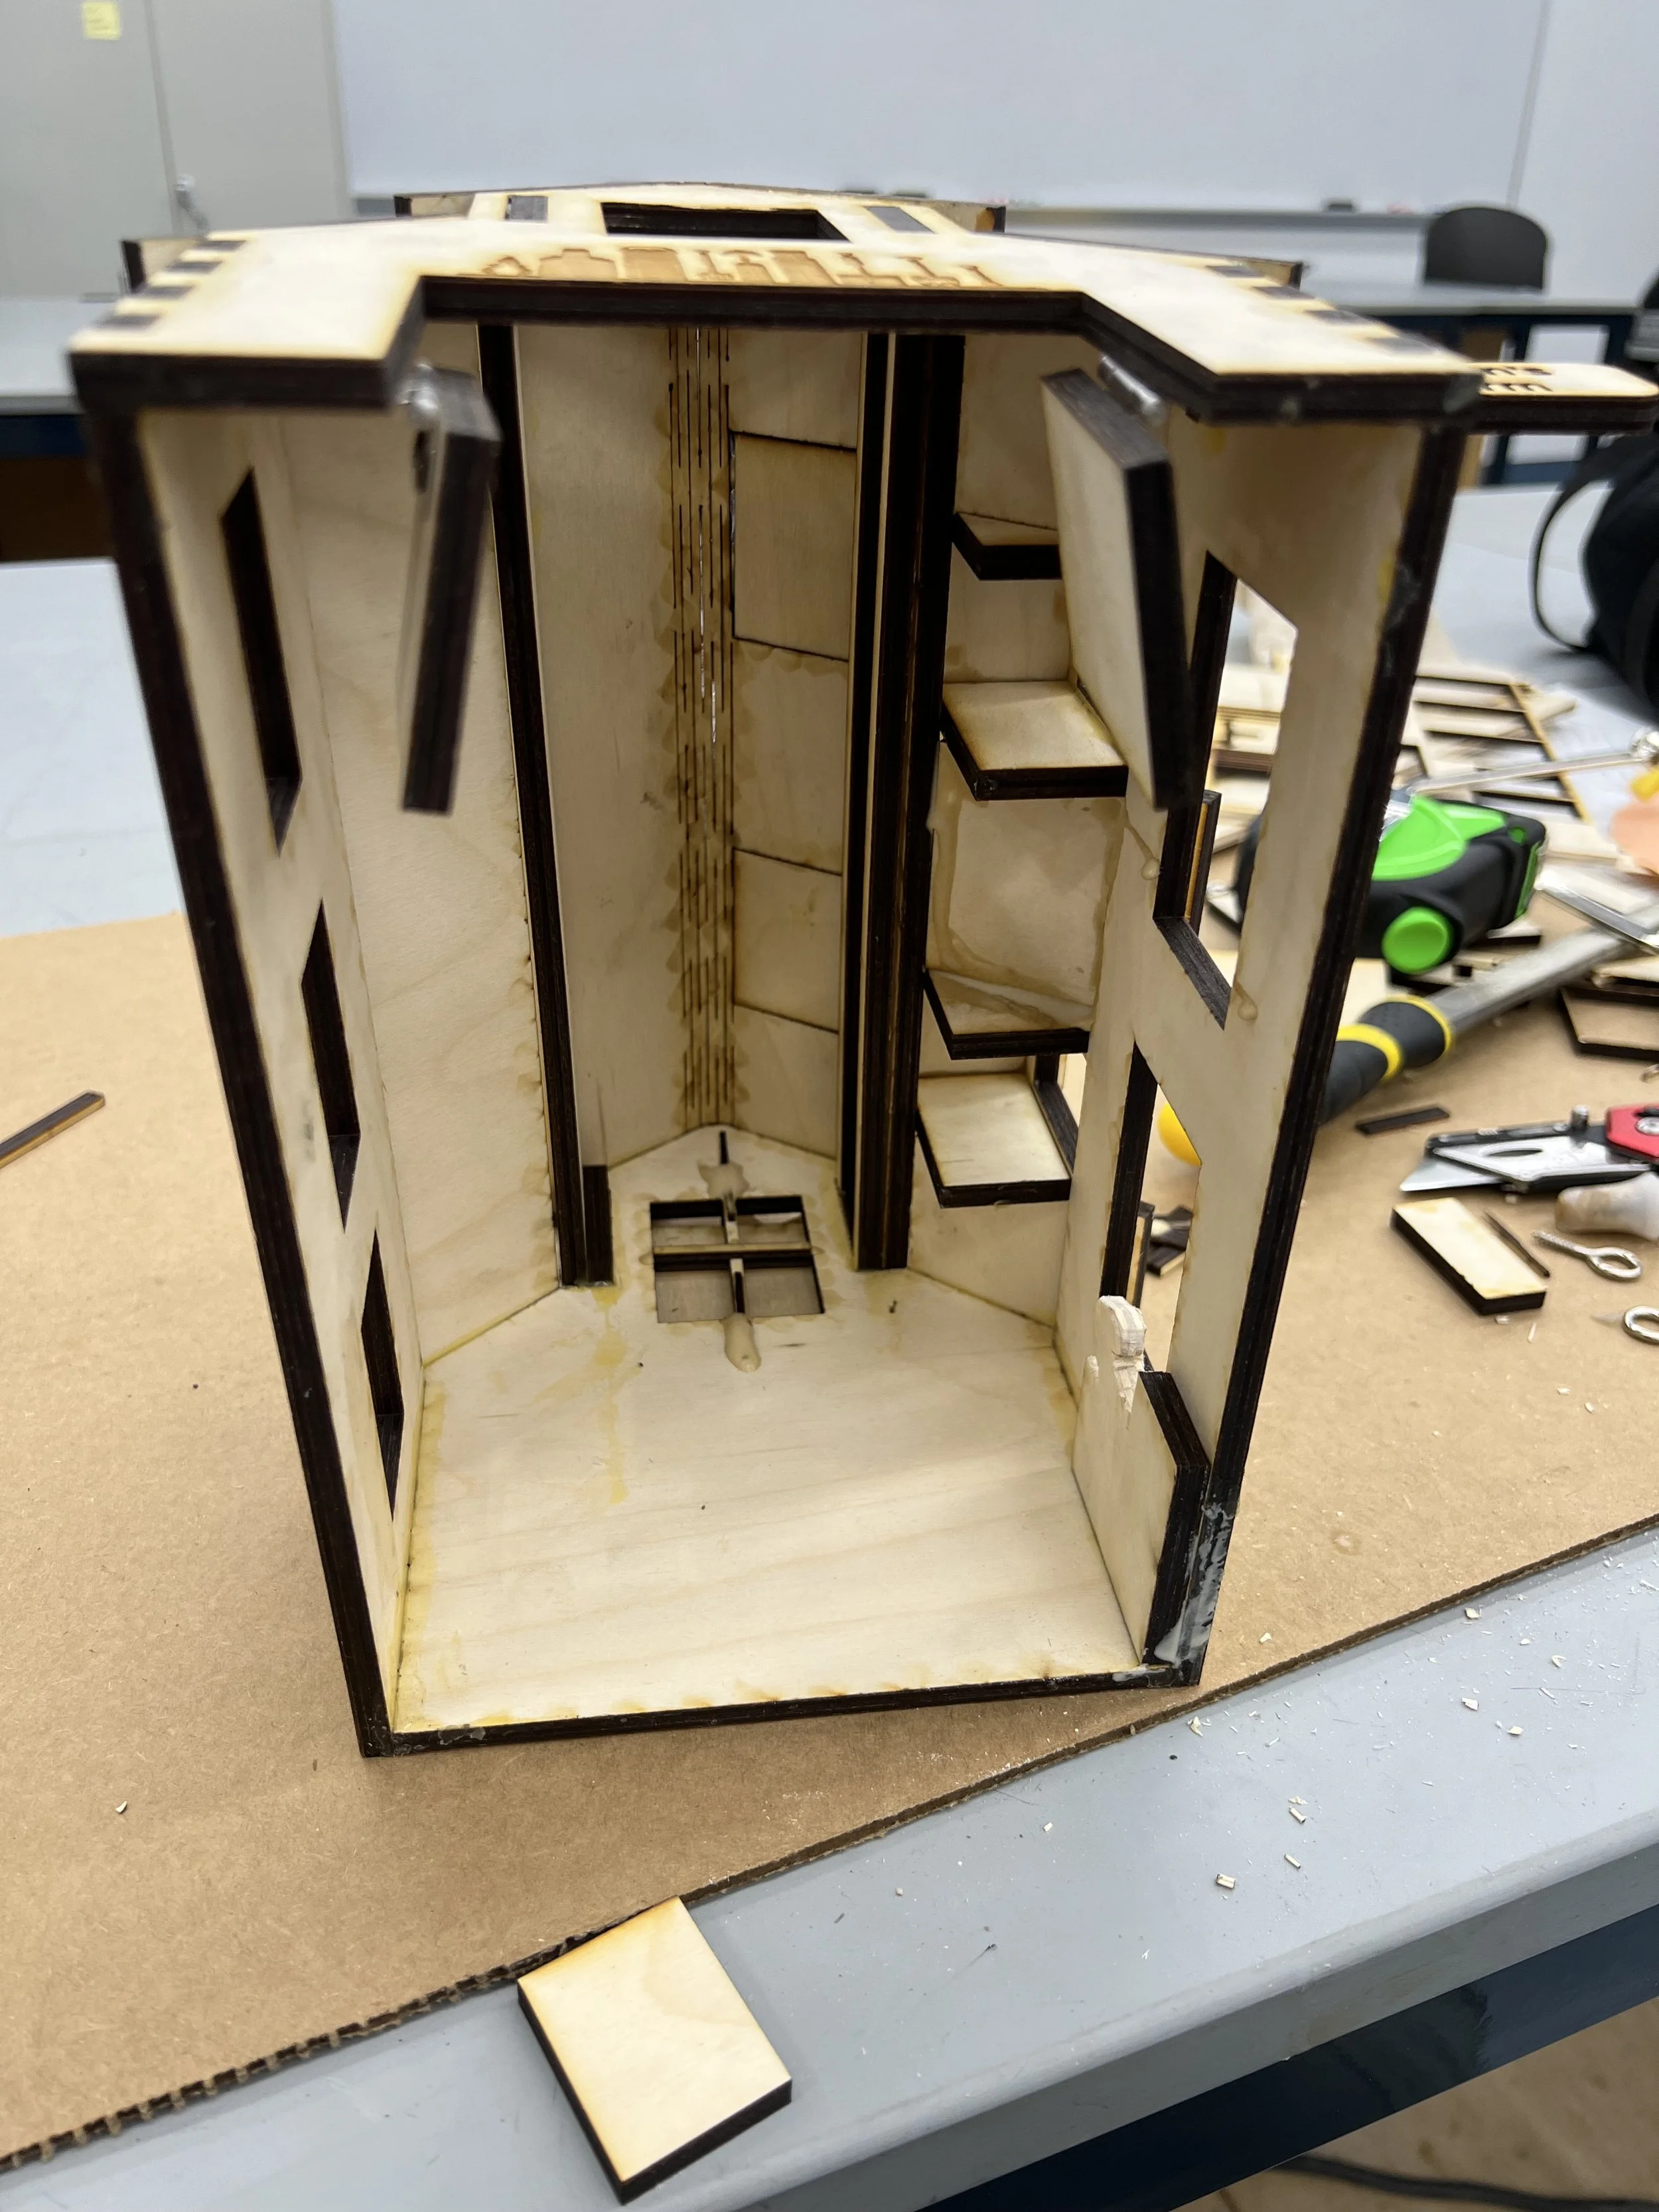
Technical Challenges & Solutions
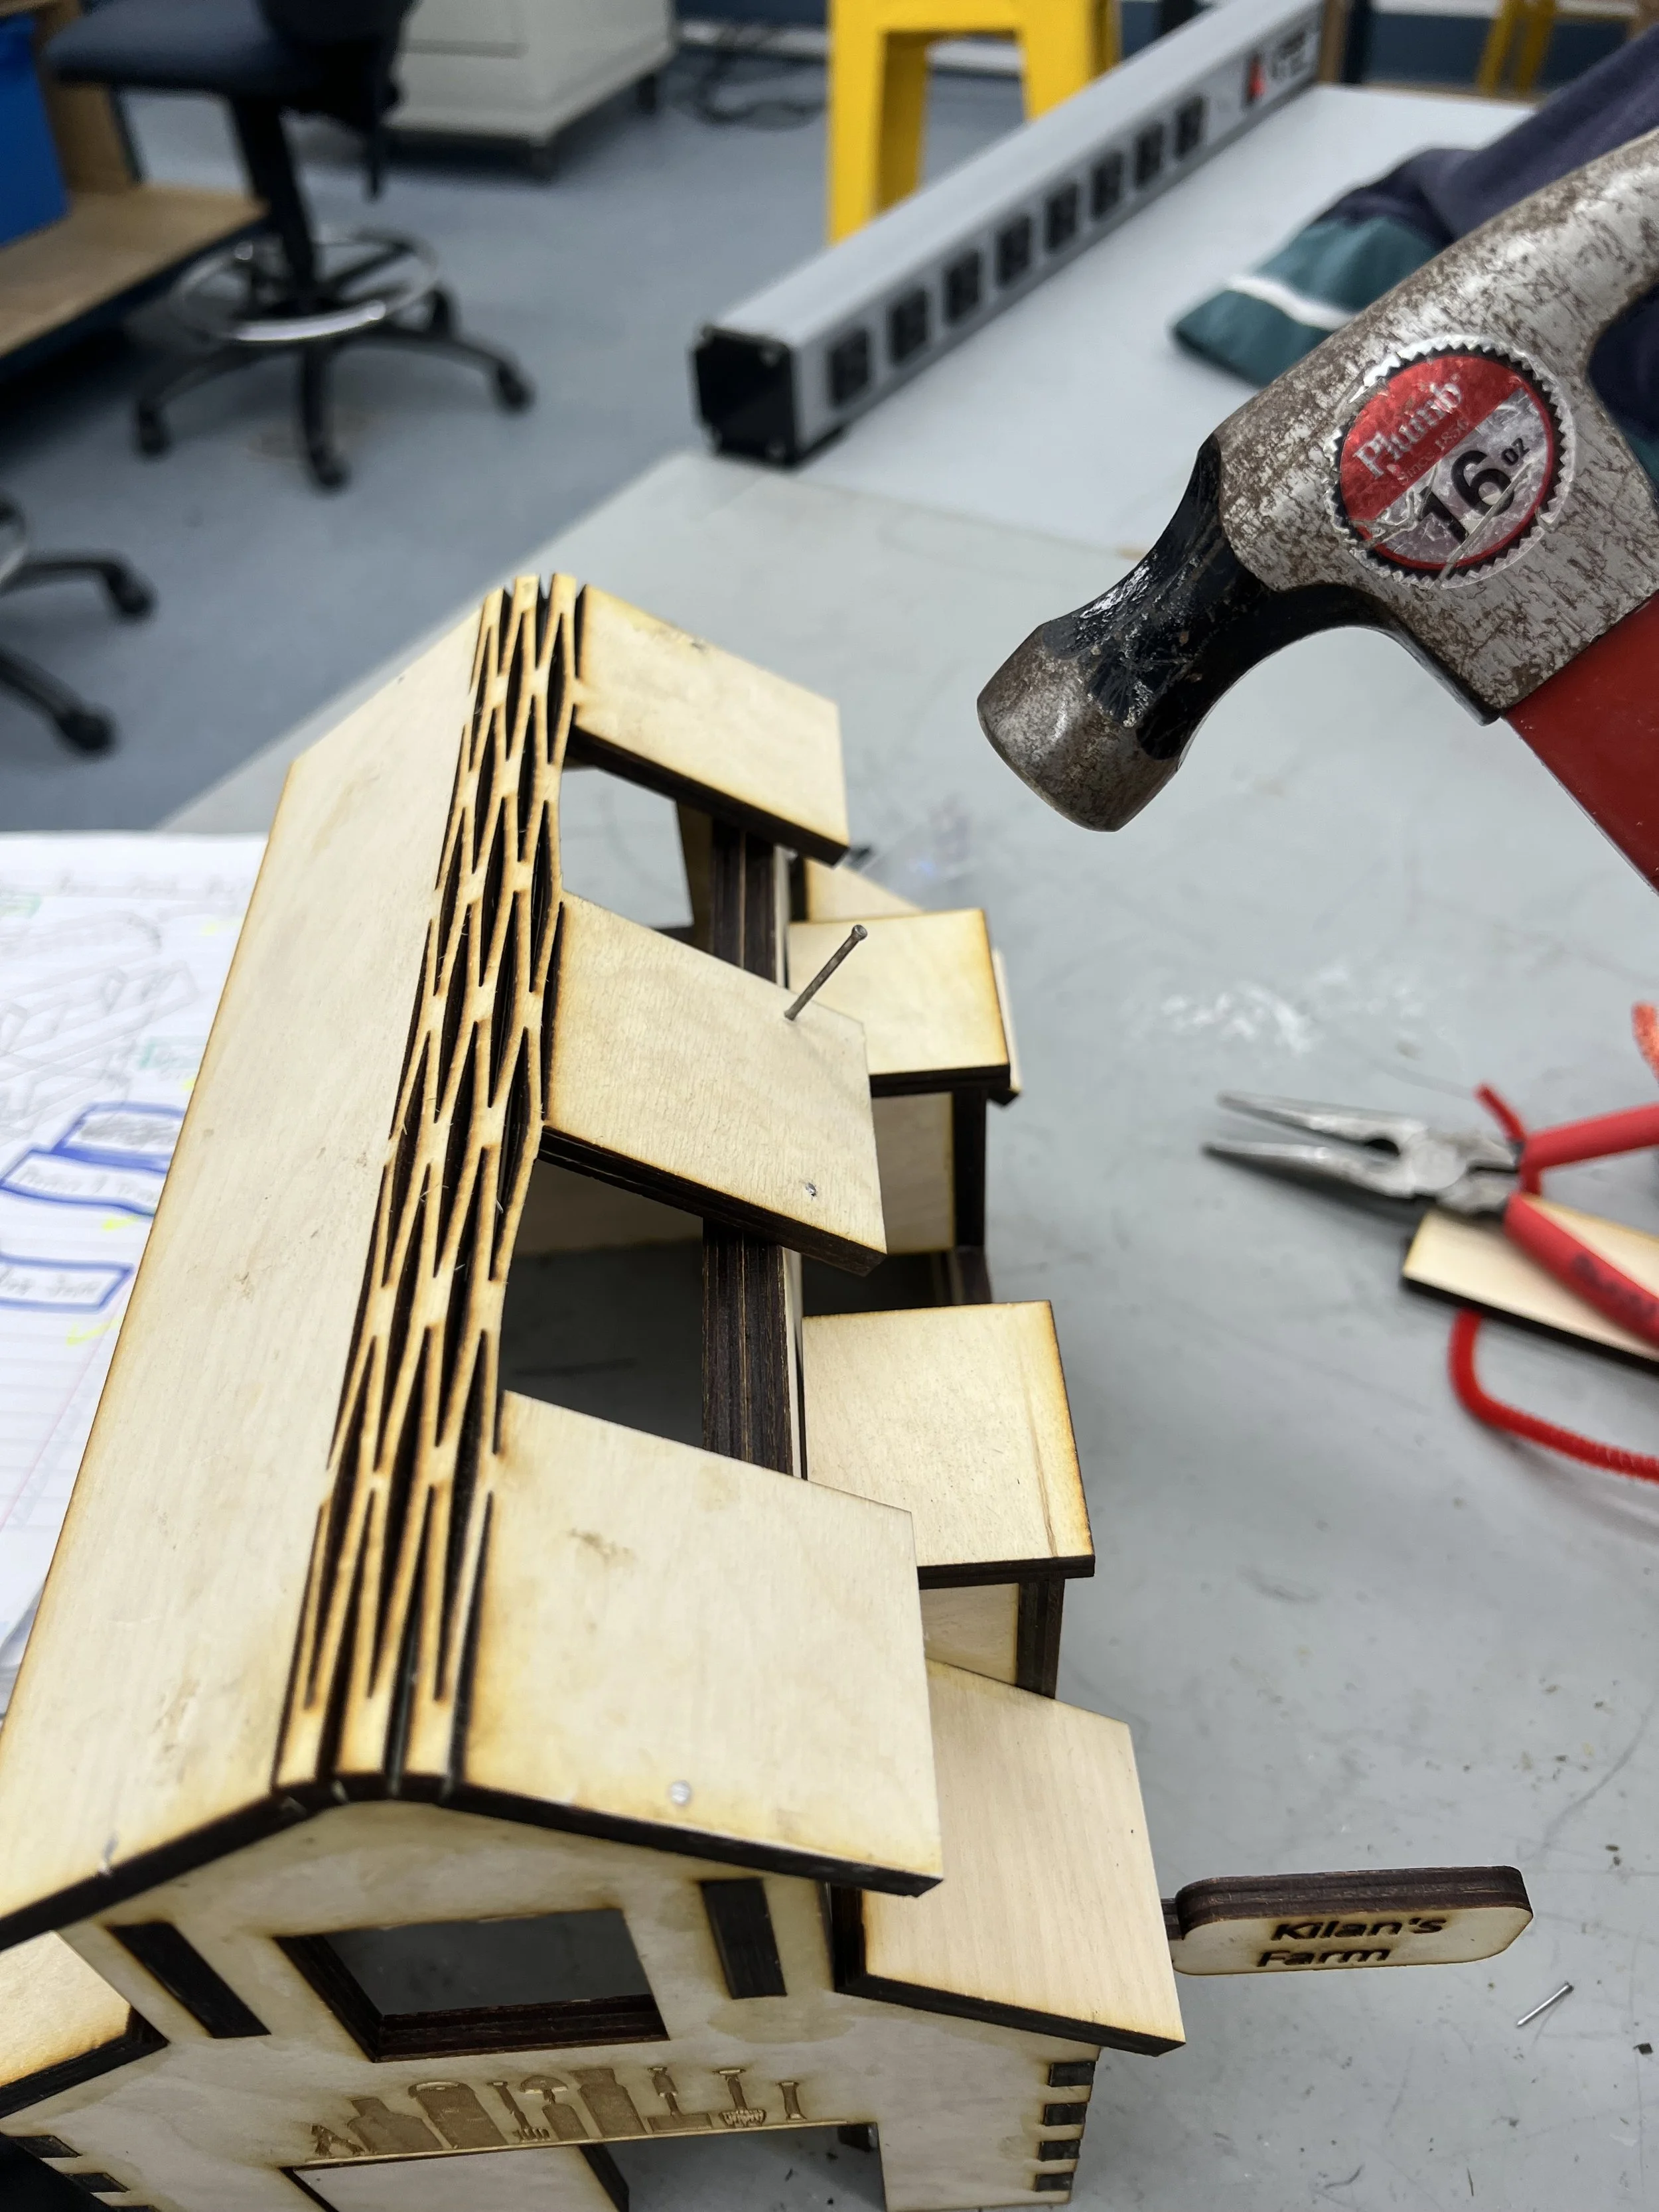
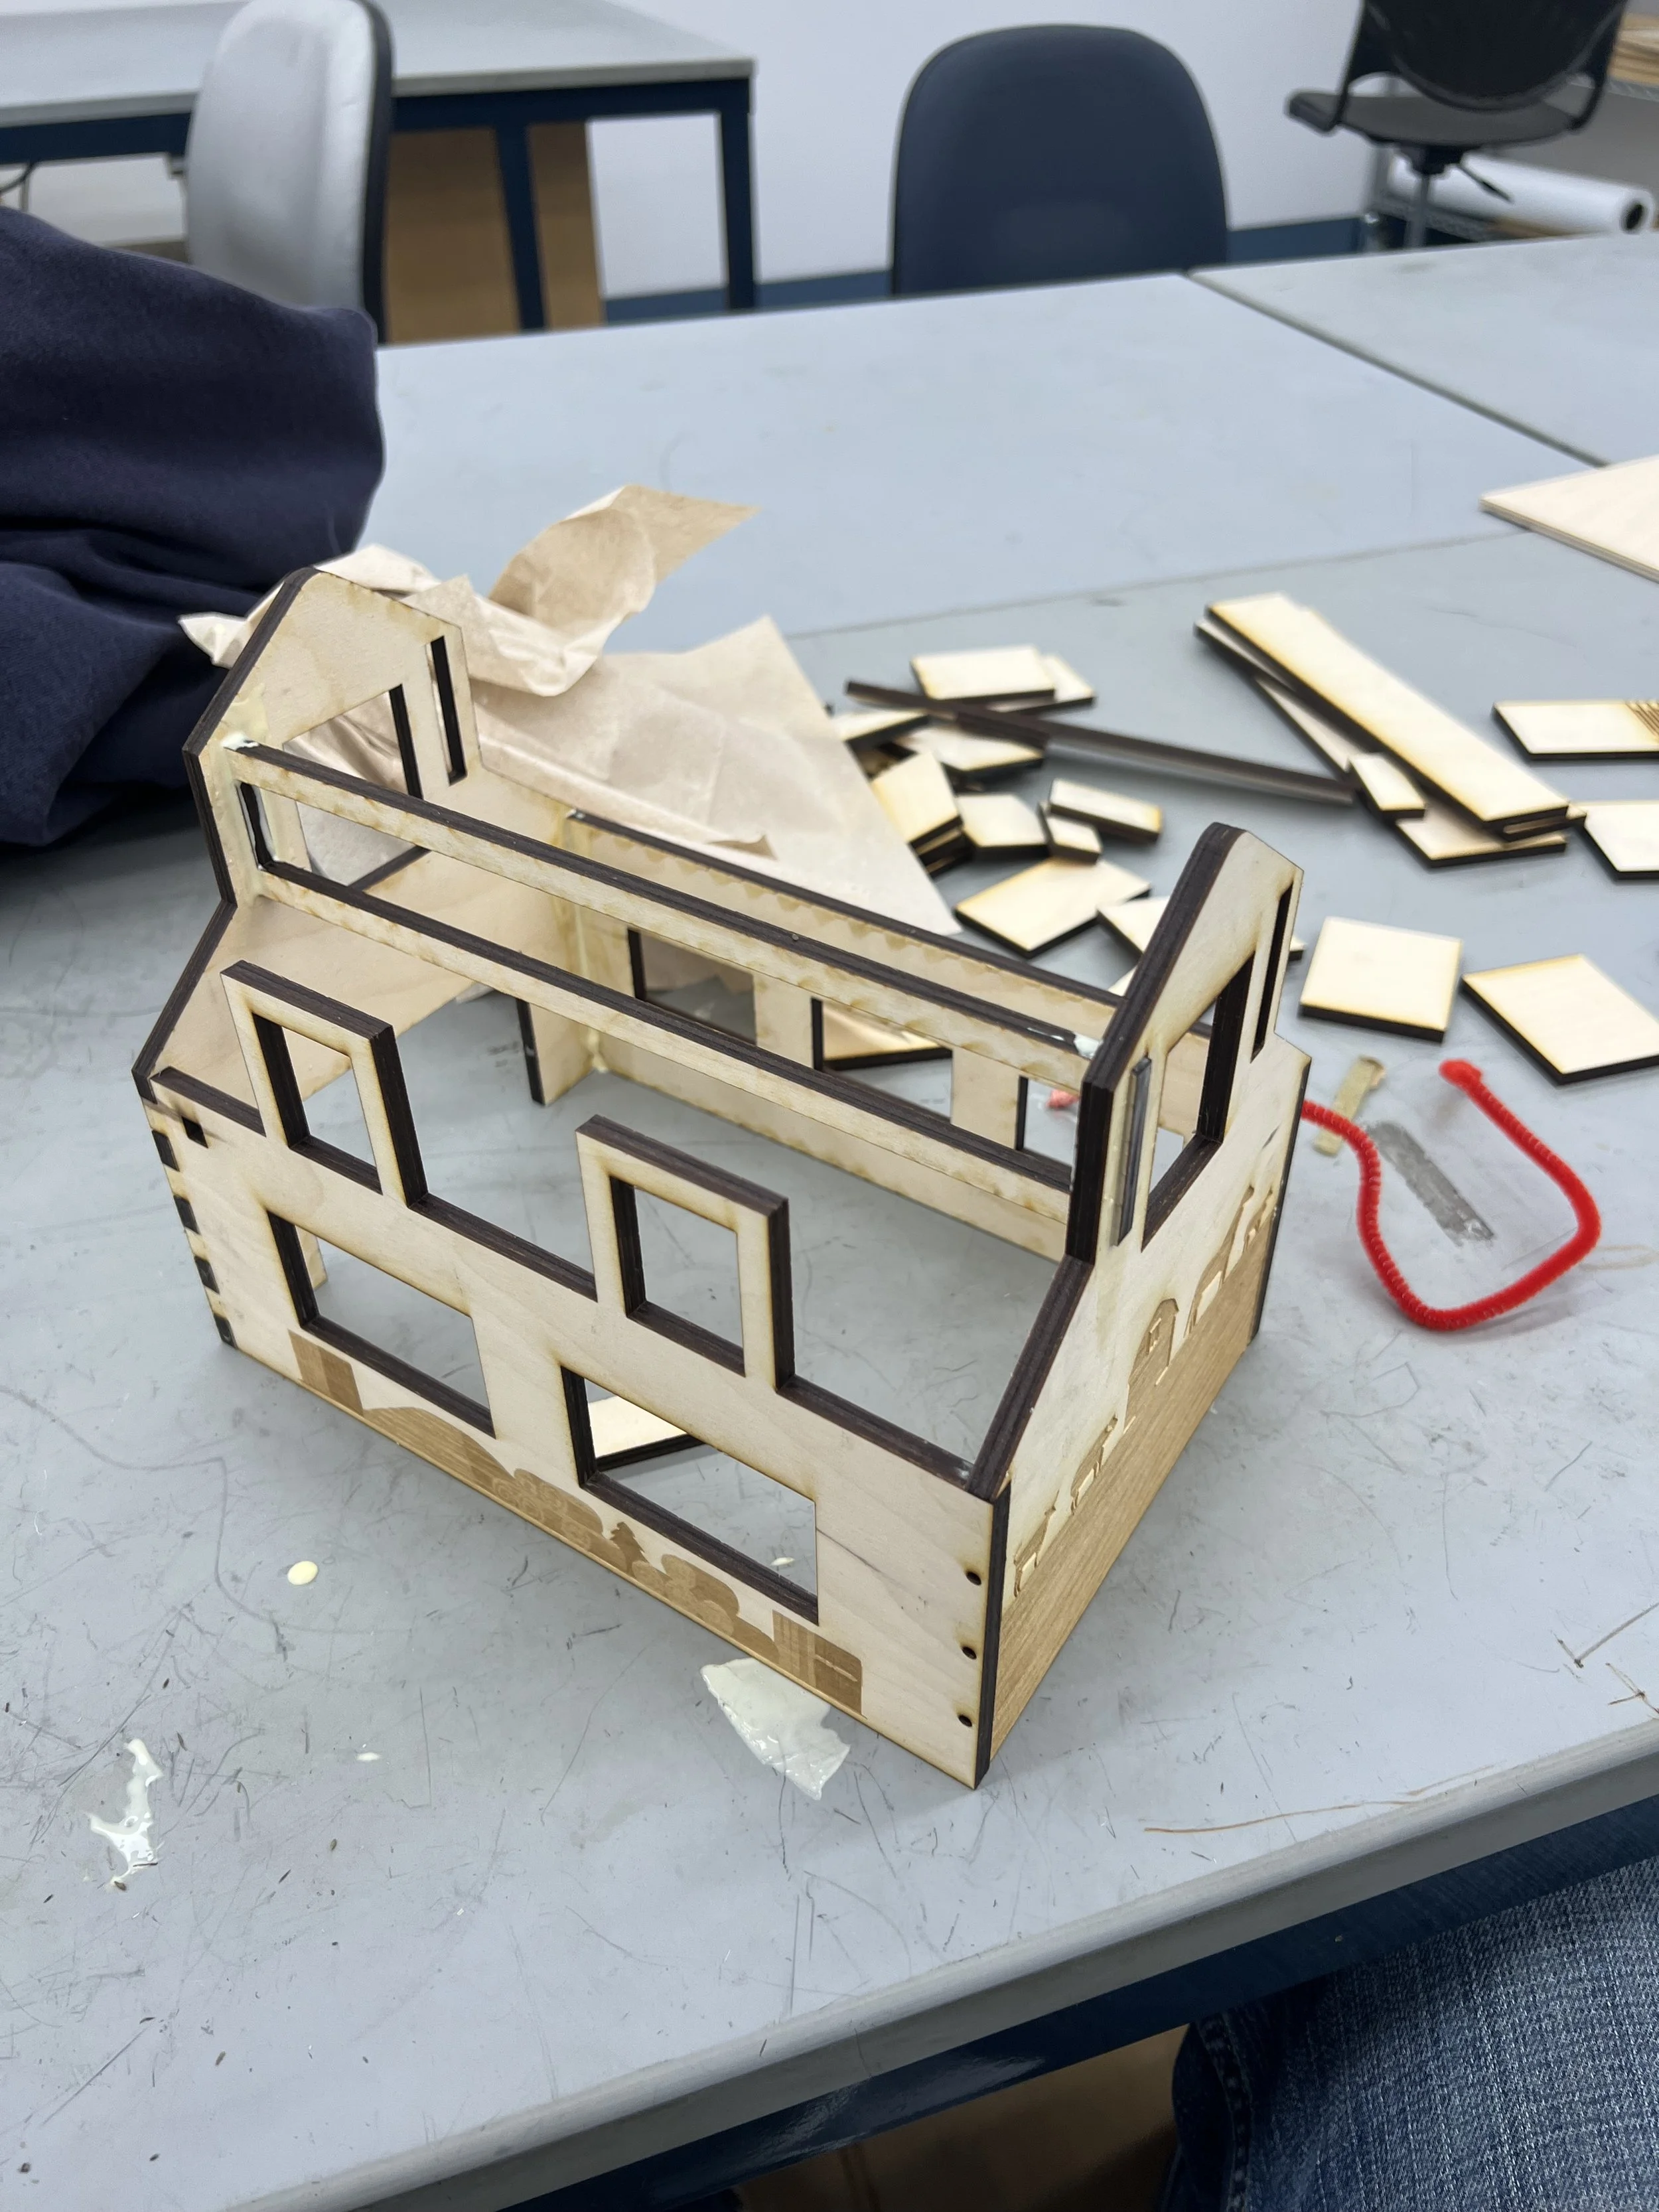
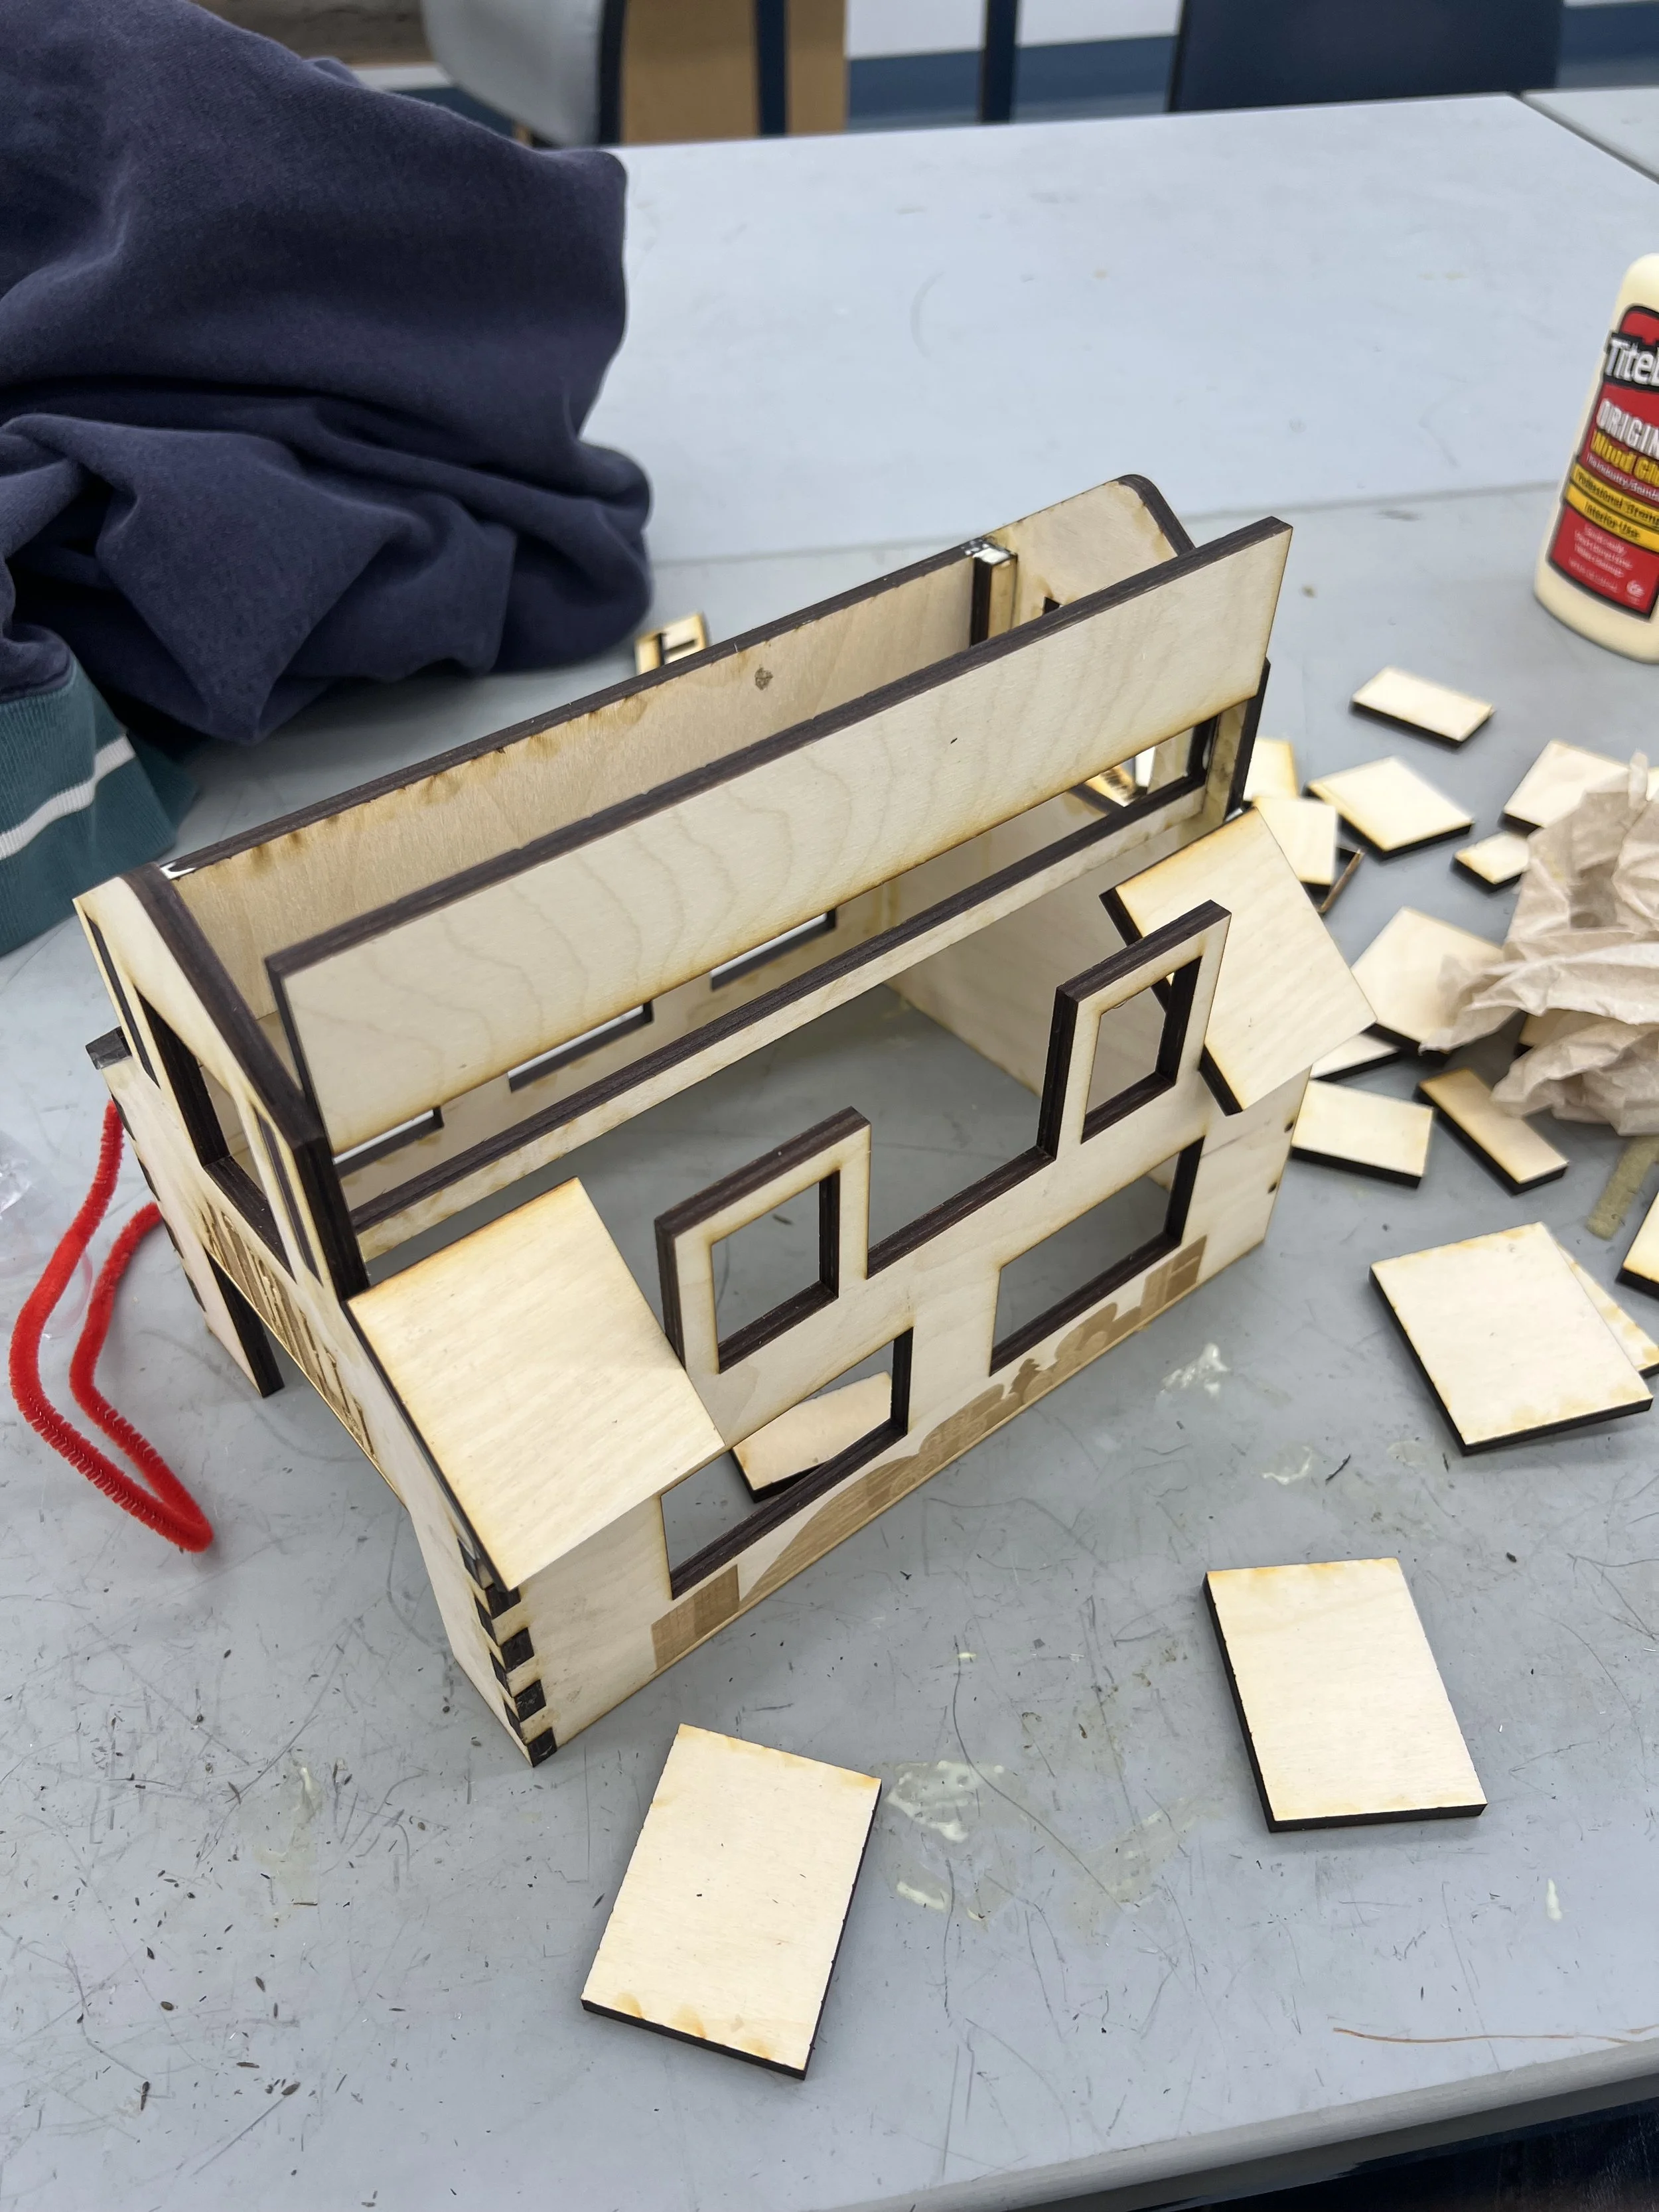
1. Roof Assembly Complexity
Challenge: The straight lattice joint roof required precise measurements, alignment, and creative connections while maintaining visual appeal.
Solution: Researched proper lattice sketch distances and measurements and found the ideal ones for my material and used nails to secure roof as it held down much better than glue and did not distract from the visual appeal as much as other methods. Additionally, to help the curve form, I sprayed water on the joint and clamped it down to the body overnight.
3. Joint Selection
Challenge: Needed to incorporate multiple joint types while ensuring box stability and ease of assembly.
Solution: Strategically used different joints based on requirements and locations as well as adding components specifically to add joints such as the mortise & tenon sign.

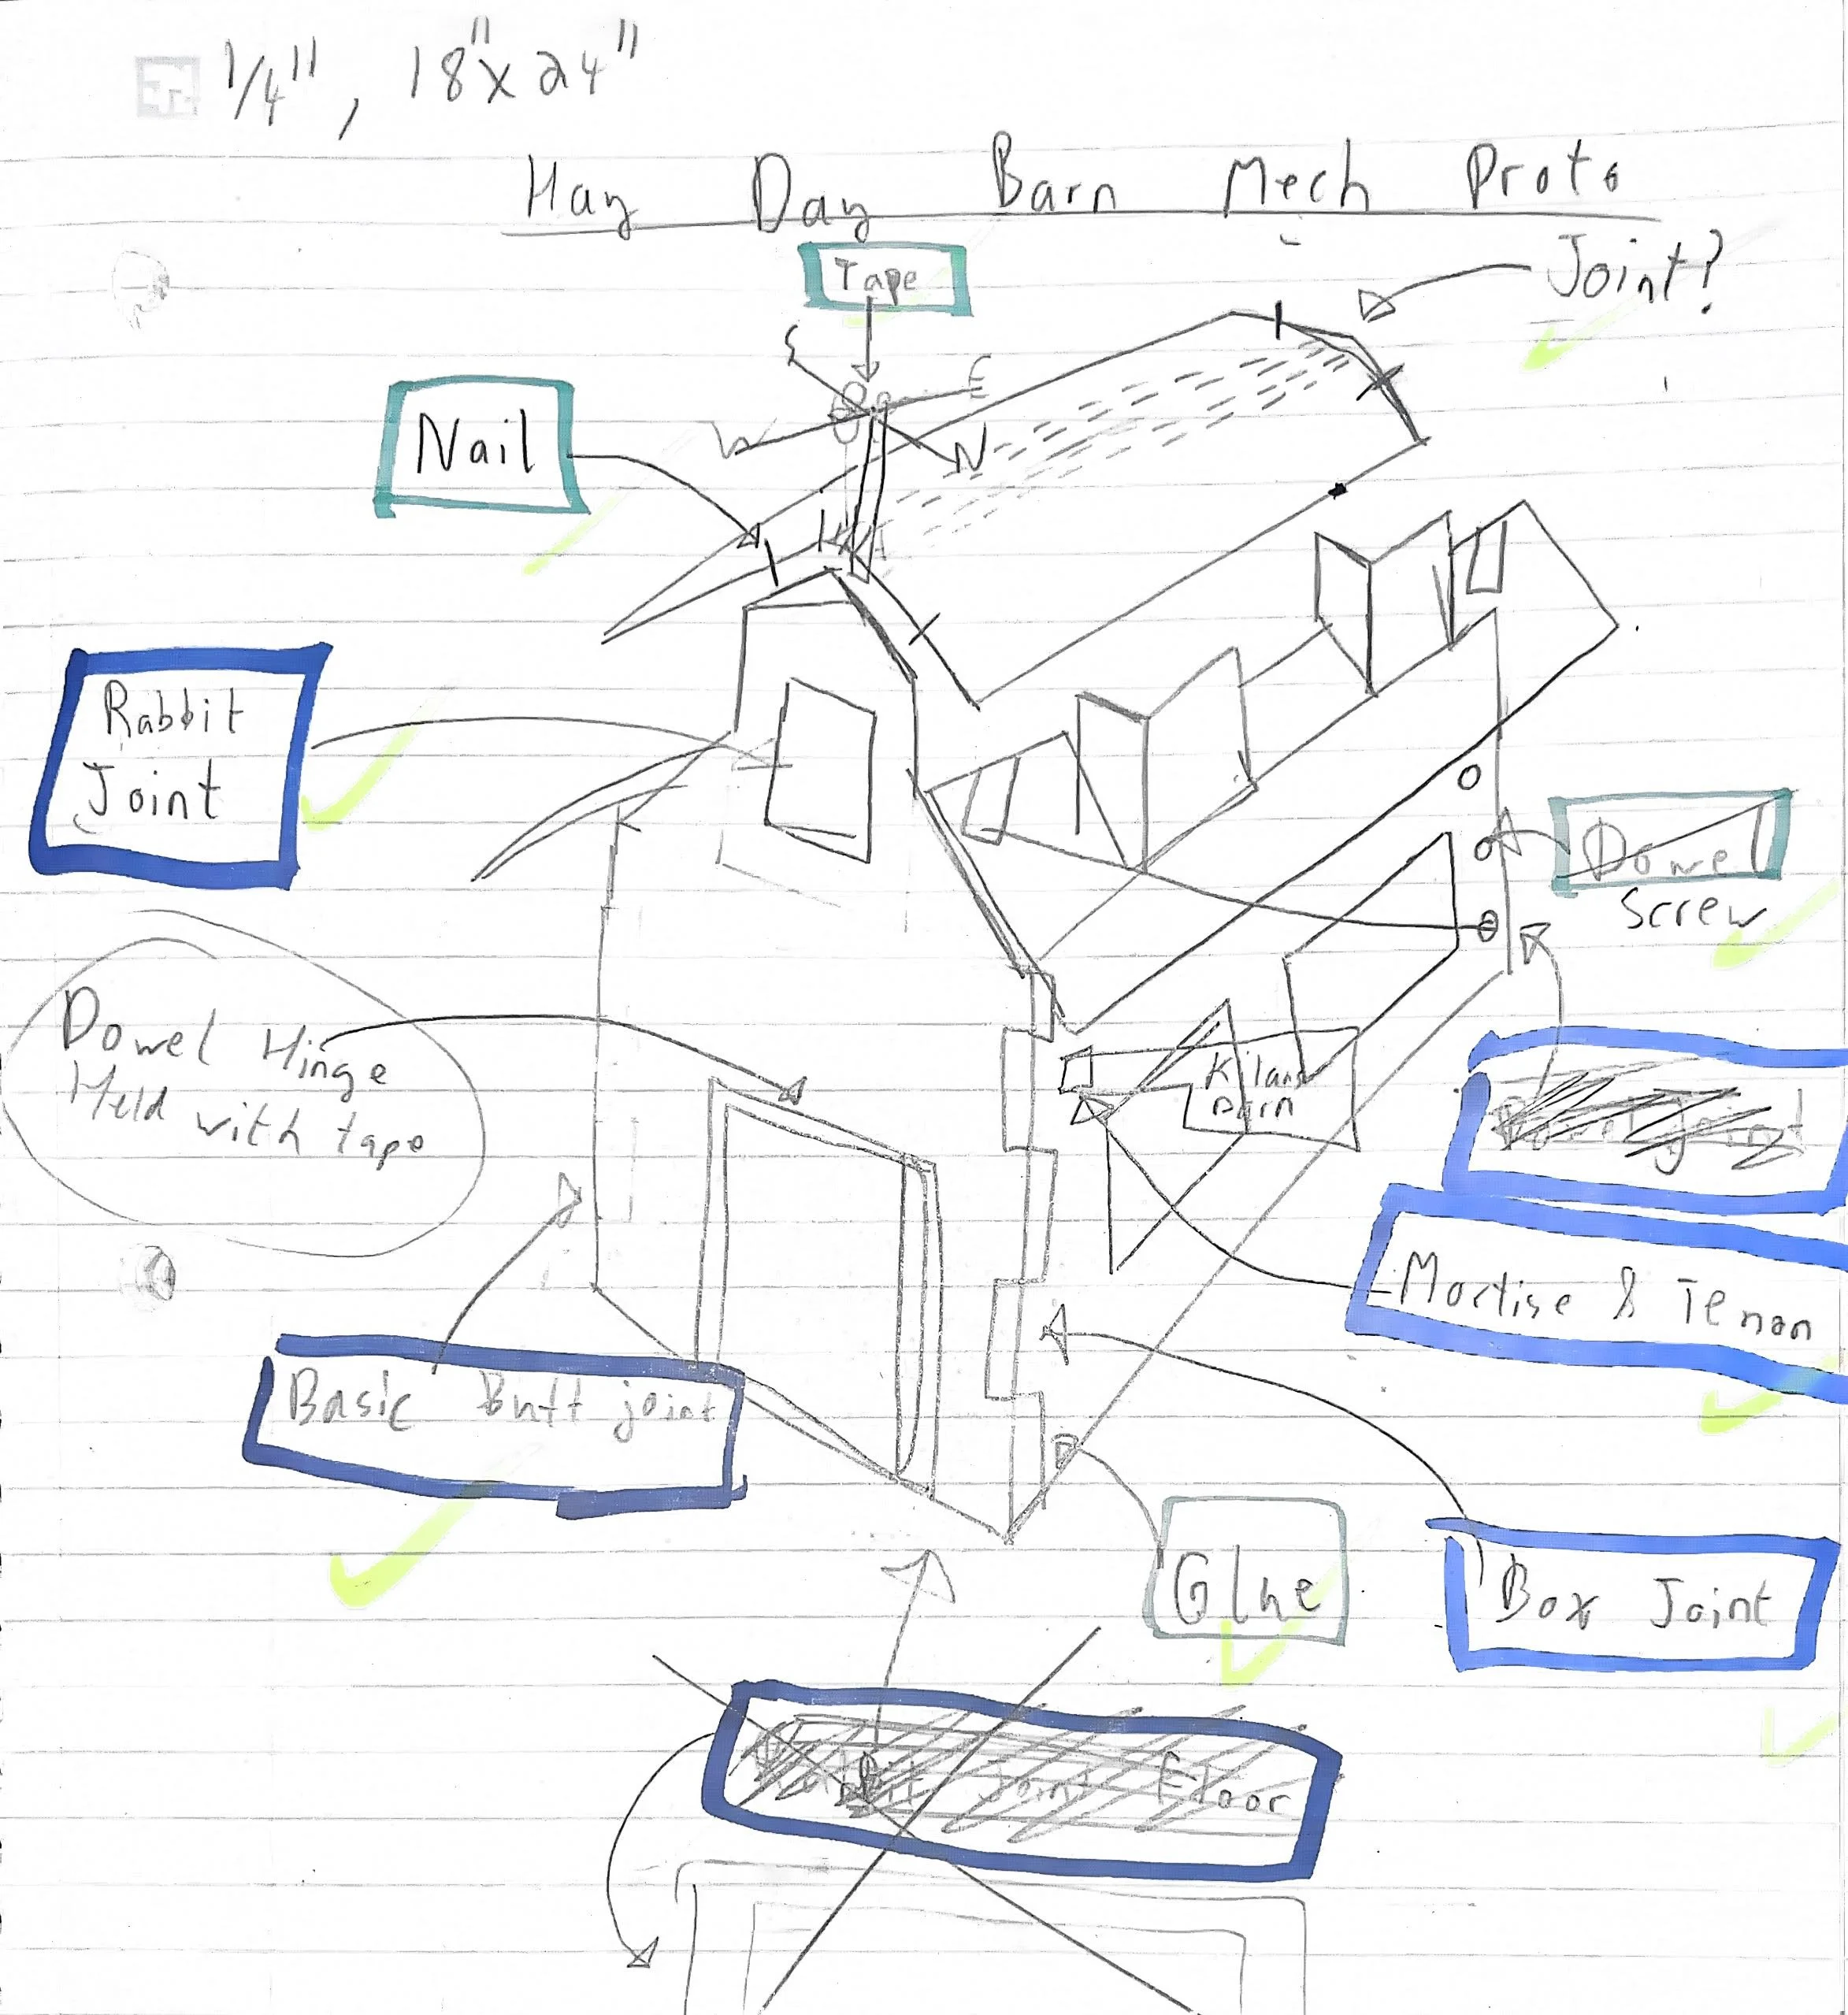
Joint and Fasteners Sketch
After careful analysis of the initial sketch, I redrew the barn and, this time, included all the fasteners and joints I wanted to include and their locations.
The list came down to the following:
Joints:
Box Joint (Front Corners of Barn)
Half Lap Joint (Window Frame)
Basic Butt Joint (Back Side of Barn)
Mortise & Tenon Joint (Barn Name Sign)
Straight Lattice Joint (Curved Barn Roof)
Hinge (Door Opening)
Fasteners:
Wood Glue (Everywhere)
Screws (Back Left Barn Wall & Hinges on Door)
Nails (Roof Attachment)
Tape and Rivet (Wind Vane Attachment)
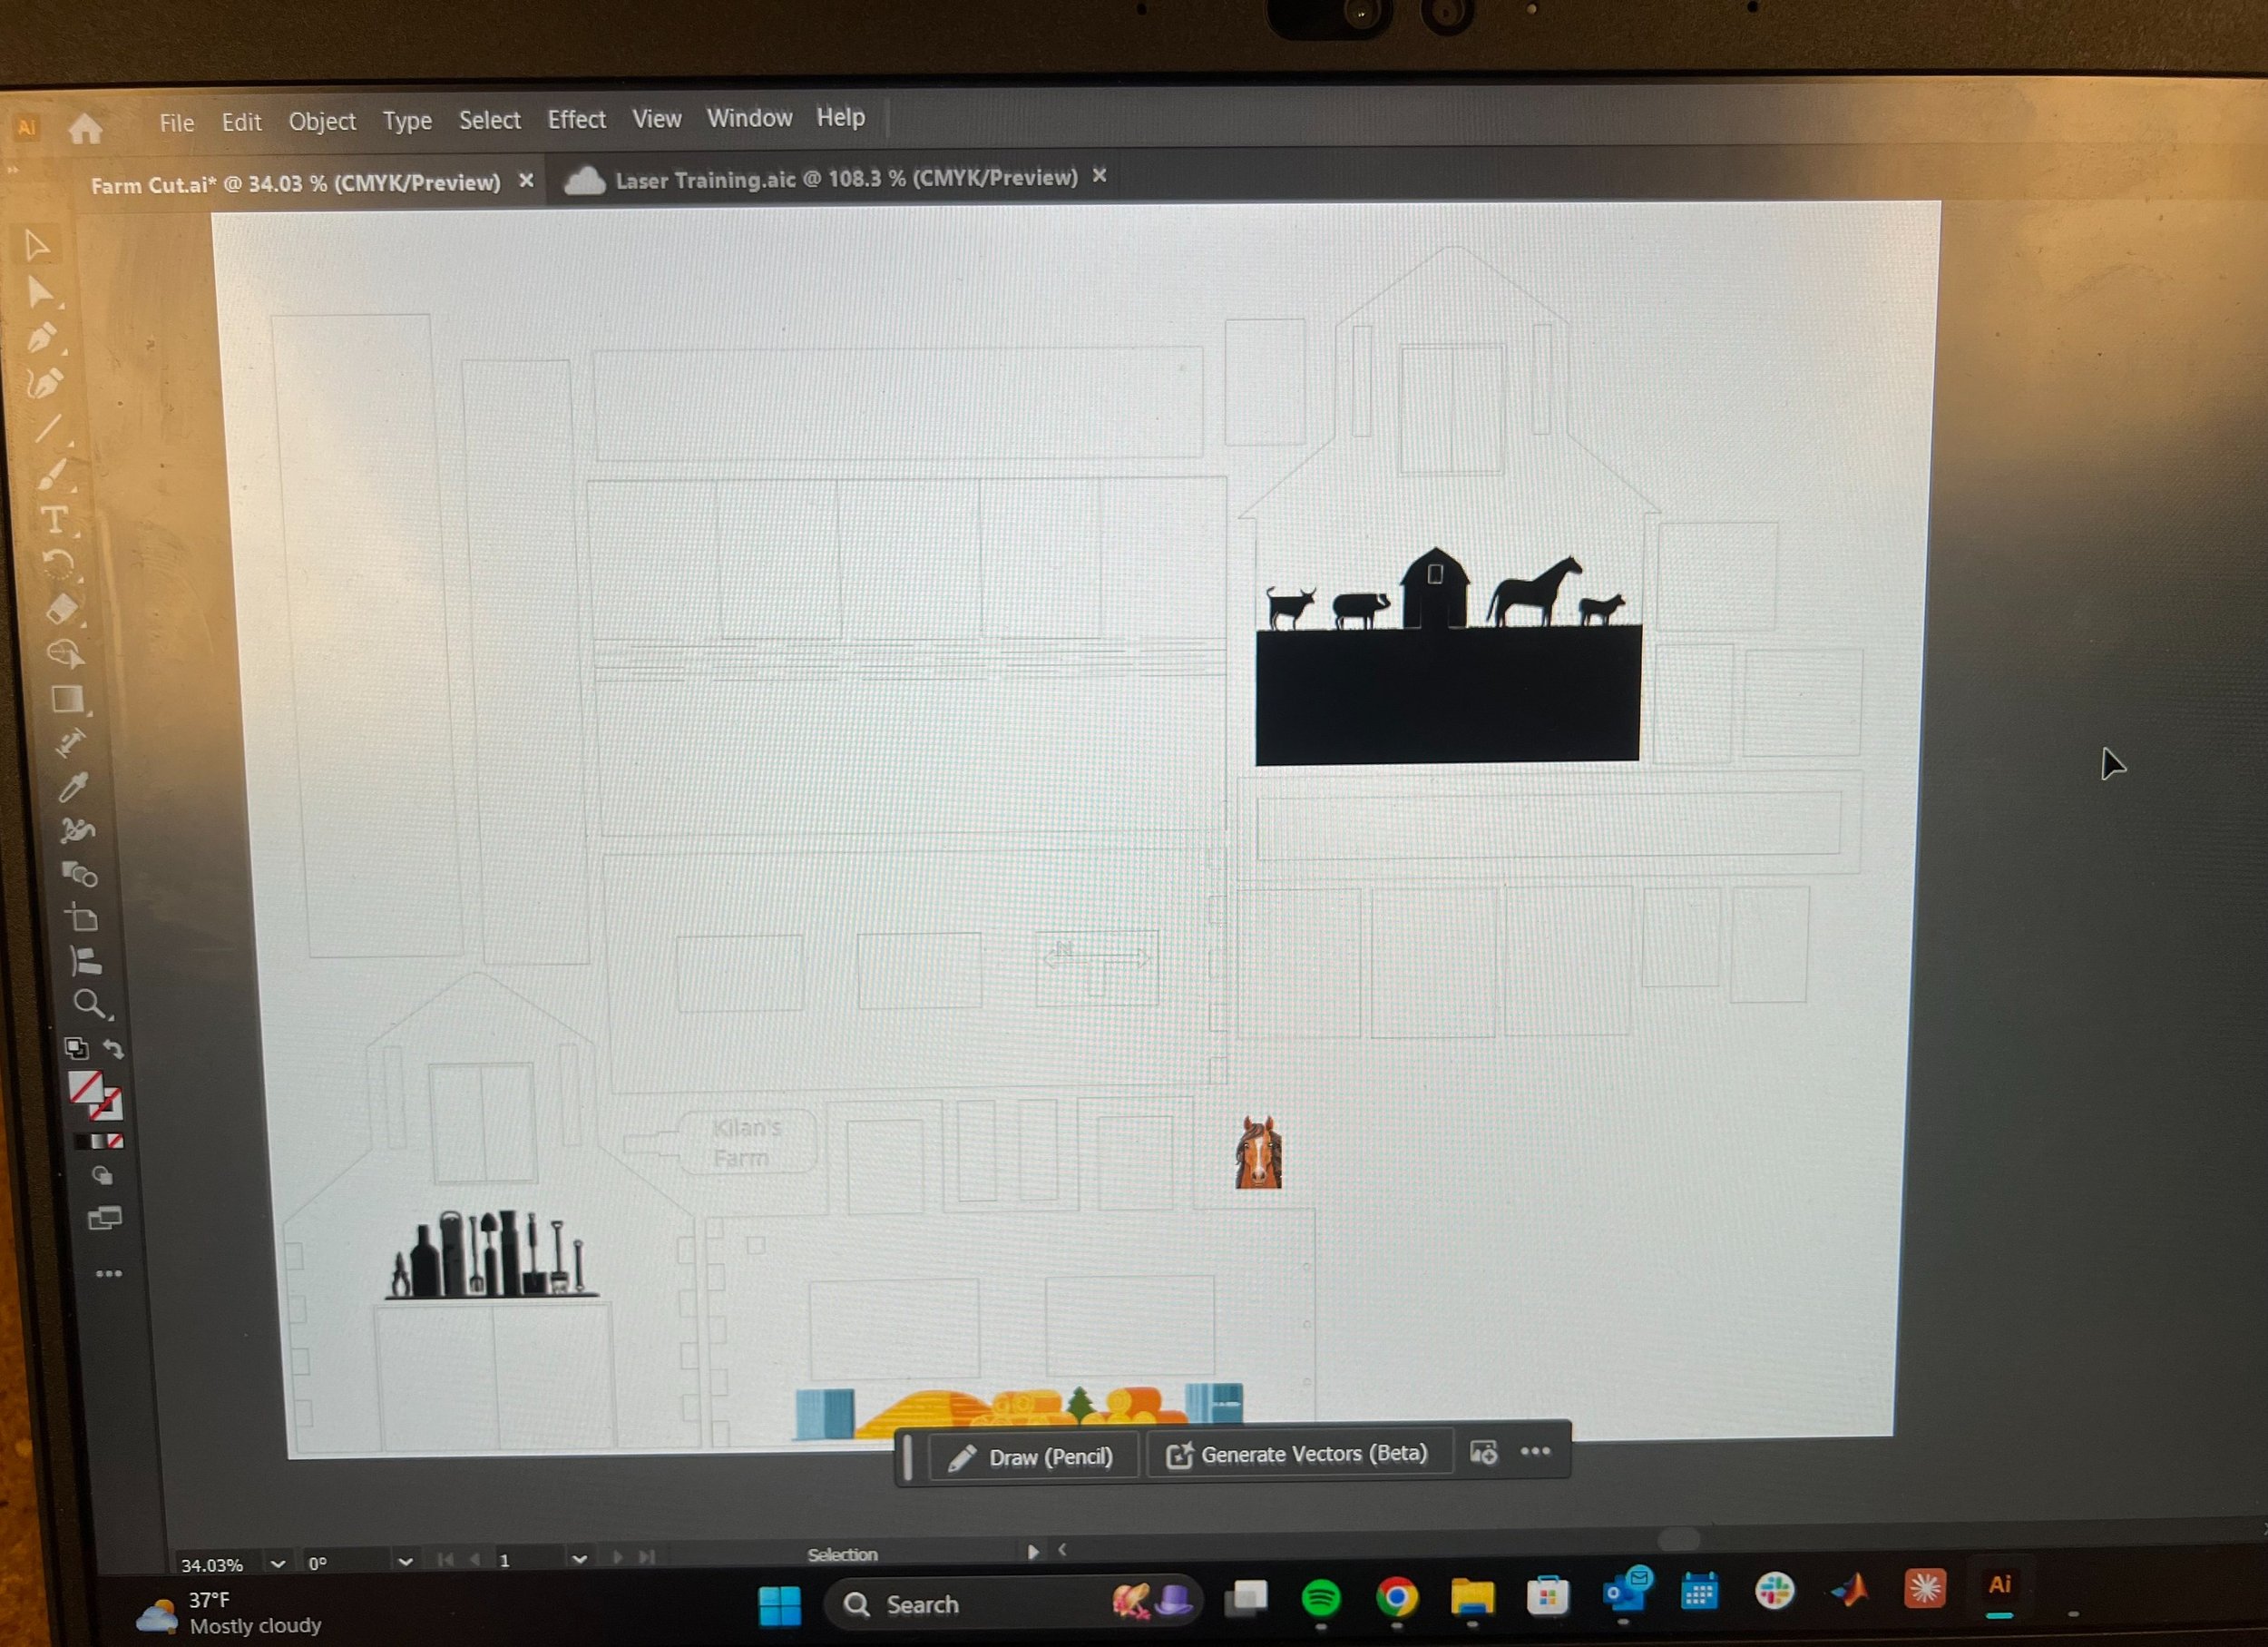
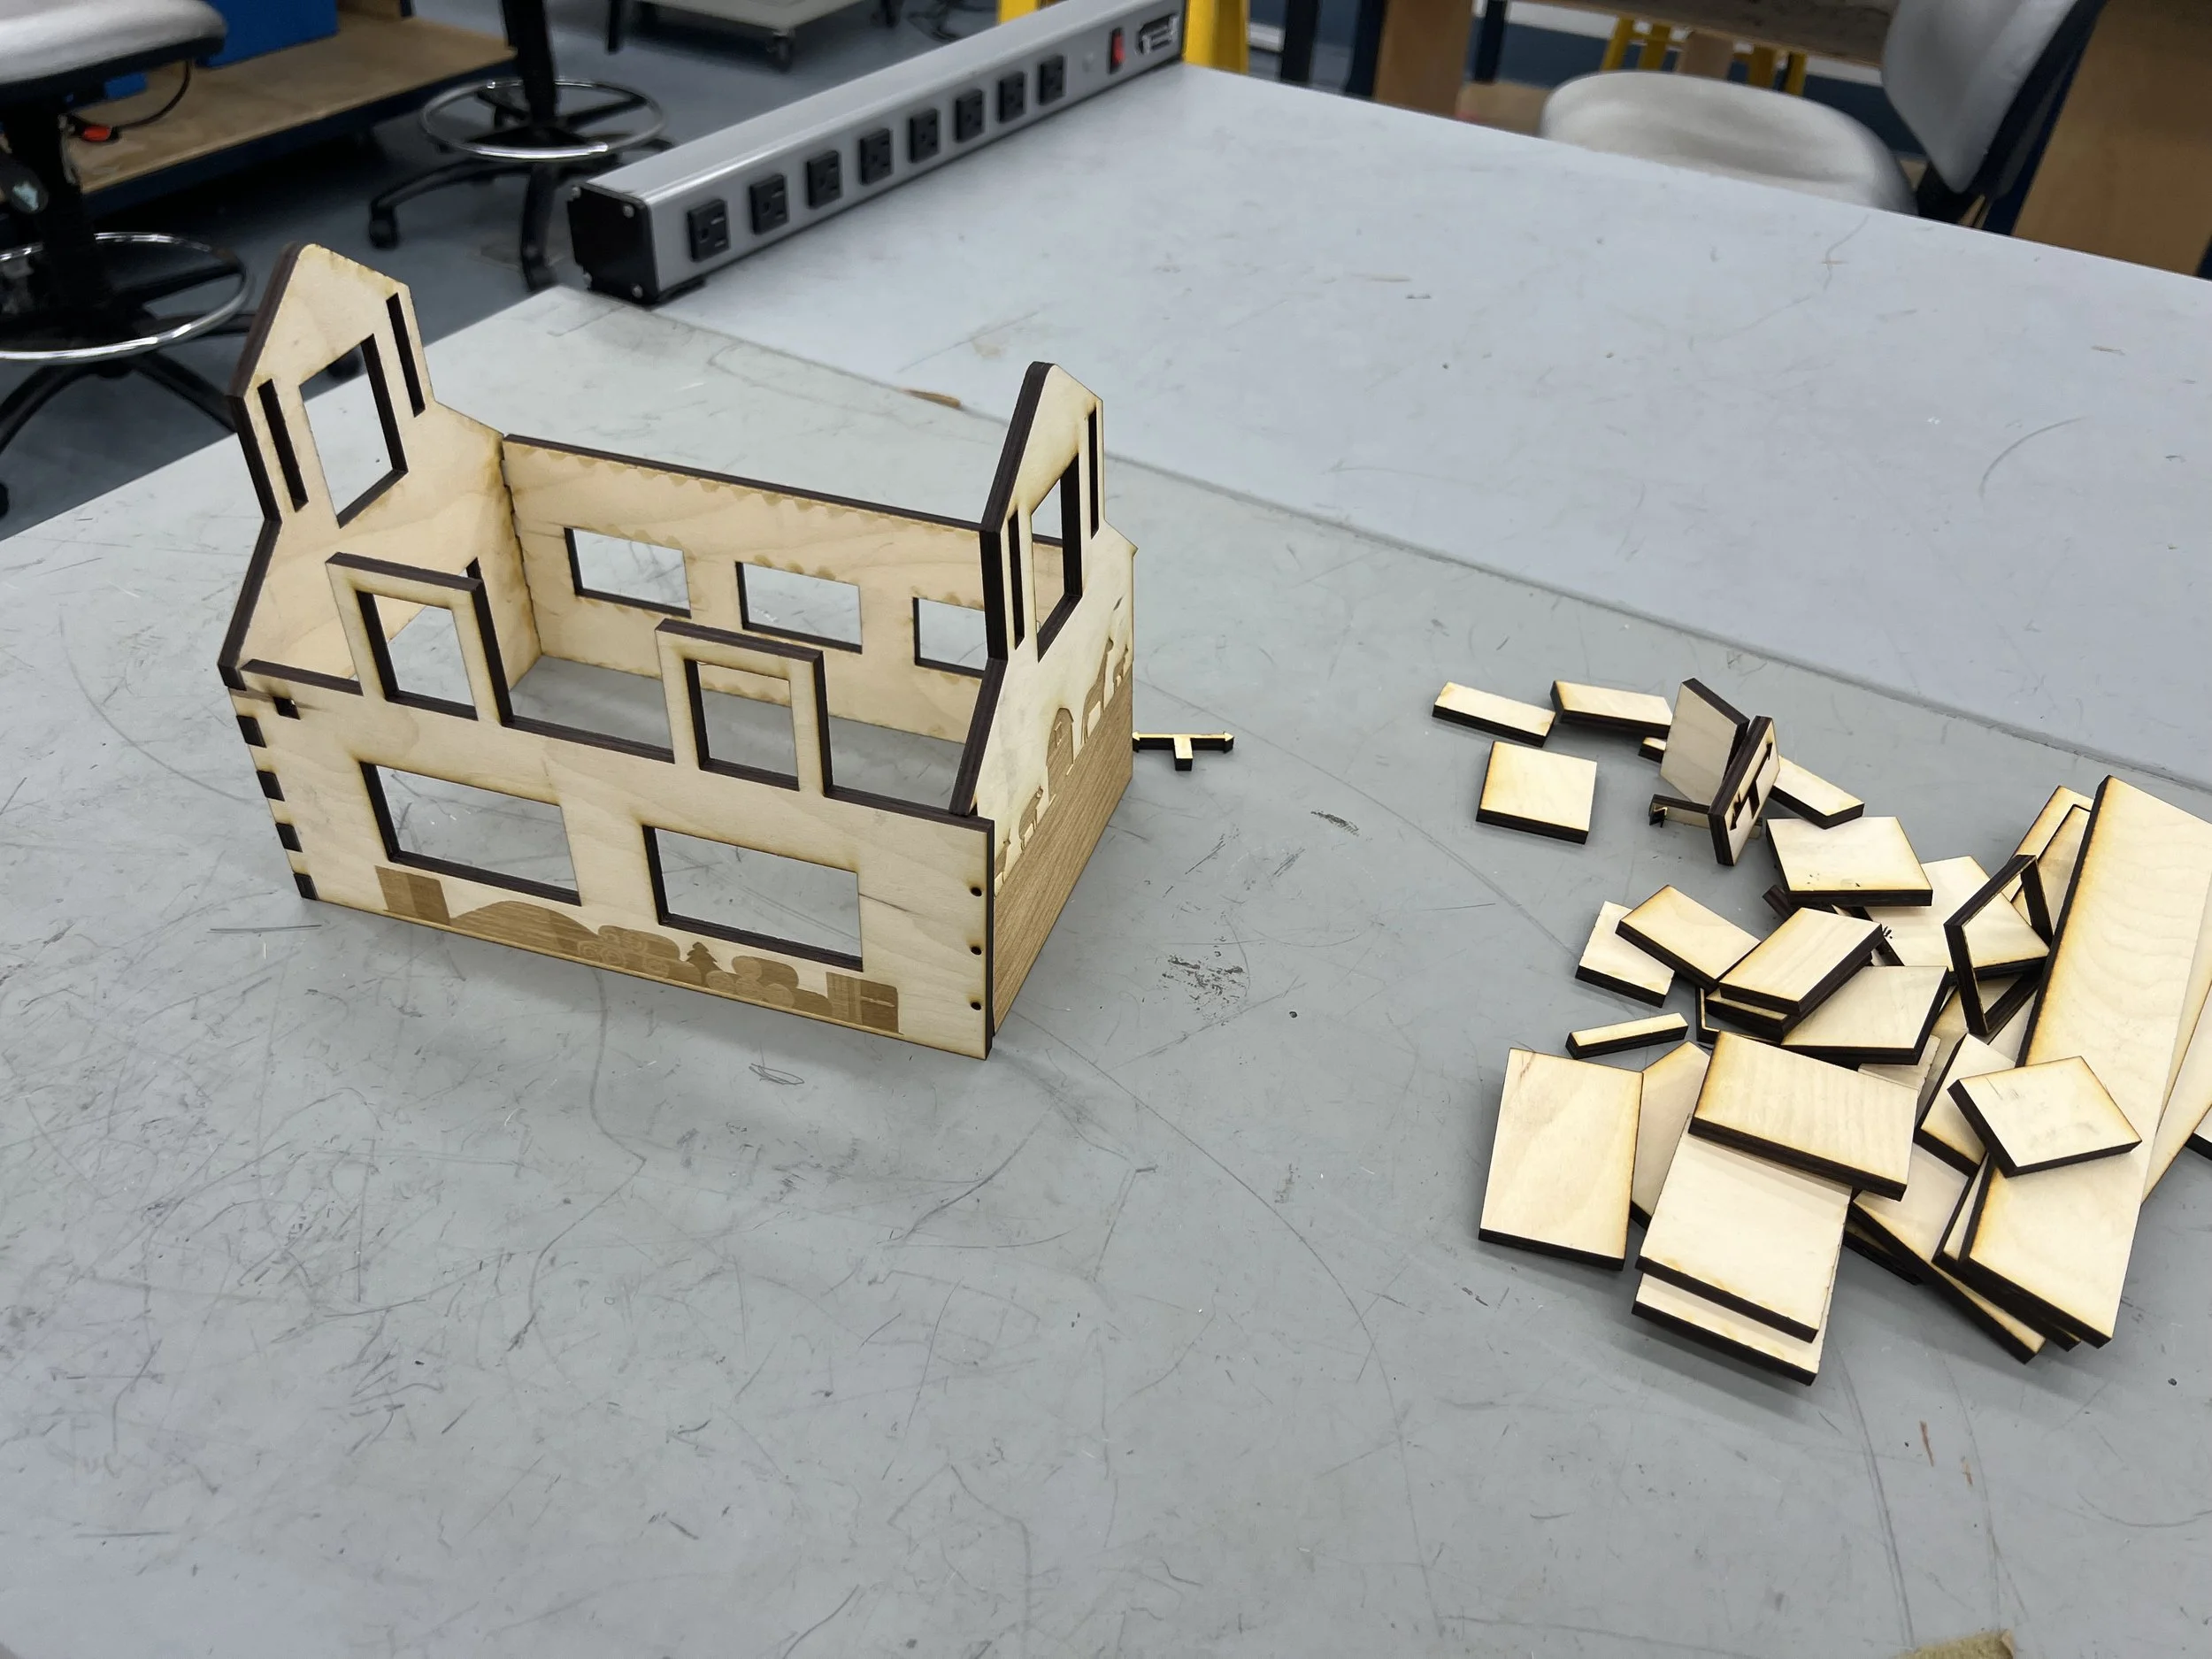
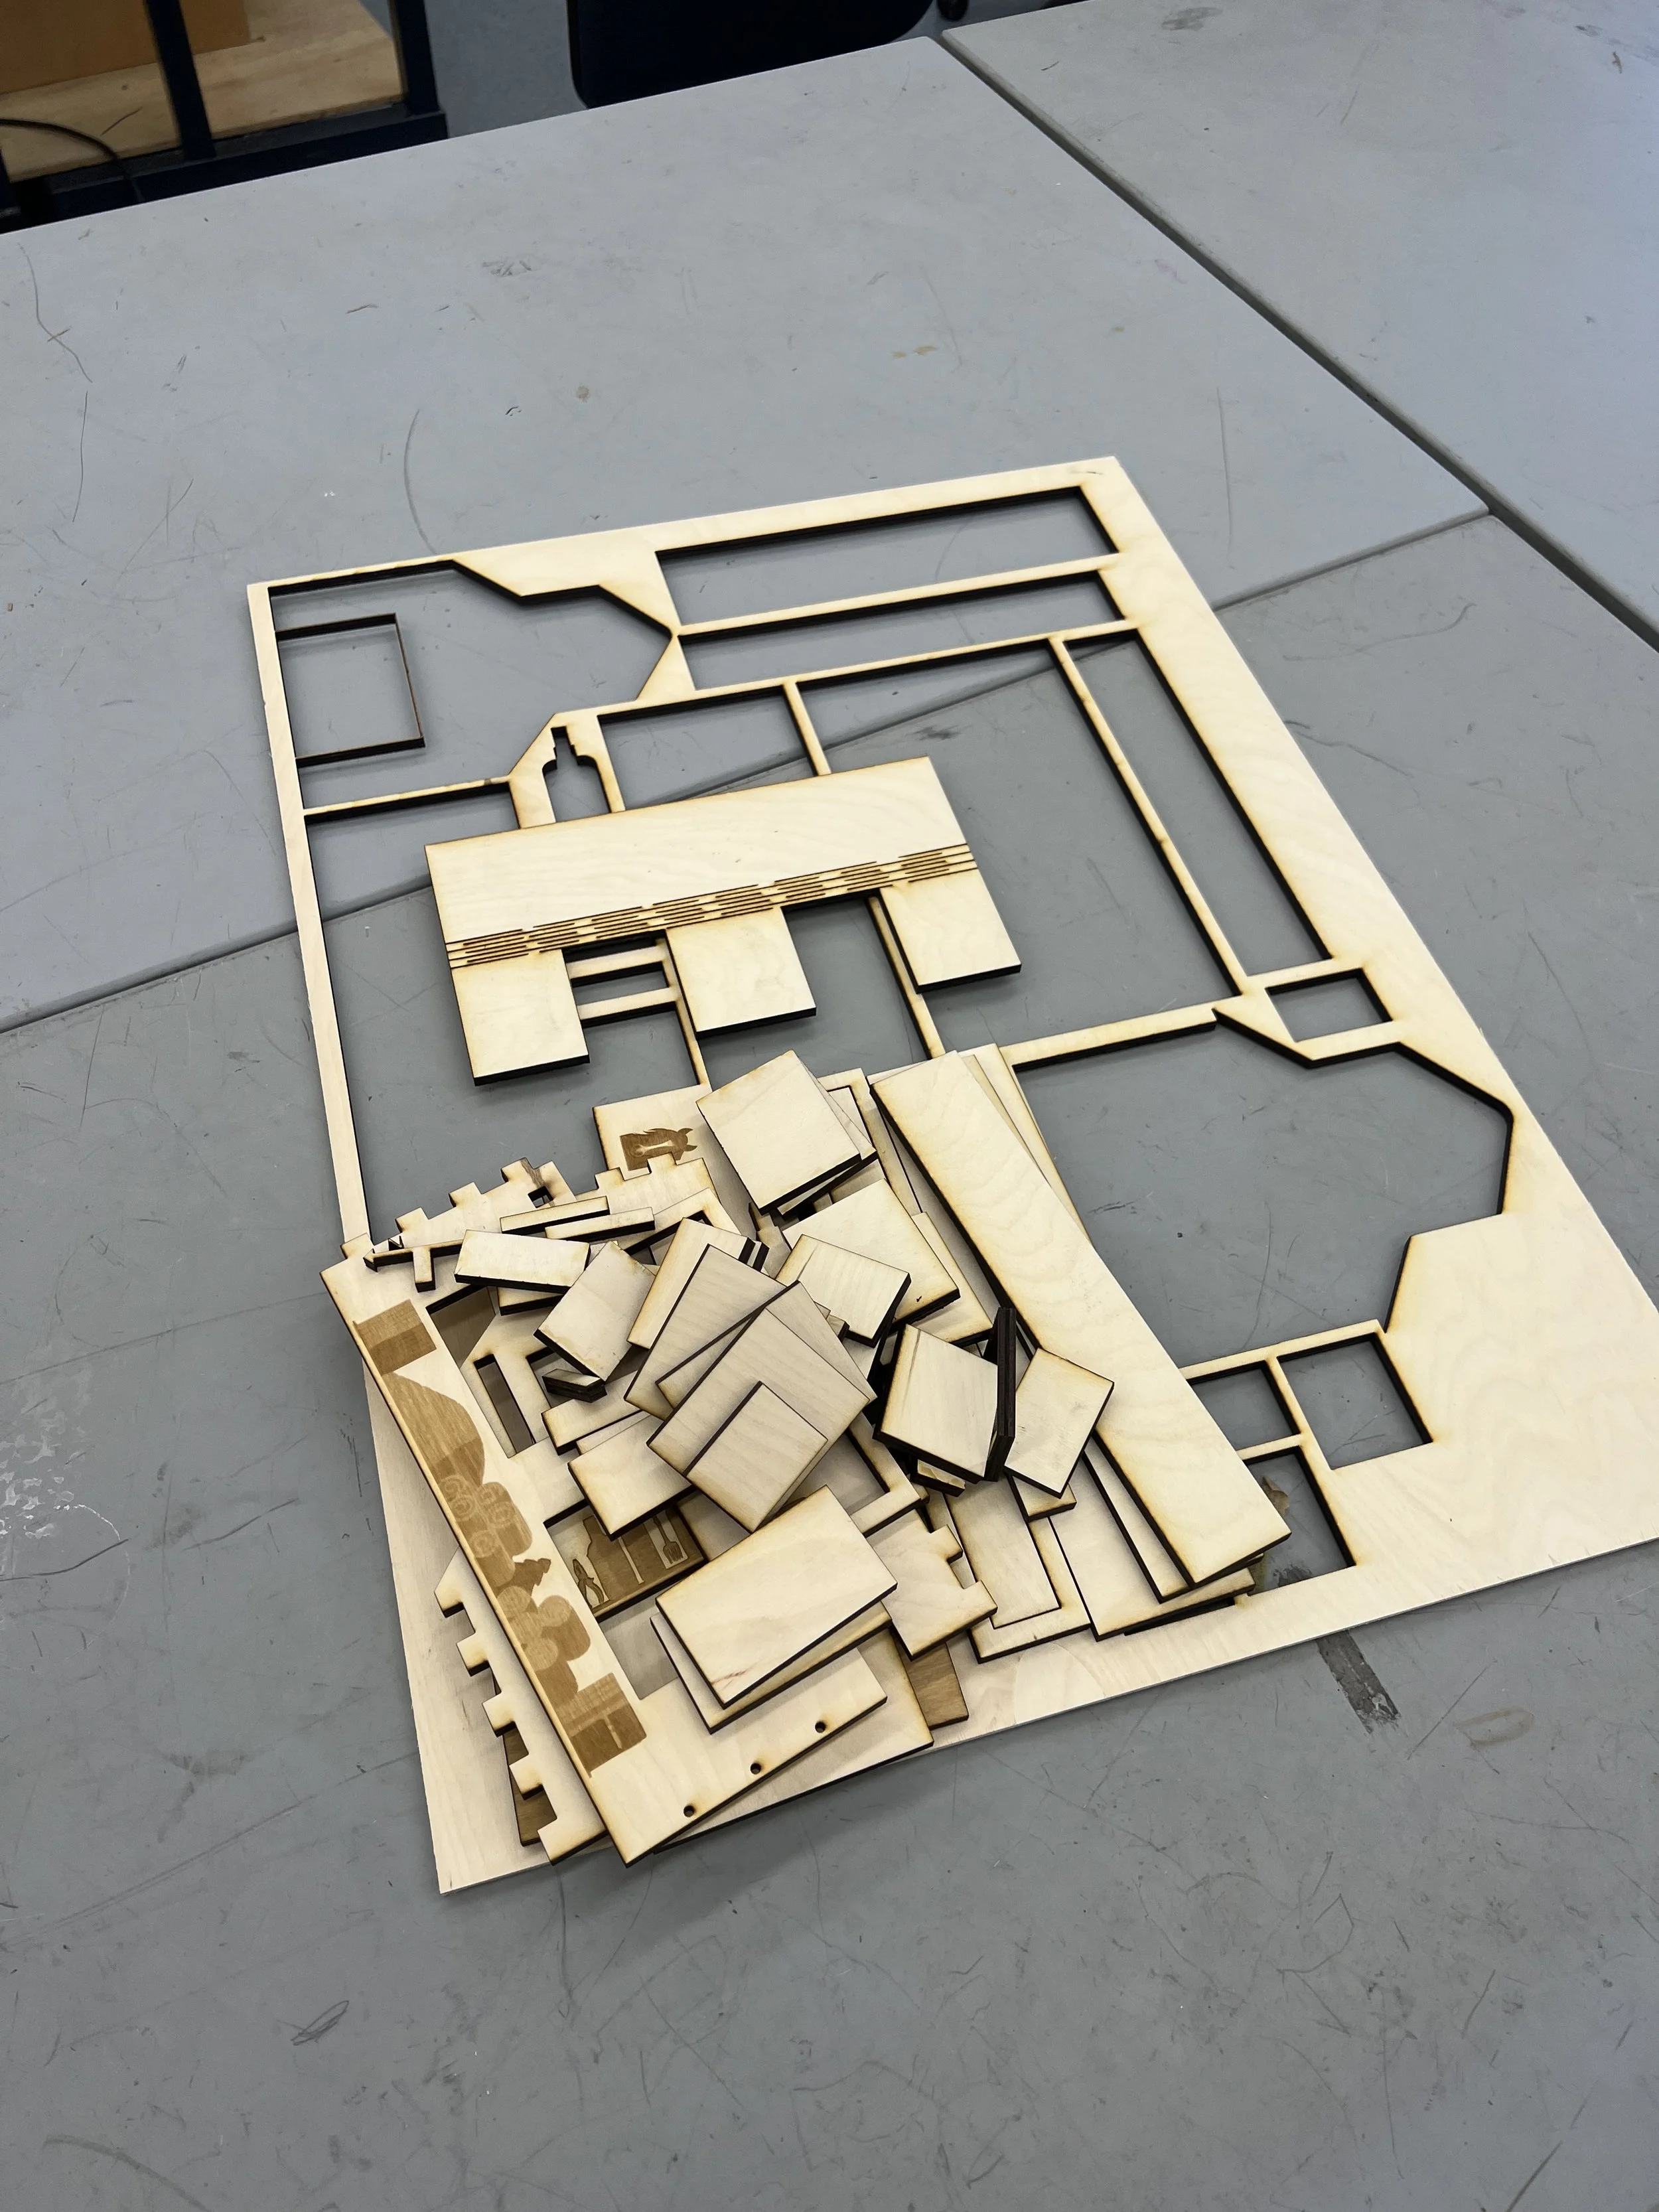
Laser Cutting Layout
The laser-cutting layout included:
Nested sketches in layout for efficient material use
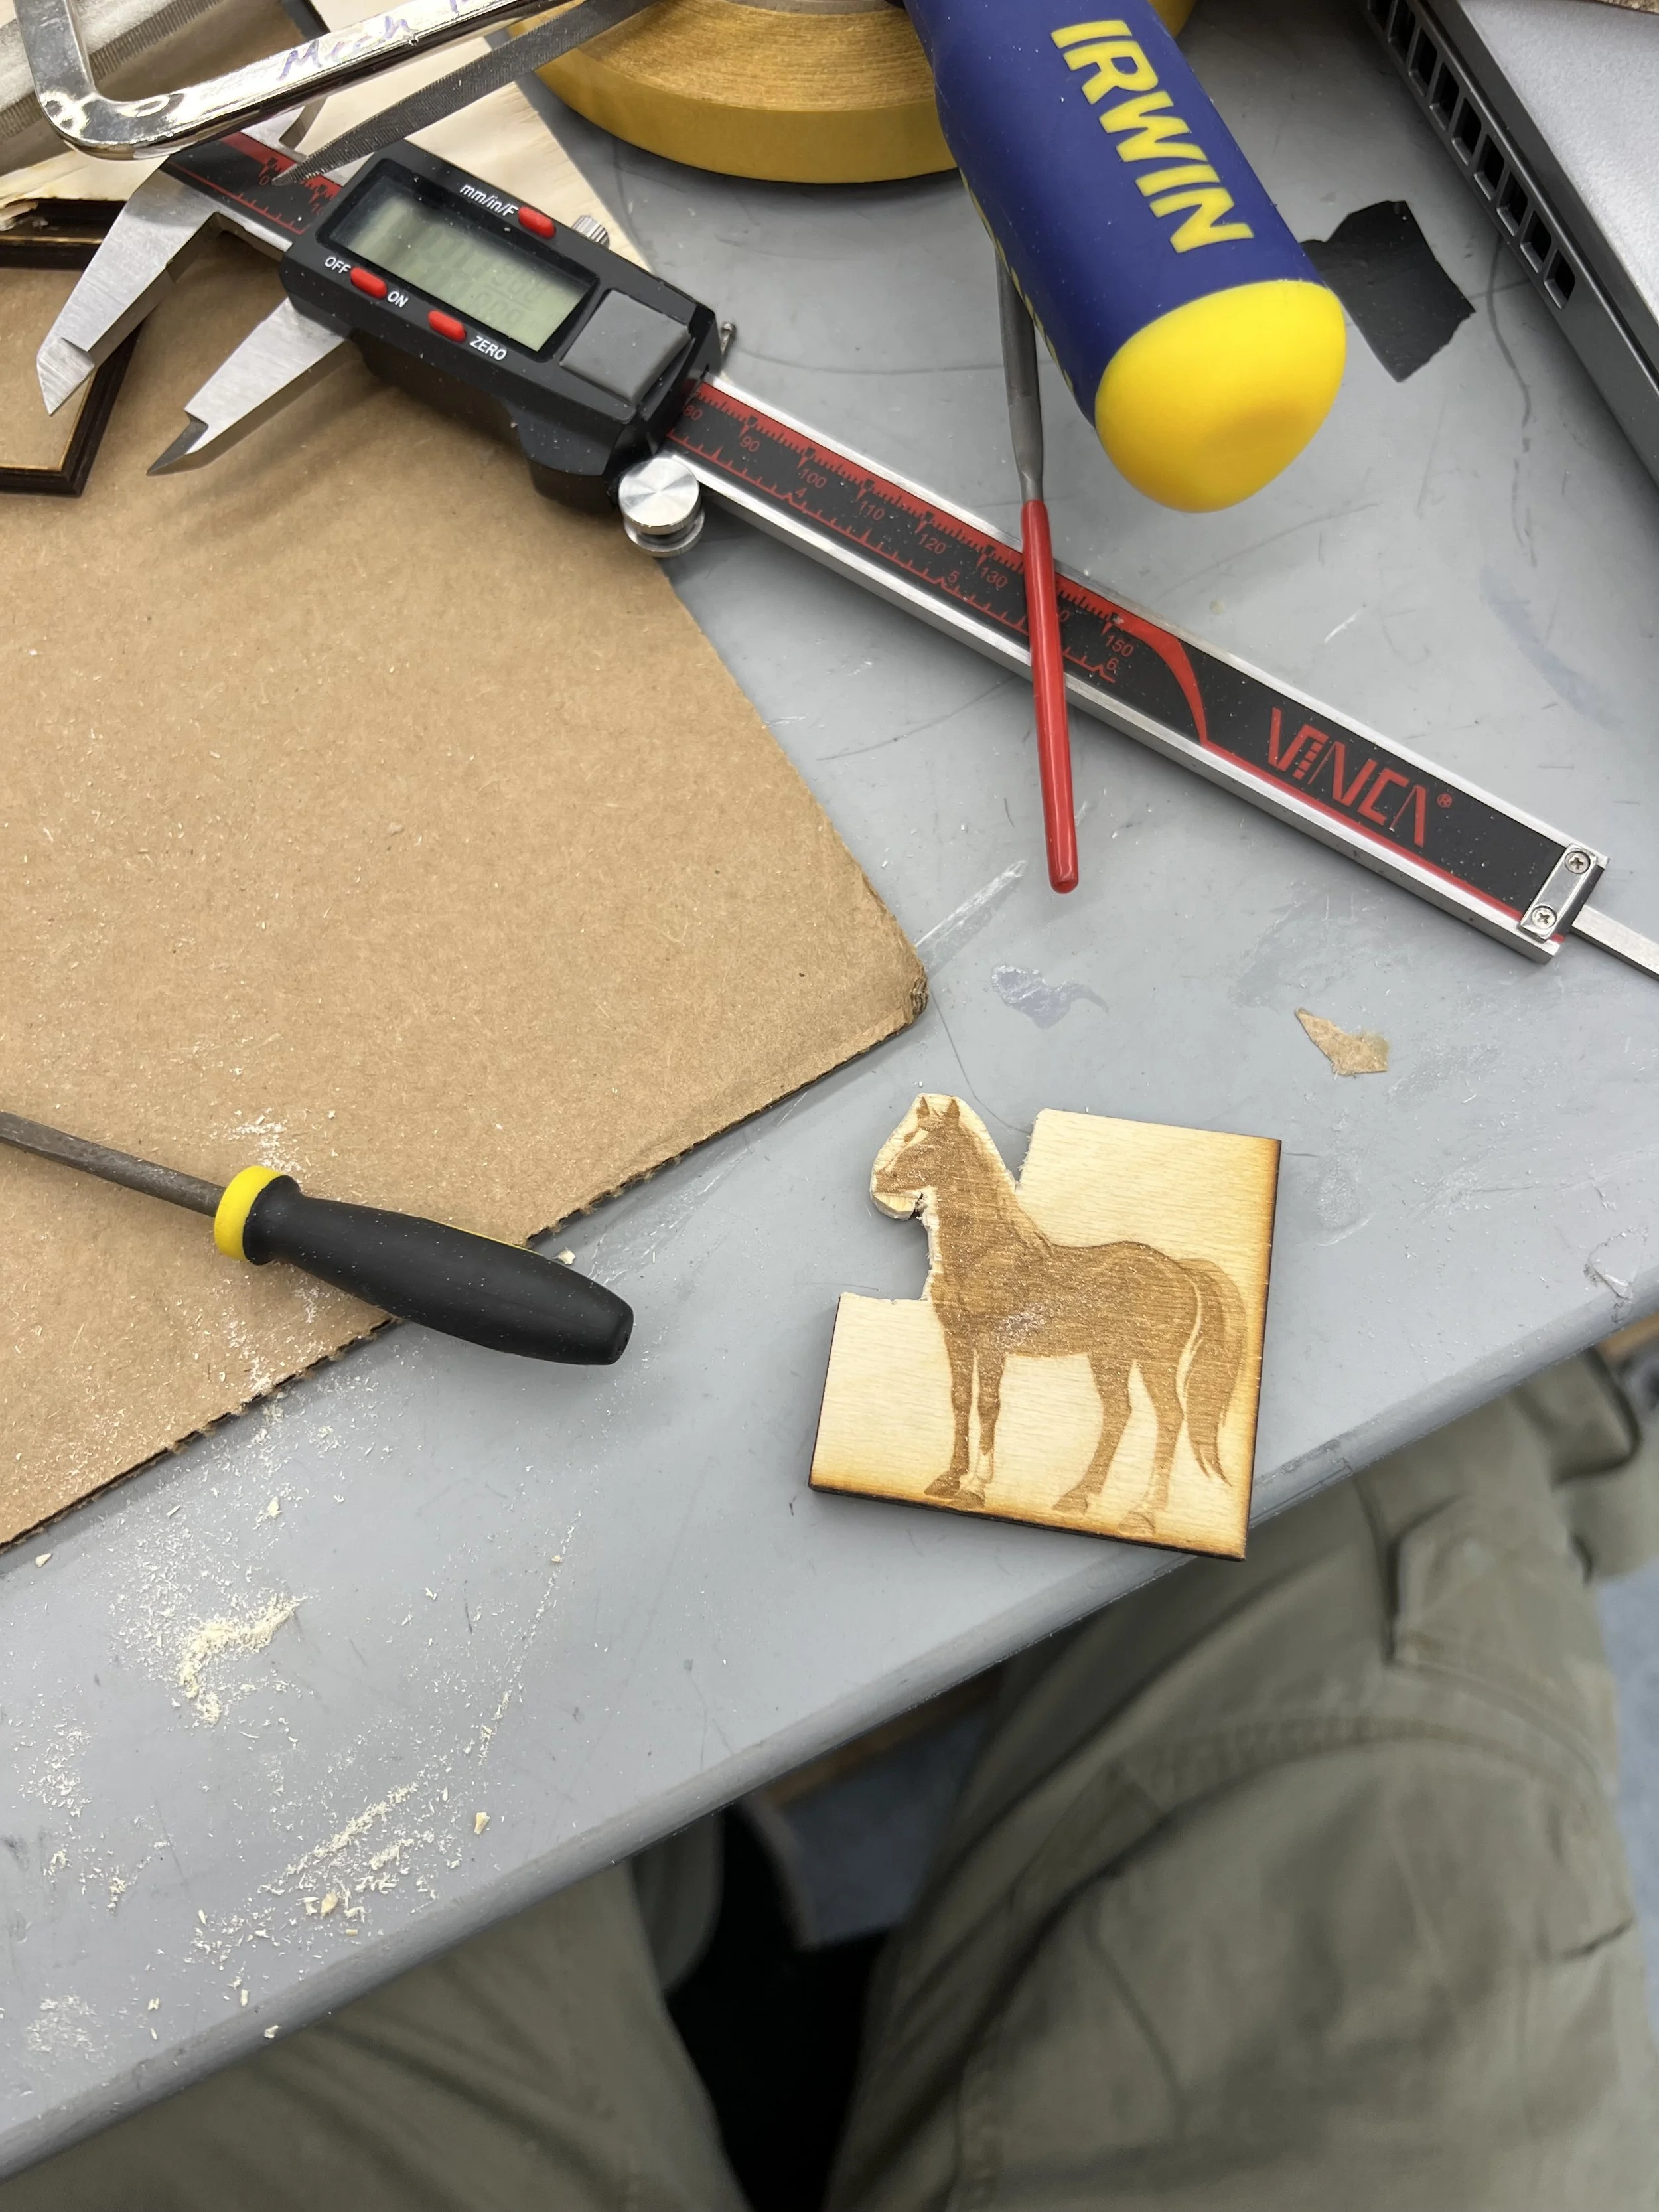
Integration of decorative elements using AI

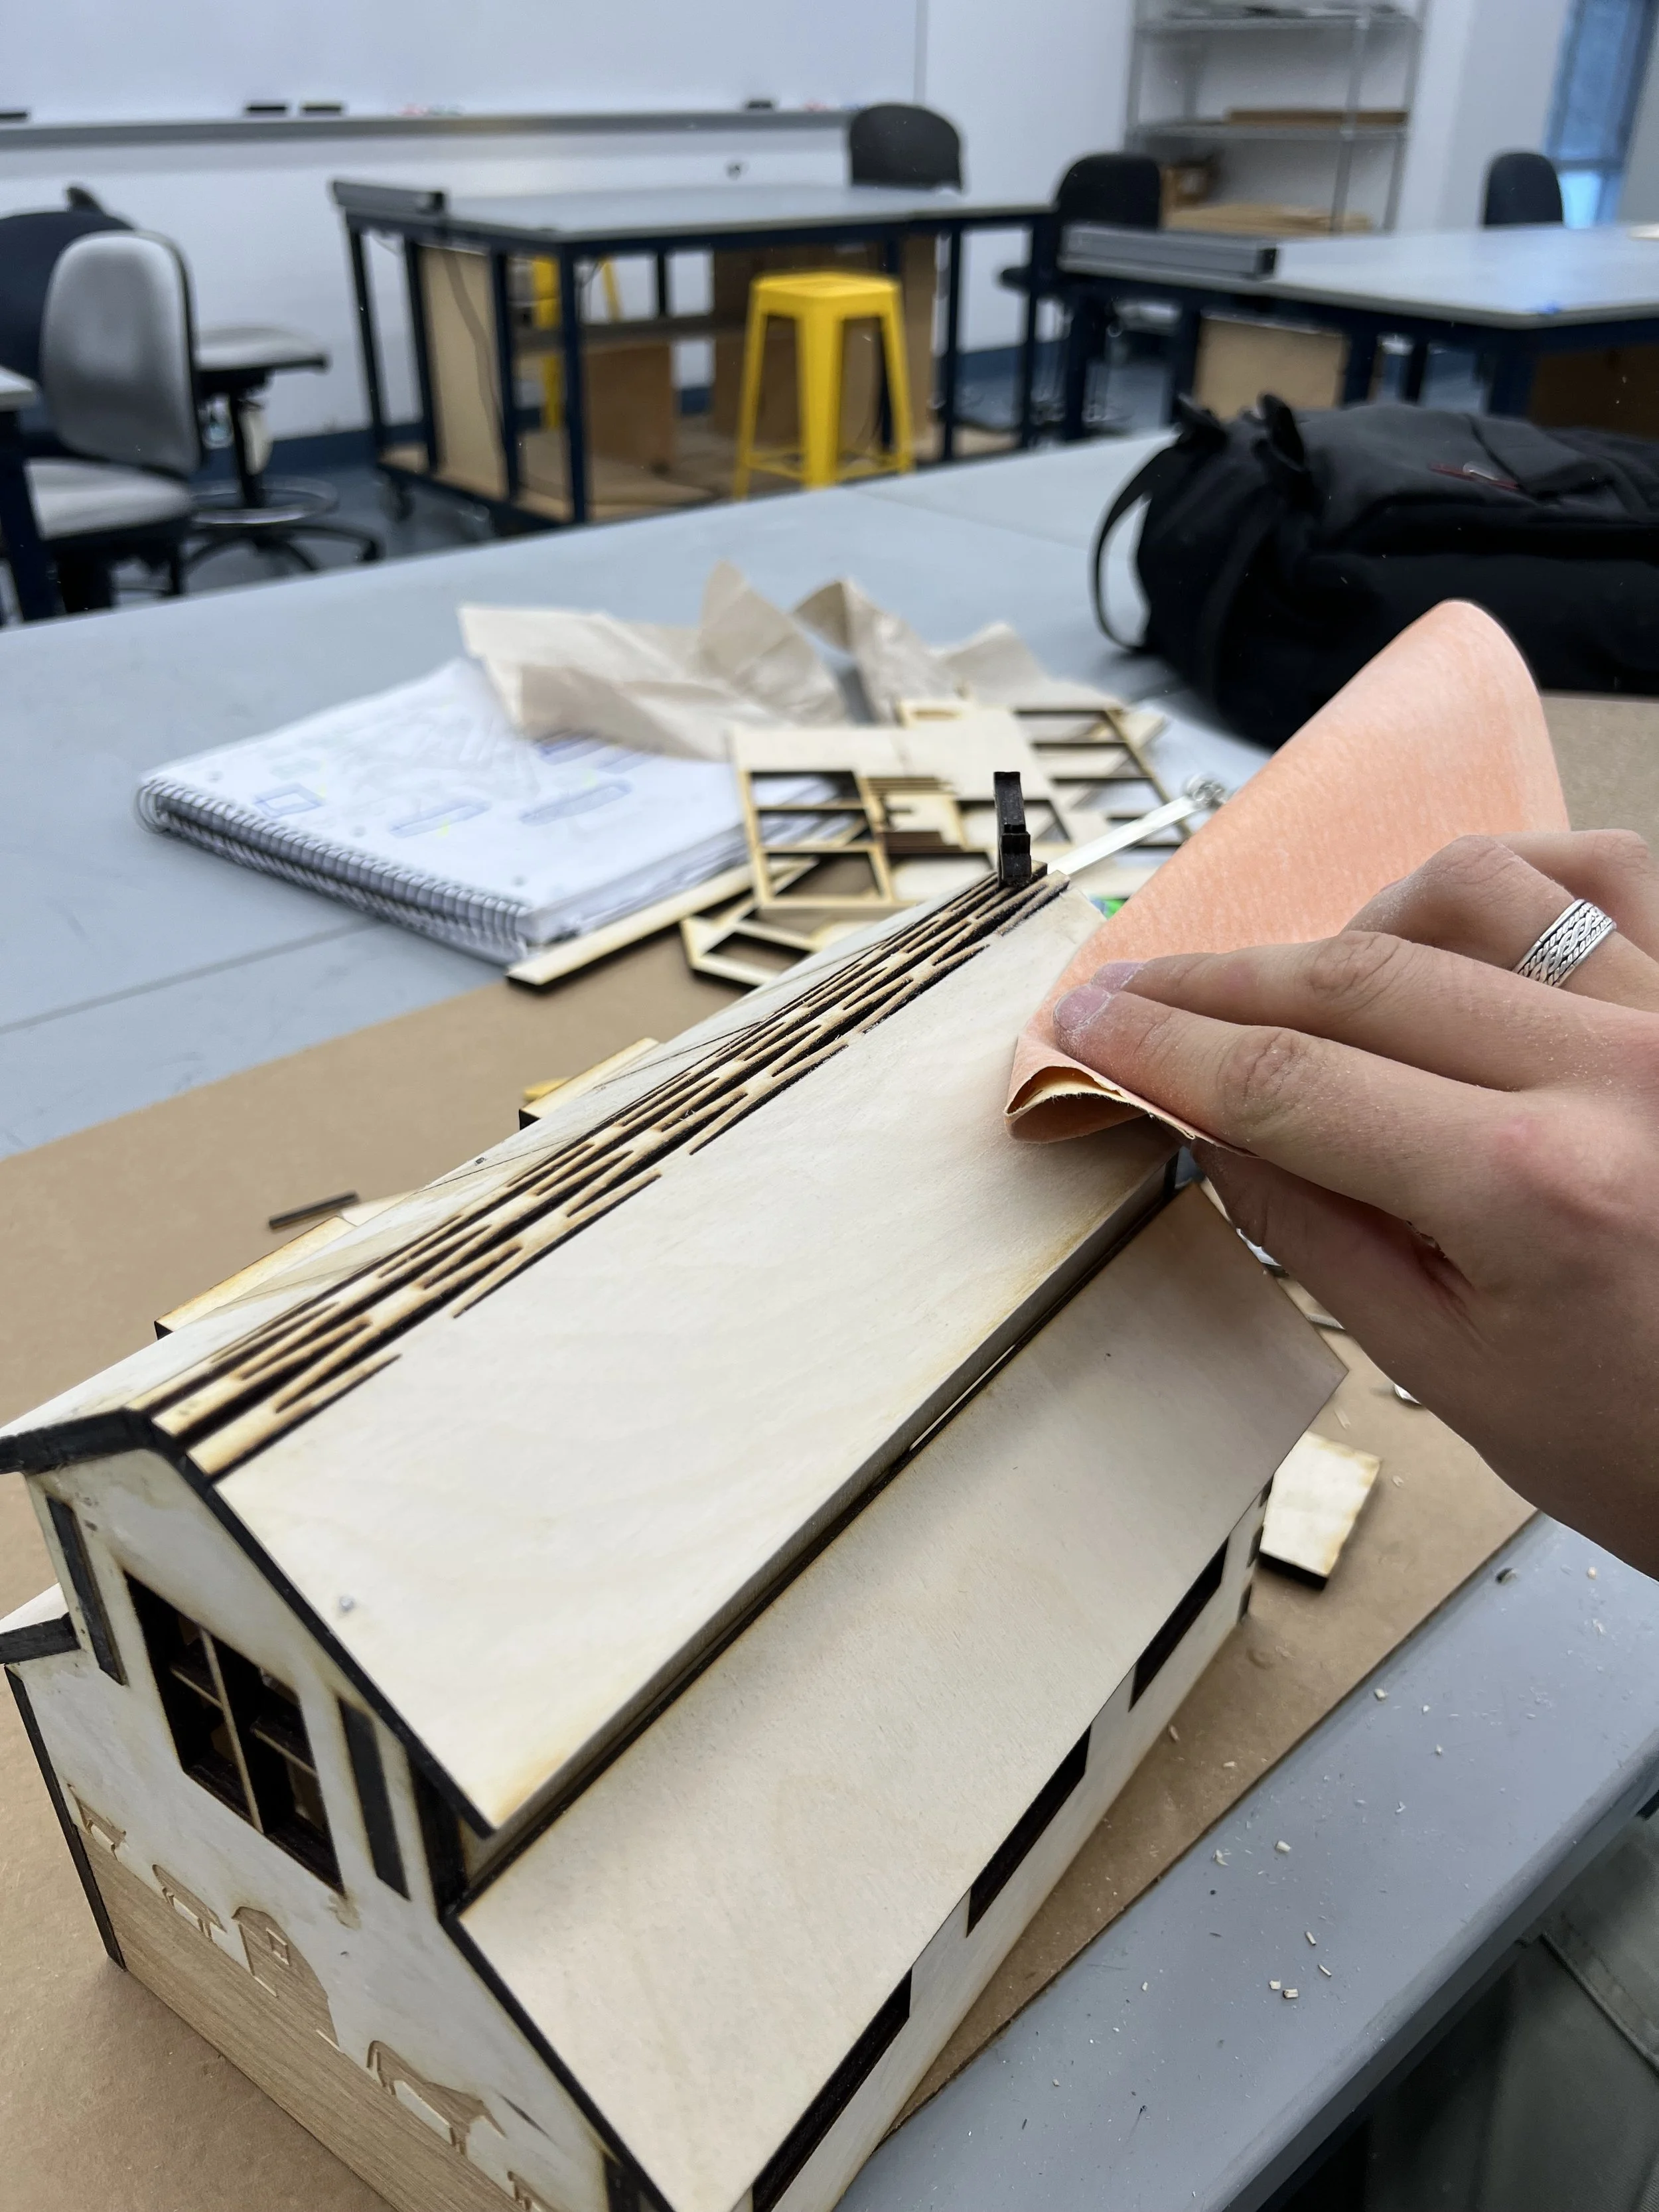
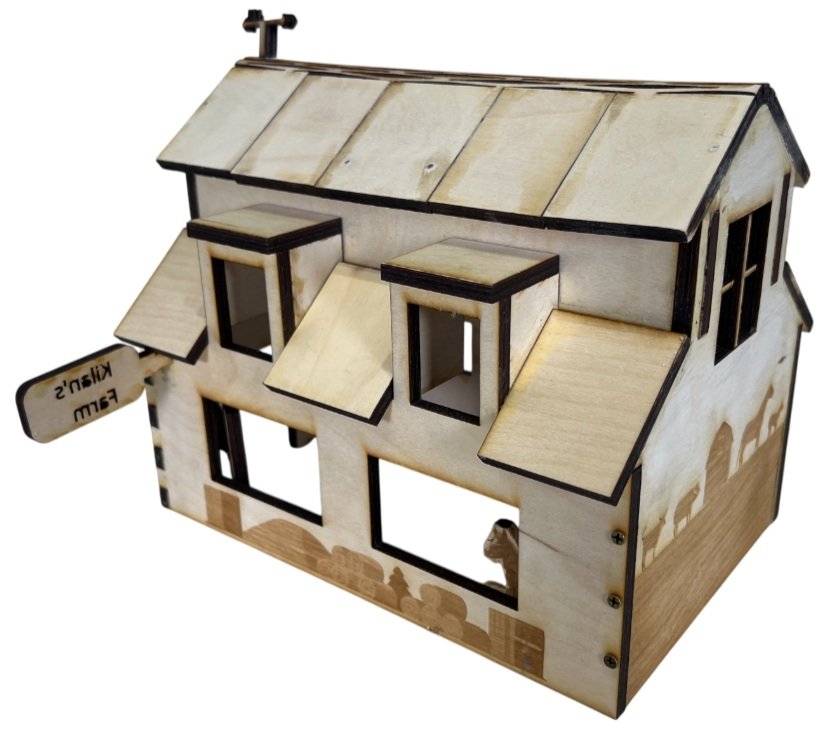
Final Product


Results
The final product successfully merged form and function through:
A distinctive barn-shaped design featuring windows and a detailed roof structure
Decorative engraving showing farm tools and animal silhouettes that tell the story of farm life
Strong construction using multiple joint techniques and fasteners
Integration of both traditional woodworking techniques and modern digital fabrication
Skills Developed
CAD modeling and assembly planning
Laser cutter operation and file preparation
Understanding of material properties and kerf compensation
Joint design and fastener selection
Integration of aesthetic and functional elements
2. Material Optimization
Challenge: Fitting all components within the 18" x 24" plywood constraint while maintaining proper grain orientation for strength.
Solution: Created a model and then nested the sketches in Adobe Illustrator to ensure maximized material usage. (The barn ended up being bigger than the material, so I had to reduce its overall size thanks to the CAD being entirely based on equations)