Automata
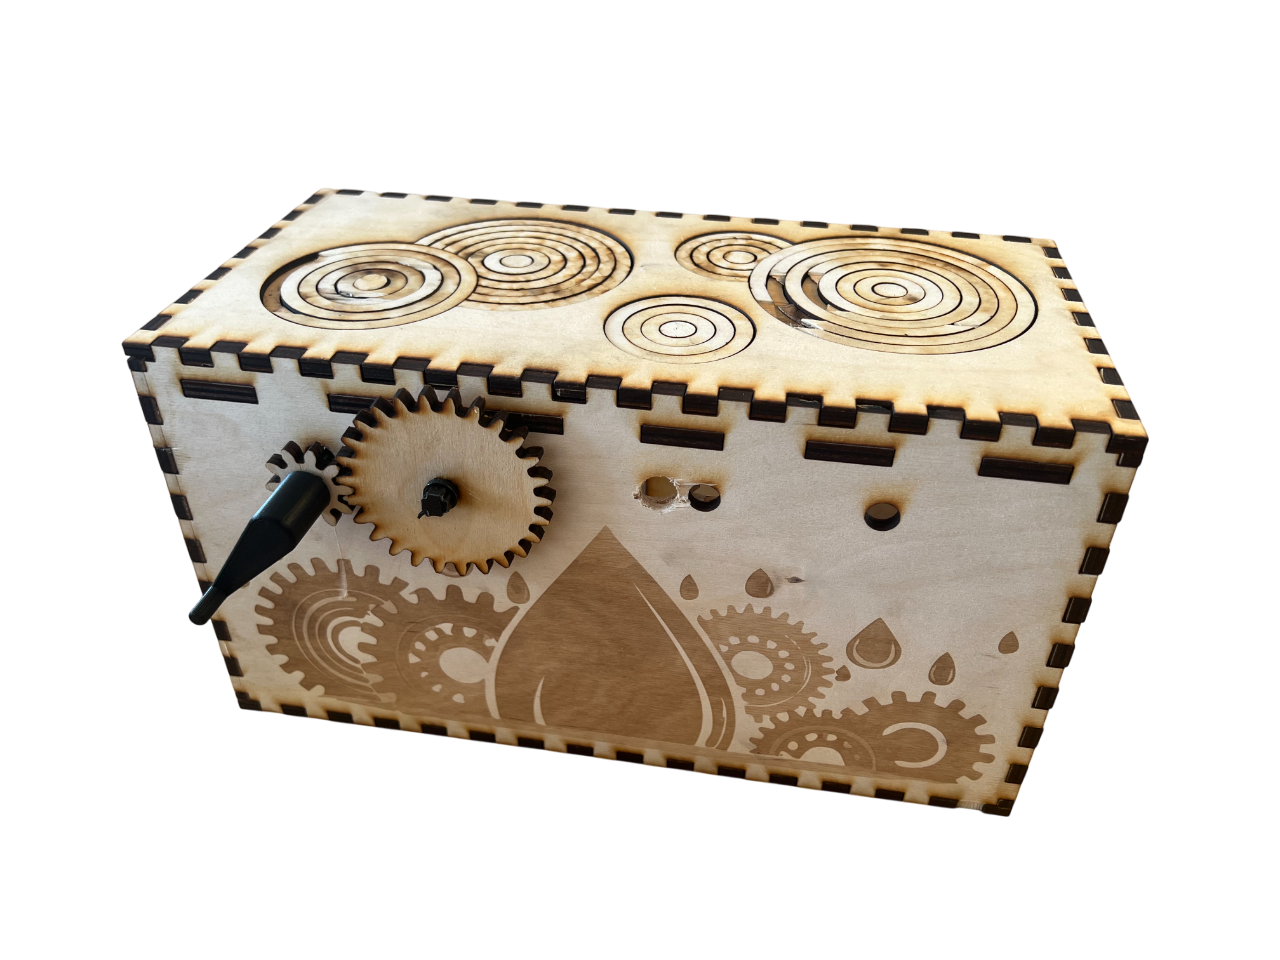
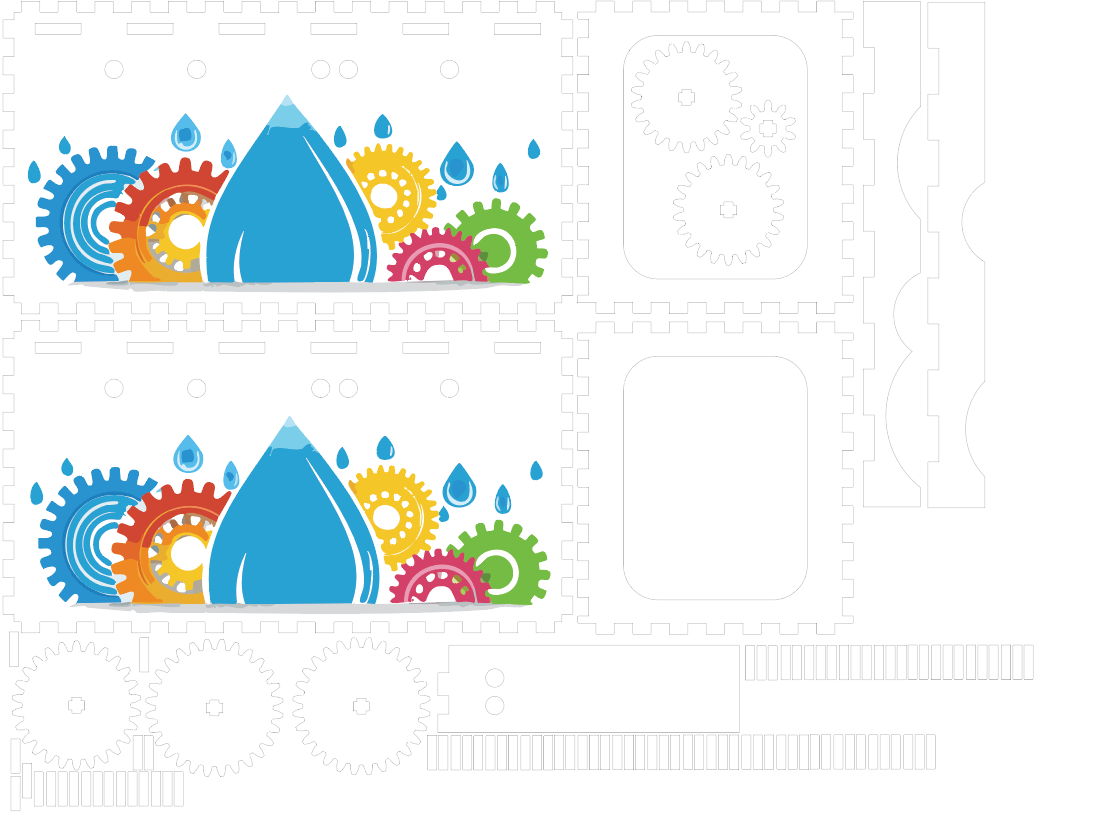
A laser-cut plywood box that mimics water droplets on a lake, designed with a crank, featuring functional 7 gears, 72 CAMS and decorative raster’s.
Objective:
Technical Challenges & Solutions
1. CAM Complexity
Challenge: The CAMs were designed wrong which meant they were too close to their follower and their slope was too steep which caused lots of friction on the crank.
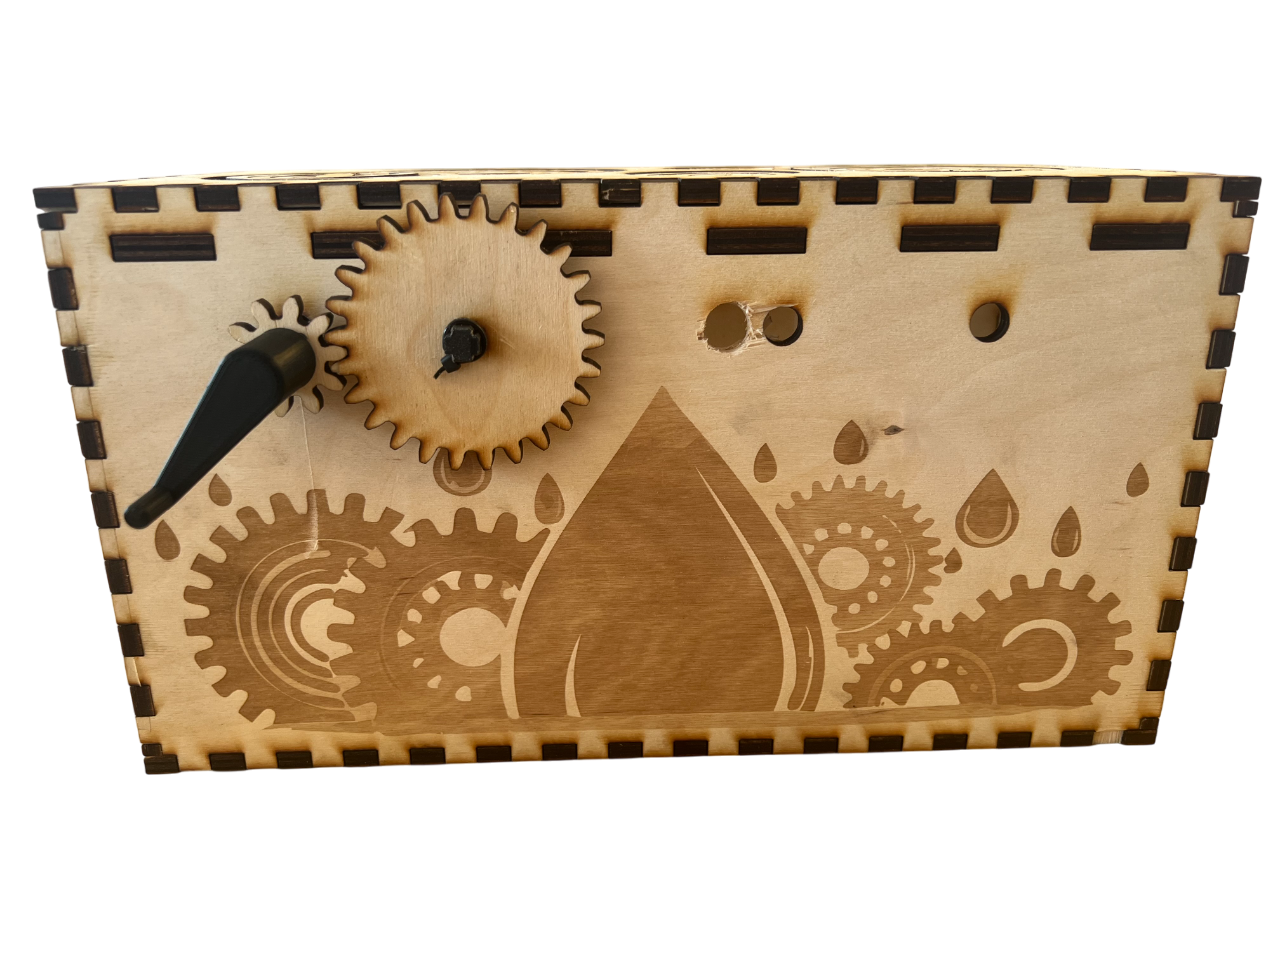
Solution: To solve this, I reduced the design from 5 raindrops to 1 which resulted in way less friction, also this meant less gears which would also reduce the friction. To solve the CAM height to follower issues I drilled the CAM shaft hole out bigger which made the shaft sit lower which made the CAMs be lower down and resulted in a working raindrop ripple.


Pictures:

This project aimed to create a functional mechanical automata that:
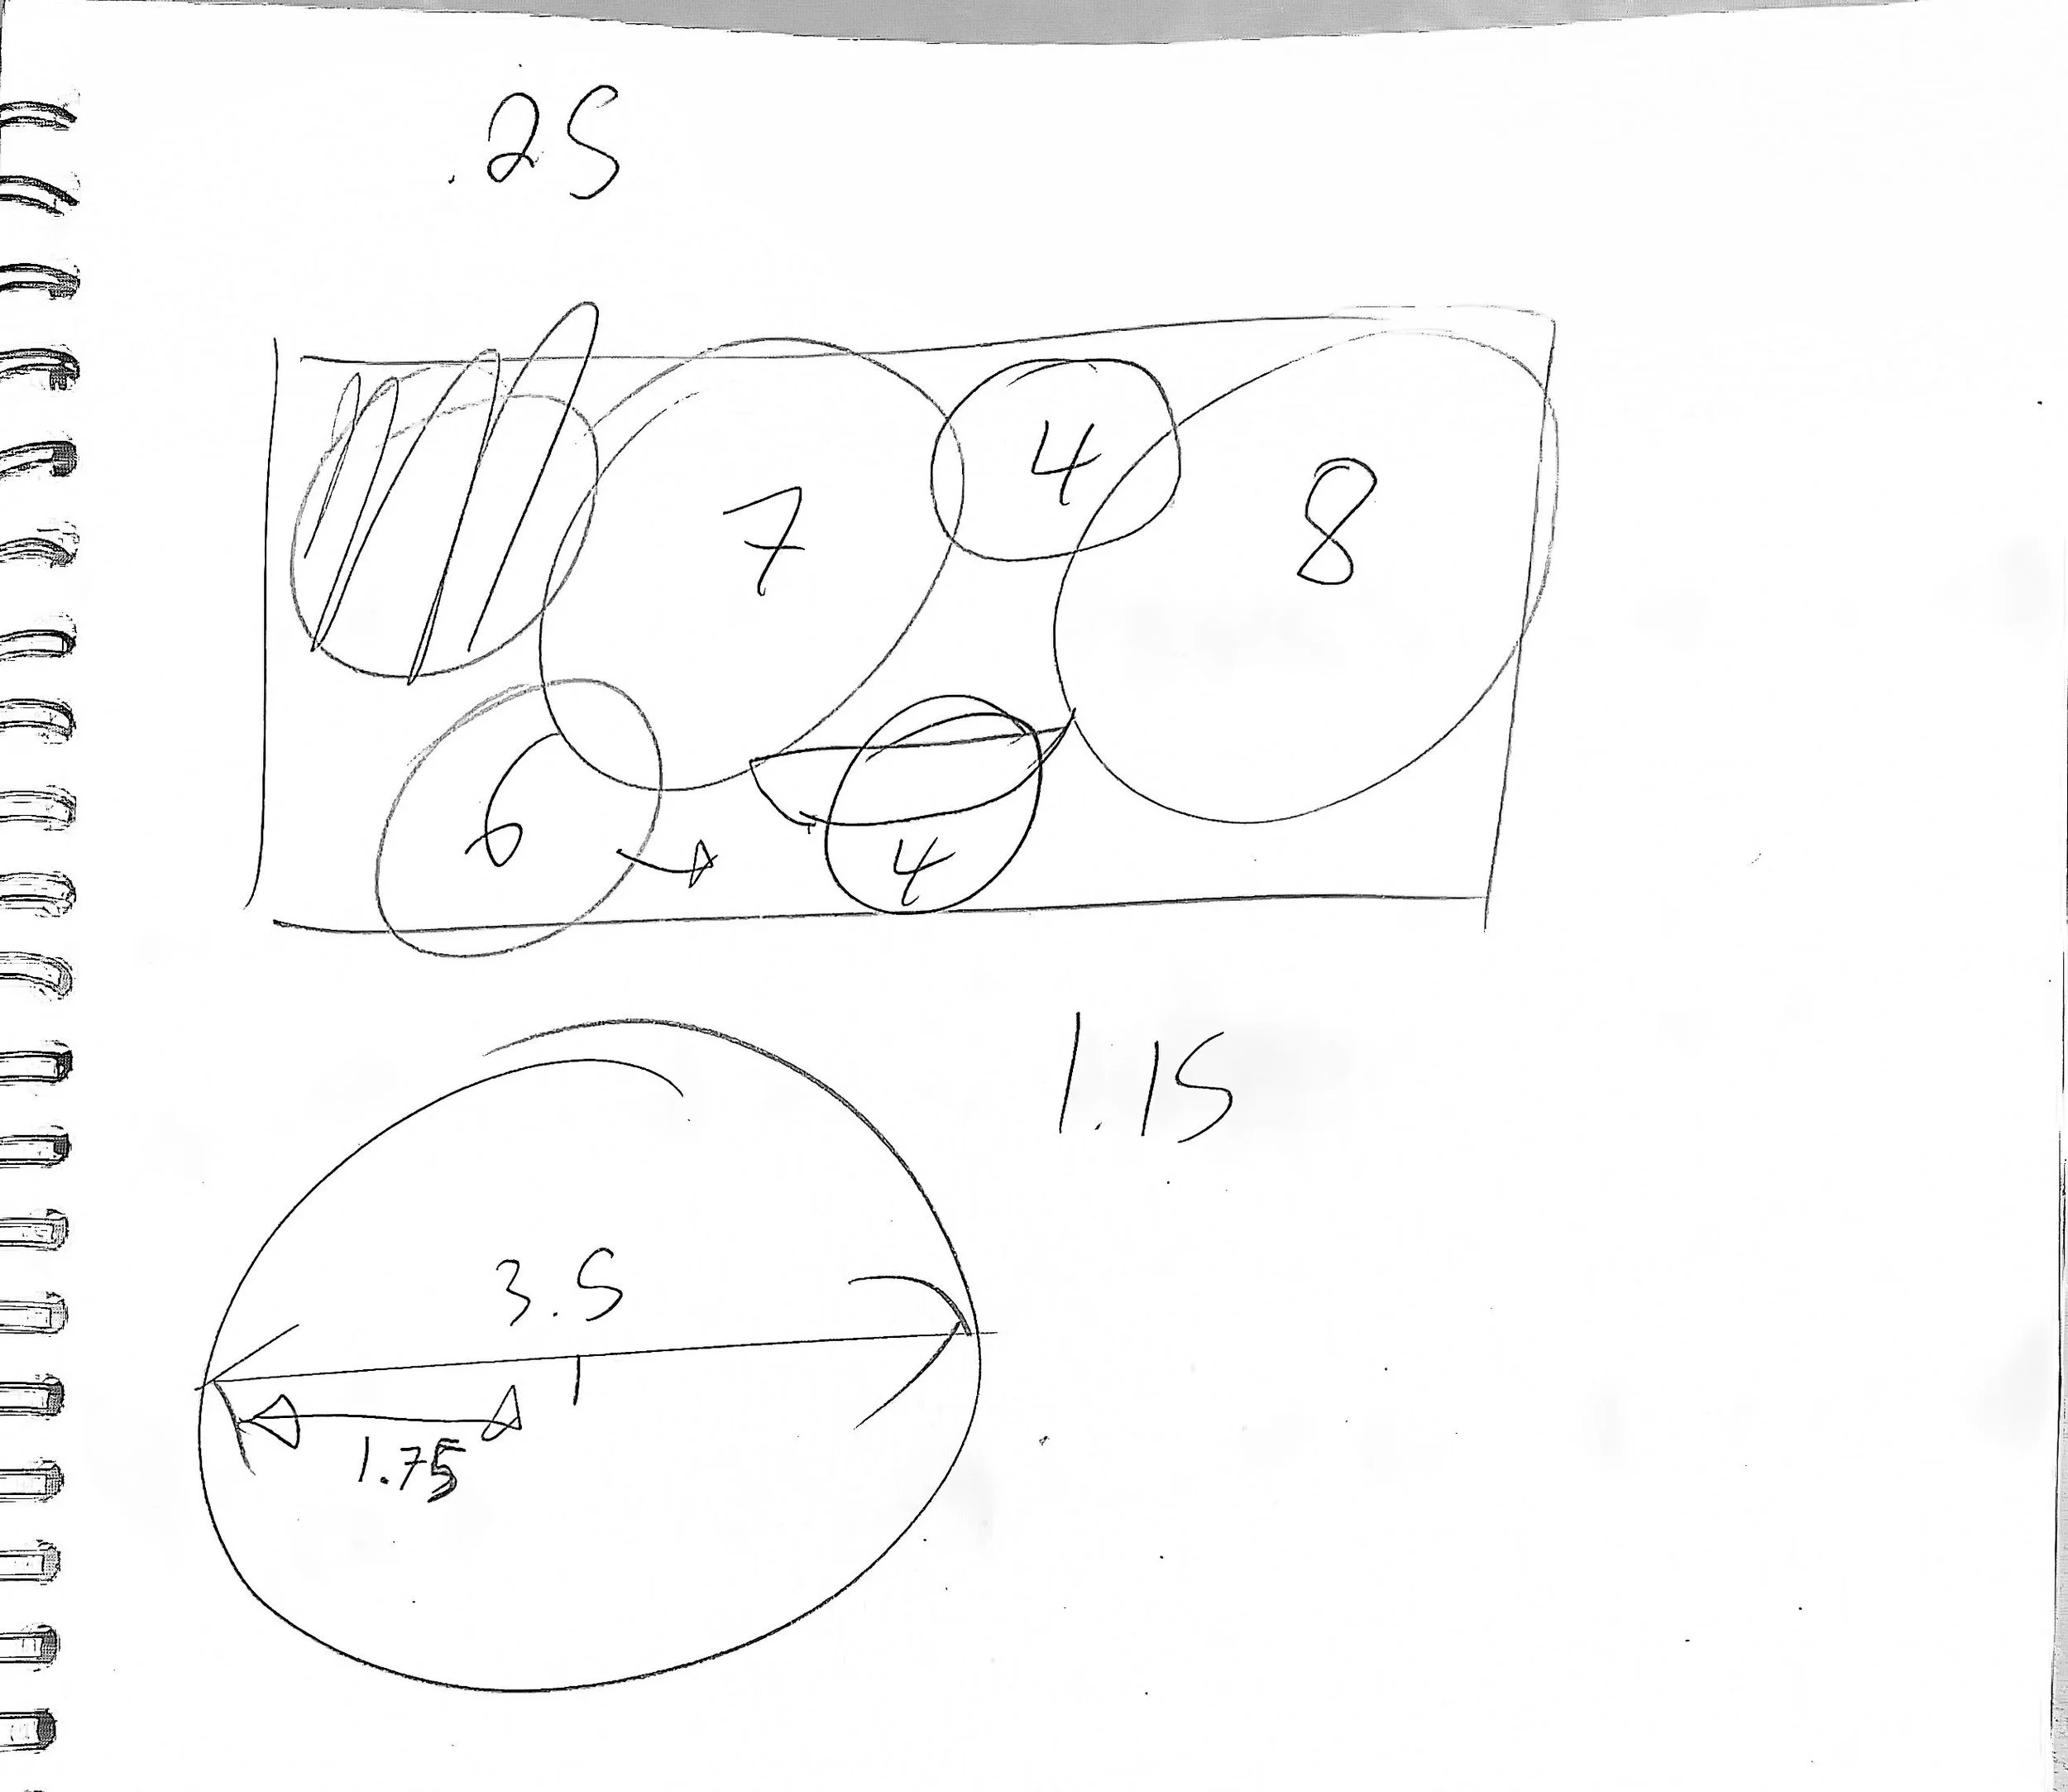
Simulates the natural phenomenon of water droplets creating ripples in a pond
Utilizes laser-cut wooden components for both structural and decorative elements
Creates an engaging visual interaction between the water surface (circular patterns) and lotus flowers
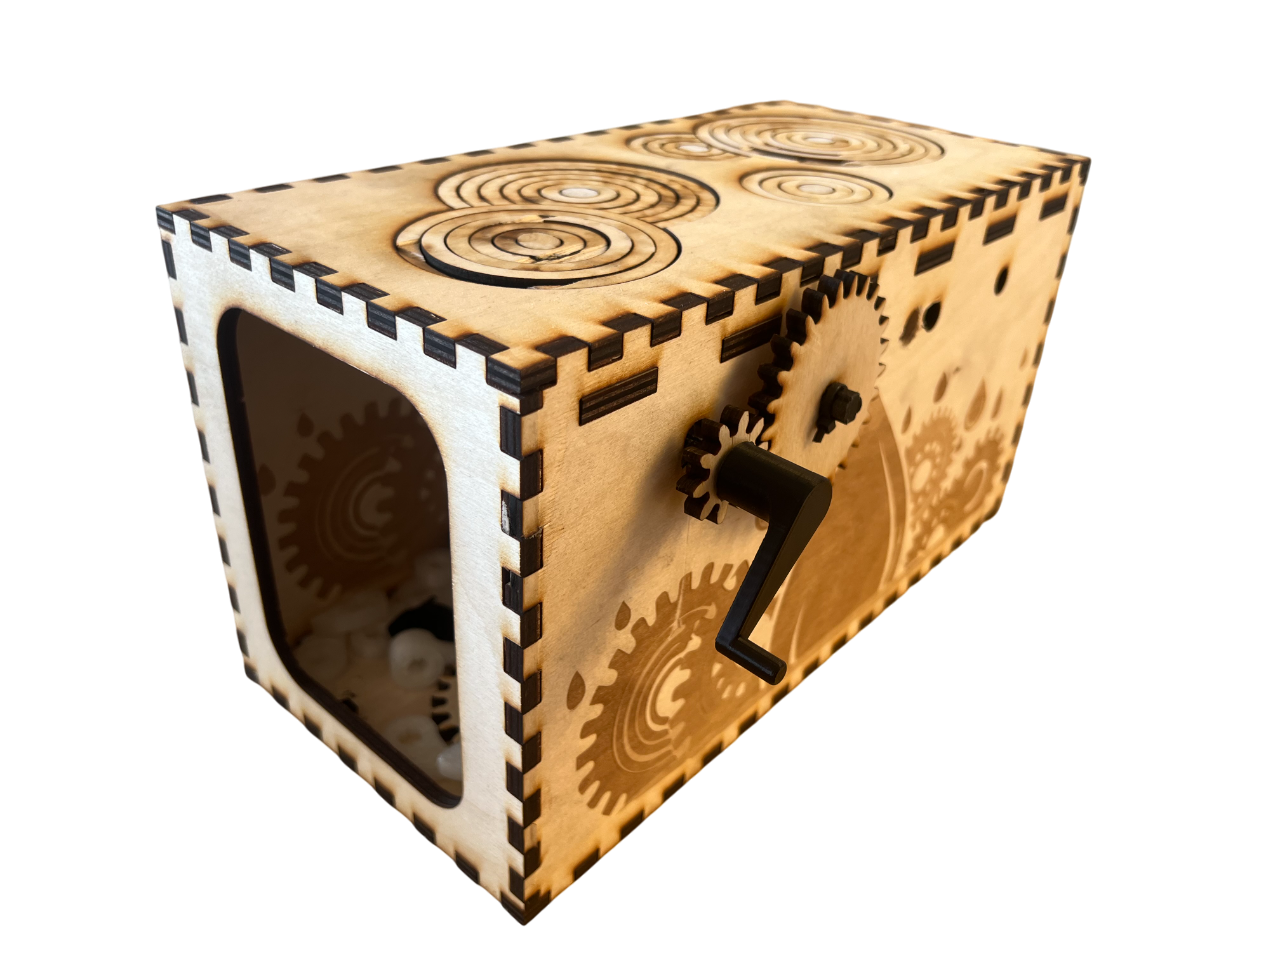
Operates with a simple hand-crank mechanism accessible to users of various ages
Balances aesthetic appeal with mechanical reliability
Results and Evaluation:
The project was over scoped and not enough prototyping was done which meant that the 72 attempted CAMS all did not work.
To fix this, I instead used only one raindrop of the 5 I had designed and used only two gears instead of the 7 that were designed.
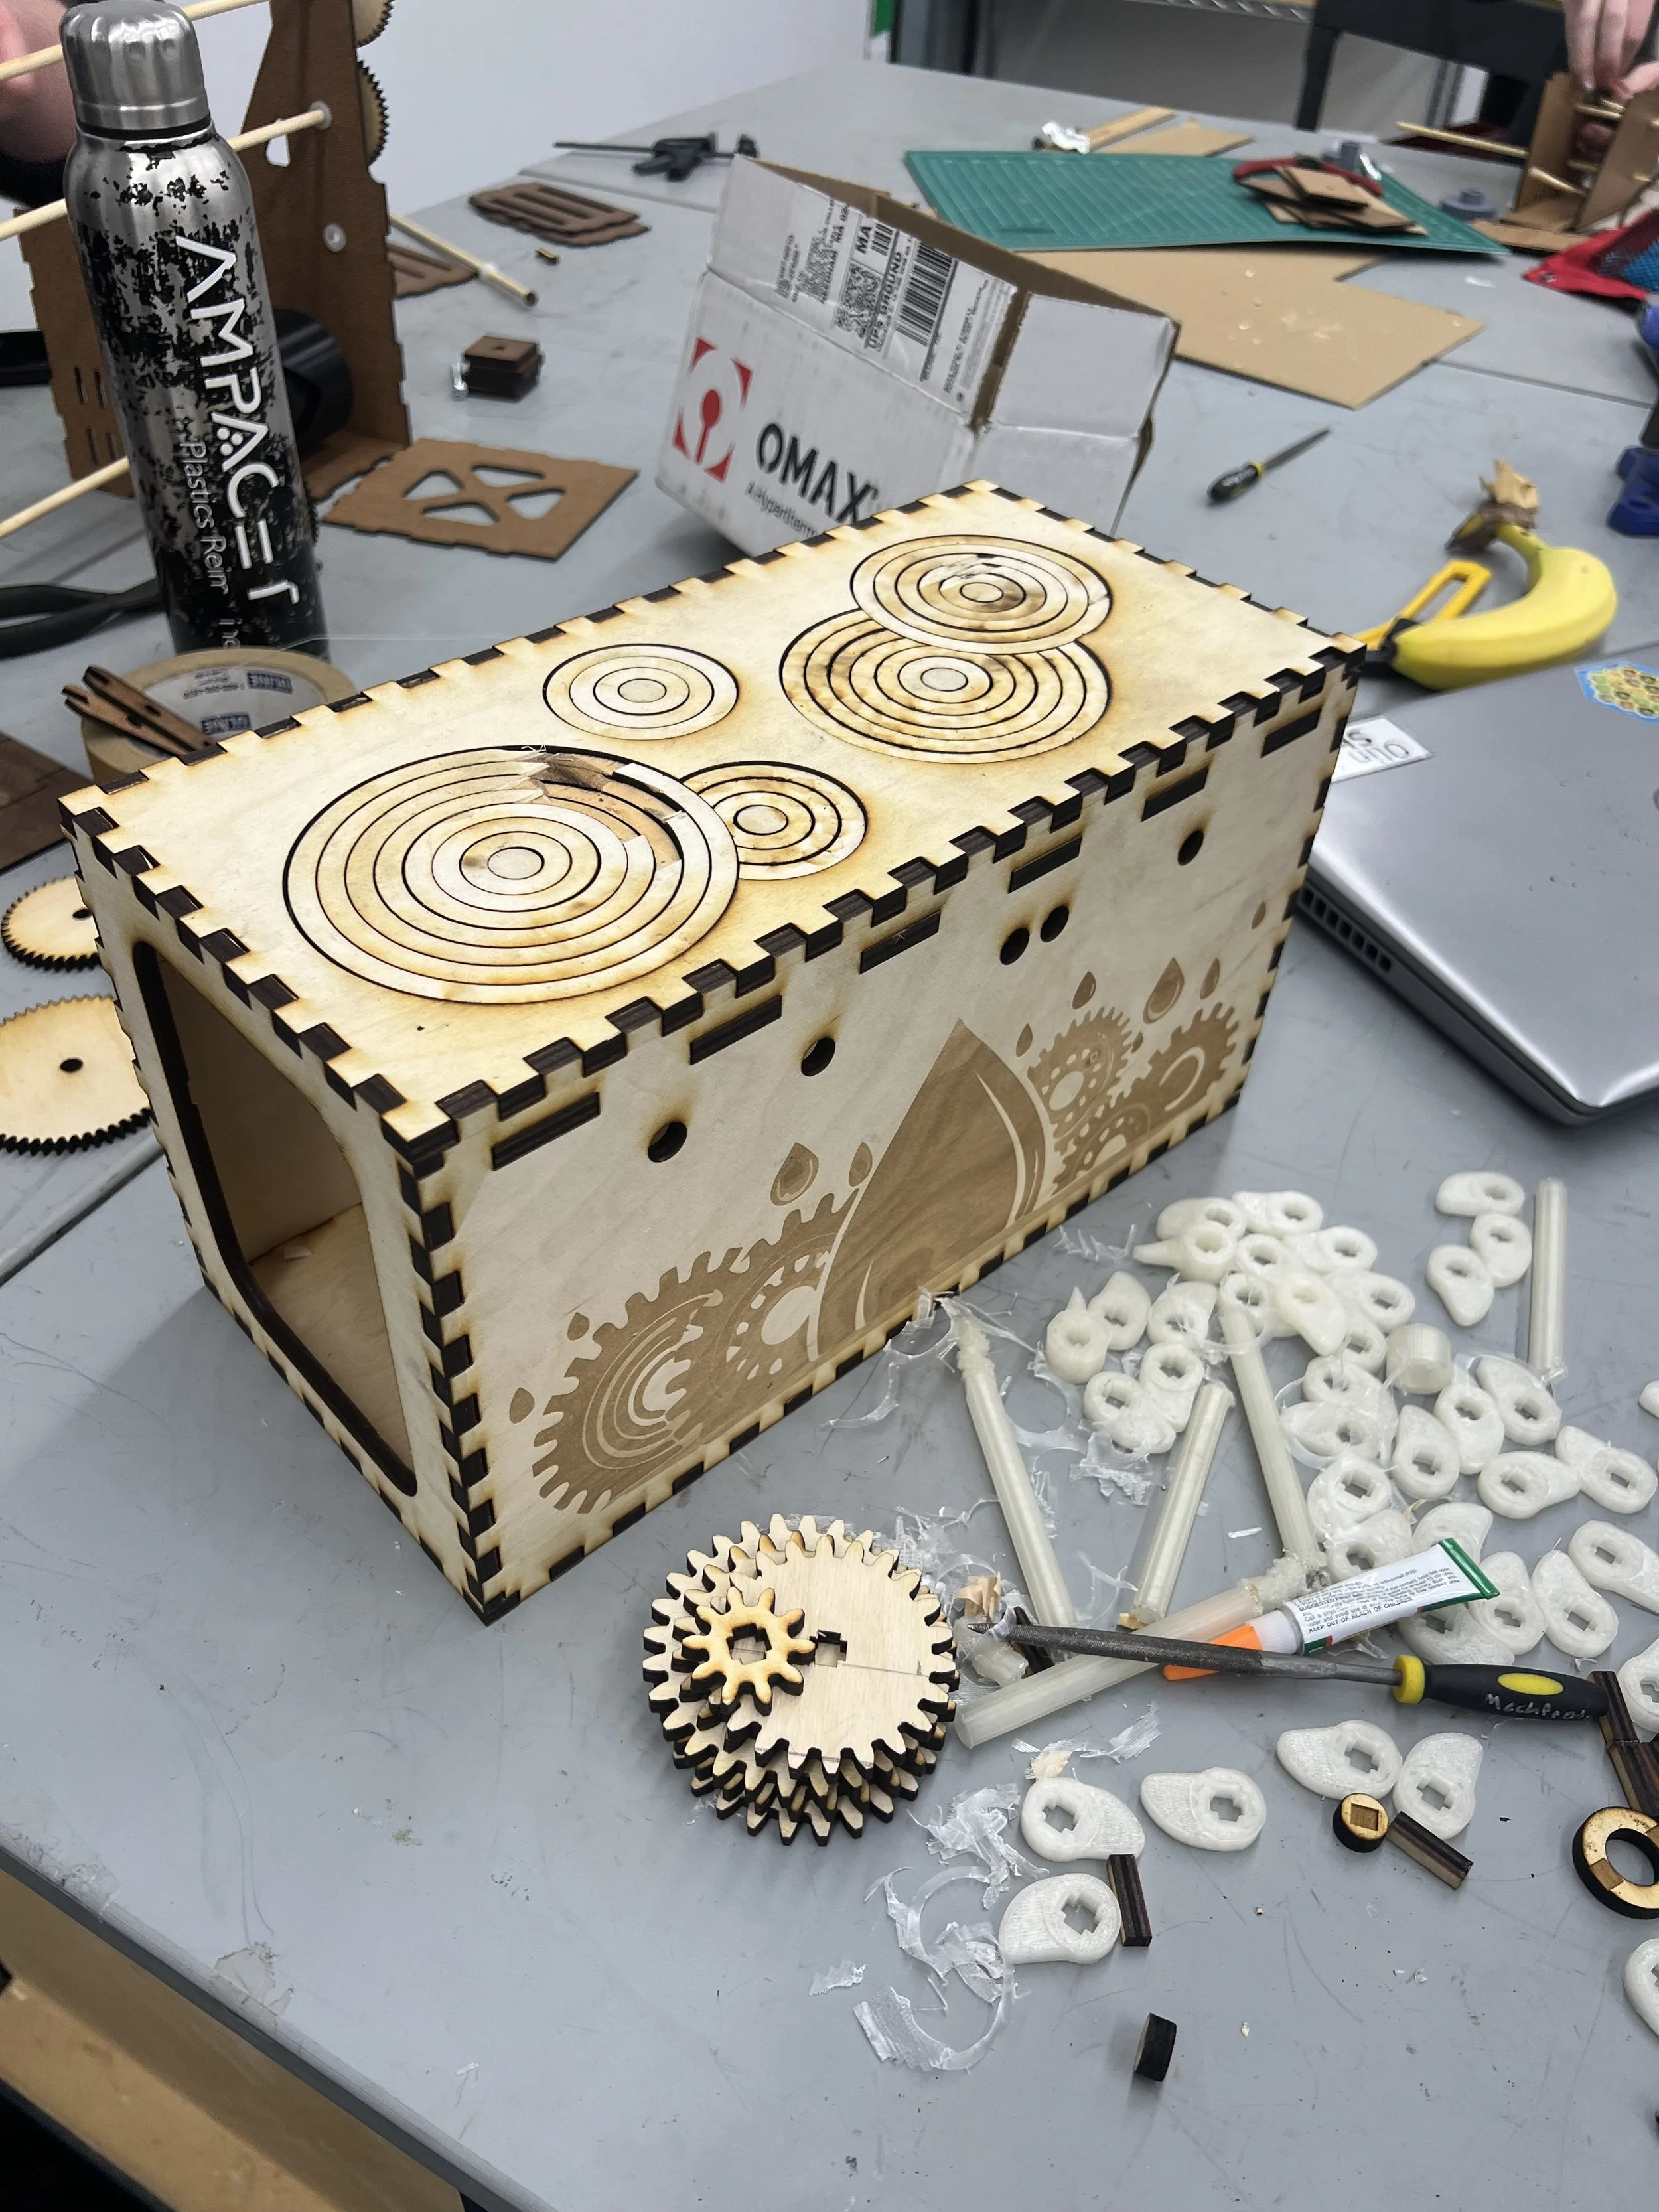
The result was a working raindrop simulator that worked with a crank.
In retrospect I would have saved so much more time testing only one out originally, redesigning it to work better with less friction on the CAM specifically because the slope of the CAM was too high and then once this worked making the 5 raindrop design work.
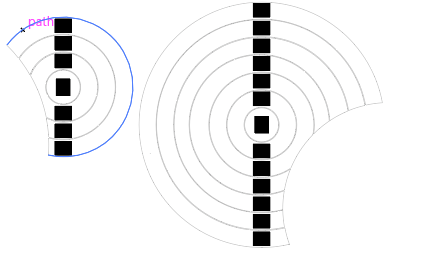
What was really hard to design was the raindrops being imbedded in one another and it meant I had to cut shafts to allow the CAMS to work so close to one another.
Skills Developed:
Mechanical design - Creating a functional hand-crank mechanism that simulates water droplets and ripples
CAM design - Working with mechanical CAMs, including troubleshooting issues with slope and friction
Gear design - Working with gear tools in Onshape and finding the optimal gear sizes and properties for manufacturing
Prototyping and iteration - Adjusting the original design (reducing from 5 planned raindrops to 1, and from 7 gears to 2) based on testing results
Laser cutting - Working with laser-cut wooden components for both structural and decorative elements
Problem-solving - Identifying that the project was over-scoped and finding a practical solution
Systems thinking - Creating an integrated system where mechanical components work together to create visual effects
Aesthetics - Balancing visual appeal with functional requirements
User experience design - Making the crank mechanism accessible to users of various ages
Time management - Learning about efficient testing and development processes (as mentioned in the retrospective comments)
Manufacturing considerations - Understanding the constraints and capabilities of CAM-based manufacturing

2. Raindrop Follower Design
Challenge: Making the followers sit in the same place with the raindrop rings.
Solution: To do this I rastered squares at a high intensity on the raindrop rings to mark out where the follower should be placed this created a divet of 2mm in the wood which helped place the glue and follower into it.
3. Raindrop Follower Design
Challenge: Making the raindrop rings stay in place but be able to move up and down.
Solution: To do this I made the top of the box 3 layers, the first layer was the rings for the raindrops and the frame of the box (the rings had 0.02mm spacing between each other to reduce friction), then the second layer was a sheet of wood with square holes cut into it to allow room for the follower to slide through but have the raindrop ring rest on this, lastly there was the support bars that held the previous sheet in place using gravity and mortise and tenon joints.